
Welcome to the world of RV awnings! If you’re new to the RV lifestyle, you may be wondering what exactly an RV awning is and why it’s an essential accessory for your mobile home on wheels. Think of an RV awning as a shaded oasis that extends from the side of your RV, providing a comfortable and protected outdoor space. It’s like having your own personal outdoor living room, allowing you to enjoy the great outdoors while staying sheltered from the sun and rain.
Whether you’re camping in the mountains, lounging at the beach, or simply enjoying a quiet evening at a campground, an RV awning can greatly enhance your overall camping experience. It’s the perfect spot to relax, entertain guests, or simply soak in the beauty of nature. But why do you need an awning? Well, imagine sitting outside in the scorching heat or getting caught in a sudden downpour without any shelter.
Not really a pleasant thought, is it? RV awnings provide much-needed shade and protection from the elements, making your outdoor time much more enjoyable and comfortable. Not only do RV awnings provide shade and shelter, but they also add a touch of style and personality to your RV. With a wide range of colors, patterns, and designs to choose from, you can easily customize your awning to match your RV’s aesthetics and stand out from the crowd.
So, whether you’re a seasoned RV enthusiast or just starting your journey, investing in an RV awning is definitely a smart move. It’s the perfect addition to your mobile home on wheels, offering a comfortable and inviting outdoor space that you’ll love to spend time in. Now, let’s dive deeper and explore the different types of RV awnings available and how to choose the right one for your needs.
Table of Contents
What is an RV Awning Motor?
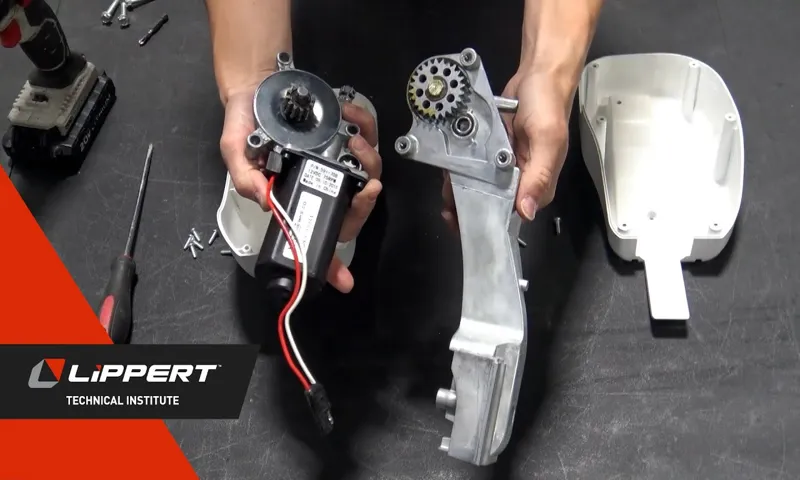
An RV awning motor is an essential component that allows you to retract and extend your RV awning with ease. It is a small electric motor that is installed in the awning assembly and is responsible for powering the retracting and extending mechanism. Just imagine having to manually retract and extend your RV awning every time you need shade or shelter.
It would be a lot of manual labor and not very convenient. That’s where the awning motor comes in. It does all the work for you, making your RVing experience much more enjoyable.
However, like any mechanical part, the awning motor may need to be replaced at some point due to wear and tear or malfunction. If you find yourself in need of replacing your RV awning motor, don’t worry, it’s a relatively simple process. With the right tools and a little bit of mechanical know-how, you can easily replace the awning motor and have your RV awning working like new in no time.
Definition and function of an RV awning motor
An RV awning motor is a crucial component of the awning system in an RV or motorhome. It is responsible for smoothly extending and retracting the awning with ease. Think of it as the power behind your awning’s movement, like the engine of a car.
The awning motor is typically located inside the awning roller tube and is connected to the retracting and extending mechanism. When you press a button or use a control switch, the motor activates and starts rotating. This rotation drives a set of gears that engage with the awning arms, allowing them to extend or retract the awning fabric.
The function of an RV awning motor is to provide convenience and ease of use for RV owners. By simply pressing a button, you can effortlessly extend or retract your awning, providing shade and protection from the sun or rain. This is especially useful when setting up camp or packing up to leave.
Not only does an RV awning motor offer convenience, but it also saves time and effort. Instead of manually cranking the awning open or closed, the motor does the work for you, making the process quick and simple. It also ensures a smooth and controlled extension or retraction, minimizing the risk of damage to the awning or RV.
Overall, an RV awning motor is an essential component of the awning system, providing convenience, efficiency, and ease of use for RV owners. With just a push of a button, you can effortlessly extend or retract your awning, making your outdoor living experience more enjoyable and hassle-free.
Signs that your RV awning motor needs replacement
If you’ve noticed that your RV awning motor isn’t working as it should, it may be time for a replacement. There are a few signs that can indicate that your motor needs to be replaced. One of the most obvious signs is if your awning isn’t extending or retracting properly.
This could mean that the motor is worn out or damaged. Another sign to look out for is if the motor is making unusual noises. If you hear grinding or squeaking sounds coming from the motor, it could be a sign that the internal parts are wearing out.
Finally, if you’ve tried to troubleshoot the issue by checking the power source and ensuring that the awning is properly aligned, and the motor still isn’t working, it’s probably time for a replacement. To replace the awning motor, you’ll need to first remove the old motor by disconnecting the wiring and removing any screws or bolts holding it in place. Then, simply install the new motor in the same location and reconnect the wiring.
It’s important to make sure that the new motor is compatible with your RV’s awning system, so be sure to check the specifications before making a purchase. By replacing the motor, you’ll be able to enjoy your RV awning again in no time.
Common indicators of a faulty RV awning motor
If you own an RV, you probably know how important the awning is for providing shade and protection from the elements. However, over time, the awning motor may start to show signs of wear and tear. One common indicator of a faulty RV awning motor is when the awning starts to retract or extend at a slower pace than usual.
This could be a sign that the motor is struggling and may need replacement. Another telltale sign is if the awning motor makes unusual noises during operation, such as grinding or squeaking sounds. These noises could indicate that the motor gears are worn out or misaligned.
Finally, if you notice that the awning is not fully extending or retracting, this could also be a sign that the motor is not functioning properly. In this case, it is best to consult a professional to determine if a replacement motor is needed. Overall, it is important to pay attention to these common indicators of a faulty RV awning motor to ensure the longevity and functionality of your awning.
Tools and materials needed for replacing an RV awning motor
If you’re experiencing issues with your RV awning motor, it may be time for a replacement. But before you dive into the process, it’s important to gather the necessary tools and materials. First and foremost, you’ll need a replacement motor specifically designed for your RV model.
Be sure to check your owner’s manual or consult with a professional to ensure you purchase the correct one. Additionally, you’ll need a set of wrenches and screwdrivers, as well as a power drill with the appropriate size bit. A ladder or step stool will also come in handy for reaching the awning.
Lastly, it’s a good idea to have some silicone spray lubricant, a clean cloth, and a waterproof tape for any necessary repairs. With these tools and materials on hand, you’ll be ready to tackle the process of replacing your RV awning motor and getting back to enjoying the great outdoors.
List of essential tools and materials
In order to replace an RV awning motor, you will need a few essential tools and materials. First and foremost, you will need a replacement motor that is compatible with your specific RV awning model. It’s important to check the specifications and dimensions of the motor to ensure a proper fit.
You will also need a set of basic hand tools, such as wrenches and screwdrivers, to remove the old motor and install the new one. Additionally, you may need a ladder or step stool to reach the awning and safely perform the replacement. It’s also a good idea to have some lubricant or grease on hand to ensure smooth operation of the new motor.
Finally, make sure to have a clean and well-lit work area, as well as any necessary safety equipment, such as gloves or goggles, to protect yourself during the replacement process. By having all of the necessary tools and materials prepared, you can confidently tackle the task of replacing your RV awning motor and enjoy a properly functioning awning on your next camping adventure.
Step-by-step guide to replacing an RV awning motor
Are you tired of struggling with a malfunctioning RV awning motor? Don’t worry, replacing it is easier than you might think! In this step-by-step guide, we’ll walk you through the process of replacing your RV awning motor, so you can get back to enjoying the great outdoors in no time. First, you’ll need to gather the necessary tools for the job. These may include a ladder, a drill, a socket set, and a replacement awning motor.
Once you have everything you need, start by removing the old motor. This may involve disconnecting any electrical connections and removing mounting bolts. Next, you’ll need to install the new motor in its place.
Make sure to follow the manufacturer’s instructions for proper alignment and secure it with the mounting bolts. Finally, reconnect any electrical connections and test the awning to ensure it’s working properly. With a little bit of time and effort, you’ll have a brand new awning motor that will have your RV looking and functioning like new again.
So what are you waiting for? Let’s get started on replacing that RV awning motor!
Step 1: Detaching the awning fabric
When it comes to maintaining and repairing your RV, sometimes you may encounter issues with your awning motor. If you find that your RV awning motor is faulty or has stopped working altogether, don’t panic! Replacing an RV awning motor is a task that can be tackled by most DIY enthusiasts. In this step-by-step guide, we’ll walk you through the process of replacing your RV awning motor.
The first step in this process is detaching the awning fabric. You’ll want to start by making sure the awning is completely retracted. Then, locate the screws that hold the awning fabric in place.
Carefully remove these screws, being sure to keep track of them as you go. Once the screws have been removed, gently pull the awning fabric away from the awning frame. Take care to avoid tearing or damaging the fabric as you do this.
With the fabric detached, you’re ready to move on to the next step in replacing your RV awning motor.
Step 2: Removing the old motor
In this step-by-step guide, we will walk you through the process of replacing the motor on your RV awning. The first step in this process is to remove the old motor. Start by disconnecting the power source to the awning.
This could be a switch or a plug, depending on your specific setup. Next, locate the screws or bolts that hold the motor in place. These are typically found on the ends of the awning roller.
Use a screwdriver or wrench to remove these screws. Once the screws are removed, gently pull the motor away from the roller. Be careful not to damage any wires or connectors that may be attached.
With the motor removed, you can now move on to the next step in the process. RV awning motor replacement can be a straightforward task if you follow the proper steps. By removing the old motor correctly, you’ll be well on your way to installing a new one and getting your awning back in working order.
Step 3: Installing the new motor
Replacing an RV awning motor may seem like a daunting task, but with the right tools and step-by-step guide, it can be a manageable DIY project. Once you have removed the old motor and have prepared the area, you are ready to install the new motor. Begin by aligning the new motor with the mounting bracket on the awning assembly.
Make sure the motor is securely attached to the bracket using the provided screws. Next, connect the power wires to the motor. These wires are typically color-coded, so match the corresponding colors and secure them tightly.
Take note of the wire connections and their positions to ensure proper installation. Once the wires are connected, test the motor to ensure it is functioning correctly. Press the awning switch and observe if the motor extends and retracts the awning smoothly.
If everything is in working order, securely fasten any remaining components and test the awning a few more times to confirm its functionality. Congratulations! You have successfully installed a new motor for your RV awning. Now you can sit back, relax, and enjoy the shade provided by your newly replaced awning.
Step 4: Reattaching the awning fabric
RV awning, replacing, motor, step-by-step guide One crucial step in replacing an RV awning motor is reattaching the awning fabric. After removing the old motor, it’s time to carefully attach the fabric back onto the roller tube. Begin by aligning the fabric with the roller tube, making sure it is centered and straight.
Use the marked reference points on the fabric and the roller tube to ensure proper alignment. Once the fabric is in position, use a cordless drill with a rivet attachment to secure the fabric to the roller tube. Start by inserting a rivet into one of the holes on the fabric, then place the rivet into the corresponding hole on the roller tube.
Use the drill to secure the rivet in place, making sure it is tight and secure. Repeat this process for all the remaining holes, working your way along the fabric. Take your time to ensure each rivet is properly installed, as this will ensure the awning fabric stays securely attached.
Once all the rivets are in place, give the fabric a gentle tug to ensure it is firmly attached to the roller tube. If everything looks good, you can proceed to the final step of reinstalling the awning arms.
Tips for proper maintenance of RV awning motor
If you’re an RV owner, you know the importance of a functioning awning motor. It’s essential for providing shade and protection from the sun and rain. But like any motor, it may eventually wear out or need to be replaced.
So, let’s go through the steps on how to replace an RV awning motor. First, start by checking the user manual for your specific motor model. It will provide instructions tailored to your motor, including any specific tools you may need.
Next, disconnect the power supply to the motor to ensure safety. Then, remove the bolts or screws that hold the motor in place. Carefully disconnect any wires connected to the motor, taking note of their placement for easy reinstallation.
Install the new motor by following the reverse steps of removal. Finally, reconnect the power supply and test the motor to ensure it’s functioning correctly. With these simple steps, you’ll be able to replace your RV awning motor and continue enjoying the shade and protection it provides.
Regular cleaning and inspection
“Regular cleaning and inspection are key to maintaining the optimal functioning of your RV awning motor. Taking the time to perform these simple tasks can help prolong the lifespan of your motor and ensure that it continues to run smoothly for years to come. Start by giving your awning a thorough cleaning.
Use a mild soap and water solution to gently scrub away any dirt, debris, or bird droppings that may have accumulated. Pay special attention to the motor housing and the awning fabric, as these areas are most susceptible to damage. After cleaning, inspect the motor for any signs of wear or damage.
Look for loose or worn-out parts, frayed wires, or any other issues that may need attention. If you notice anything out of the ordinary, contact a professional for repairs or replacement. By following these simple maintenance tips, you can ensure that your RV awning motor remains in top condition and ready for your next adventure.
“
Applying lubrication
proper maintenance of RV awning motor When it comes to taking care of your RV awning motor, one important aspect is applying lubrication regularly. Lubricating the motor ensures smooth operation and prevents any friction or wear and tear. But how do you go about it? Well, here are a few tips to help you with the process.
First and foremost, you need to make sure you have the right lubricant for the job. It’s important to use a lubricant that is specifically designed for awning motors to ensure maximum effectiveness. You can check with the manufacturer or do some research to find the most suitable lubricant for your motor.
Once you have the right lubricant, the next step is to clean the motor before applying it. You can use a mild detergent and water to clean the motor and remove any dirt or debris that may have accumulated over time. This step is crucial as it ensures that the lubricant can penetrate the motor properly.
After cleaning, it’s time to apply the lubricant. Start by applying a small amount of the lubricant to the moving parts of the motor. Make sure to cover all the areas that require lubrication, such as gears, bearings, and shafts.
It’s important not to over-apply the lubricant, as it can attract more dirt and cause unnecessary buildup. Once you have applied the lubricant, it’s a good idea to test the motor to ensure everything is working smoothly. Open and close the awning a few times to check for any stiffness or resistance.
If everything feels smooth, then you have successfully applied the lubrication. If you notice any issues, you may need to reapply the lubricant or seek professional help. In addition to regular lubrication, it’s also important to keep your awning motor clean and free from debris.
Conclusion
In conclusion, replacing an RV awning motor is like choreographing a dance routine on wheels. It requires a mix of precision, strength, and a dash of finesse to execute the task flawlessly. Just like changing a flat tire, it may not be the most glamorous endeavor, but mastering this skill will make you the envy of your fellow campers.
Picture this: you’re parked in a serene campground, surrounded by nature’s beauty, and suddenly, disaster strikes – your trusty awning motor gives up the ghost. Fear not, for you now possess the knowledge and ability to bring it back to life. With the grace of a professional ballet dancer, you calmly gather your tools and approach the task at hand.
It’s time to show that awning motor who’s boss. You uninstall it with the precision of a surgeon, making sure not to disturb any of the delicate RV ecosystem. Now, here’s where the brawn comes in.
You wield your new awning motor like a seasoned lumberjack, effortlessly installing it in its rightful place. With each screw and bolt securely fastened, your accomplishment shines brighter than a prima ballerina’s tiara. But let’s not forget the finesse – the secret ingredient that elevates your work from average to extraordinary.
As you power up the new motor, you channel your inner savant, adjusting the tension and alignment until the awning glides open with the grace of a swan taking flight. The journey to becoming an RV awning motor replacement virtuoso may have had its bumps along the way, but now you can revel in the satisfaction of a job well done. And just like a standing ovation at the end of a majestic performance, your fellow campers will marvel at your prowess, wondering how on earth you managed to accomplish such a feat.
So, take a bow, my friend, for you have waltzed your way to victory, replacing an RV awning motor with finesse, strength, and a touch of whimsy. And as you sit beneath the shade of your newly repaired awning, sipping a cool beverage and basking in the admiration of your peers, you can truly say, “I am the maestro of the great RV awning dance.”
FAQs
How do I replace an RV awning motor?
To replace an RV awning motor, you will need to first remove the existing motor by disconnecting any electrical connections and removing any mounting brackets. Then, install the new motor by reversing the steps and ensuring a secure fit.
Can I replace an RV awning motor myself or do I need professional help?
It is possible to replace an RV awning motor yourself, especially if you have some basic mechanical skills. However, if you are unsure or uncomfortable with the process, it is always recommended to seek professional help to avoid any potential damage or safety hazards.
What tools do I need to replace an RV awning motor?
The tools you will likely need to replace an RV awning motor include a socket set, screwdrivers, pliers, wire cutters/strippers, and possibly a drill or impact driver depending on the specific awning model.
Are RV awning motors universal or do I need to find a specific one for my awning model?
RV awning motors are not necessarily universal and can vary depending on the specific awning model and manufacturer. It is important to identify the make and model of your awning and consult the manufacturer or a parts supplier to ensure you get the correct replacement motor.
How often do RV awning motors need to be replaced?
The lifespan of an RV awning motor can vary depending on factors such as usage frequency, weather conditions, and overall maintenance. However, on average, RV awning motors can last anywhere from 5 to 10 years before needing replacement.
How much does it cost to replace an RV awning motor?
The cost of replacing an RV awning motor can vary depending on factors such as the motor brand, awning model, and whether you choose to hire a professional for installation. On average, the cost can range from $100 to $500.
Can I upgrade my RV awning motor to a more powerful one for better performance?
It is possible to upgrade your RV awning motor to a more powerful one, but it is important to check if your awning system and supports can handle the increased load. It is recommended to consult the manufacturer or a professional for guidance before making any modifications.