So you’ve noticed that your RV patio awning fabric is looking a little worse for wear. Maybe it’s torn or faded, or maybe you just want to change up the look of your RV. Whatever the reason, replacing your RV patio awning fabric is a task that can seem daunting at first.
But fear not, because we’re here to guide you through the process and make it as easy as possible. Think of it like giving your RV a fresh new outfit. Just like clothes can wear out or go out of style, your awning fabric can also show signs of wear and tear over time.
But with a little bit of time and effort, you can give your RV a whole new look. To start, you’ll want to gather all the necessary materials and tools. This includes the new awning fabric, a ladder, a tape measure, a screwdriver, and some replacement hardware if needed.
It’s also a good idea to have a friend or family member on hand to help out, as this can make the process go much smoother. Next, you’ll want to carefully remove the old awning fabric. This can usually be done by removing a few screws or bolts and sliding the old fabric out of the awning track.
Be sure to take note of how the old fabric was attached, as this will come in handy when it’s time to install the new fabric. Once the old fabric is off, it’s time to measure and cut the new fabric. This step is crucial, as you want to ensure that the new fabric fits perfectly in the awning track.
Measure twice, cut once, as they say. Once you have the new fabric cut to size, you can then start attaching it to the awning track. Attaching the new fabric is usually a matter of sliding it into the awning track and securing it with screws or bolts.
Table of Contents
Step 1: Determine the Size and Type of Fabric Needed
If you’re looking to replace the fabric on your RV patio awning, the first step is to determine the size and type of fabric you will need. This is an important step as selecting the right size and type of fabric will ensure a proper fit and longevity of the replacement. To determine the size, measure the length of your existing awning fabric from end to end.
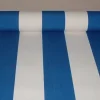
Additionally, measure the depth or projection of the awning fabric when fully extended. These measurements will help you choose a replacement fabric that matches the dimensions of your current awning. When it comes to the type of fabric, there are different options available such as vinyl, acrylic, or polyester.
Consider factors like durability, resistance to fading, and ease of maintenance when choosing the fabric type. By carefully measuring your awning and selecting the appropriate fabric, you can ensure a successful replacement that will provide you with many more years of shade and protection on your RV adventures.
Measure the Width and Length of the Awning
To begin the process of replacing or repairing an awning, the first step is to determine the size and type of fabric that is needed. This can be done by measuring the width and length of the existing awning. Using a measuring tape, start by measuring the width of the awning from one side to the other.
Be sure to measure from the outside edge of the fabric, not including any frames or hardware. Next, measure the length of the awning by measuring from the front edge to the back edge. Once you have these measurements, you can determine the size of fabric that you will need for your awning.
Additionally, you will want to consider the type of fabric that will best suit your needs. There are various options available, such as acrylic, vinyl, or canvas. Each type of fabric has its own unique features and benefits, so it’s important to choose one that will withstand the elements and complement the aesthetics of your outdoor space.
By taking the time to accurately measure the width and length of your awning and selecting the appropriate fabric, you will be on your way to successfully replacing or repairing your awning.
Choose the Right Fabric Type for your Climate
When choosing the right fabric type for your climate, the first step is to determine the size and type of fabric needed. This will depend on various factors such as the climate of your region, the intended use of the fabric, and personal preference. For example, if you live in a hot and humid climate, you may want to choose a lightweight and breathable fabric such as cotton or linen.
These fabrics allow for air circulation and can help keep you cool and comfortable. On the other hand, if you live in a cold climate, you may want to opt for a heavier fabric such as wool or fleece to provide insulation and warmth. Additionally, considering the type of fabric is important as well.
For outdoor use, you may want to consider fabrics that are UV resistant and water repellent. Ultimately, it is essential to choose a fabric that suits your unique climate and needs to ensure optimal comfort and functionality.
Step 2: Gather the Necessary Materials and Tools
Once you have decided to replace the fabric on your RV patio awning, the next step is to gather all the necessary materials and tools. You will need a few basic items for this project, including new awning fabric, a ladder or step stool, a screwdriver or drill, a tape measure, a utility knife or scissors, and some heavy-duty adhesive or Velcro strips. It is important to choose the right size and type of awning fabric for your specific RV, so be sure to measure the length from end to end and the width of the channel where the fabric slides into.
Once you have all the materials and tools ready, you are one step closer to giving your RV a fresh and updated look with a new patio awning fabric.
Fabric of Choice
fabric of choice, materials, tools, gather, sewing project, creativity, budget, aesthetics, durability, functionality, cotton, linen, silk, polyester, needles, pins, scissors, measuring tape, sewing machine. Now that you’ve decided on the fabric of choice for your sewing project, it’s time to gather the necessary materials and tools. When choosing your materials, there are a few things to consider: your budget, the aesthetics you’re aiming for, and the functionality and durability of the fabric.
Some popular fabric options include cotton, linen, silk, and polyester. Cotton is a natural and breathable fabric, perfect for everyday wear and home decor projects. Linen is also a natural fiber known for its durability and crisp texture.
Silk, on the other hand, is a luxurious and delicate fabric that adds elegance to any garment or accessory. Polyester is a synthetic fabric that is commonly used for its affordability and wrinkle-resistance. Aside from the fabric, you’ll also need a few essential tools.
Needles and pins are a must-have for any sewing project, as they help keep your fabric in place and ensure neat and precise stitches. Good quality scissors are also crucial for cutting your fabric accurately without fraying the edges. A measuring tape is necessary for taking accurate measurements and ensuring a proper fit, while a sewing machine can speed up the sewing process and provide more professional-looking results.
Gathering all these materials and tools may seem overwhelming, but remember that it’s all part of the creative process. Think of it as building blocks for your project, where each piece contributes to the final masterpiece. So, get ready to embark on your sewing journey, armed with your fabric of choice, materials, and tools.
The possibilities are endless, and you’re only limited by your imagination and skill. Happy sewing!
Tape Measure
tape measure, gather materials, necessary tools
Scissors or Knife
In order to successfully create your rock climbing chalk bag, you will need to gather all the necessary materials and tools. One of the first decisions you will need to make is whether to use scissors or a knife for cutting the fabric. Scissors are a common tool that most people have on hand and can easily cut through fabric.
They are a safe option and are especially useful if you are working with children or are concerned about accidents. On the other hand, a knife can allow for more precise cuts and is especially helpful if you are working with thicker or tougher fabrics. It is important to keep safety in mind when using a knife and to make sure you are using it properly.
Whichever tool you choose, make sure it is sharp and in good condition to ensure clean cuts.
Screwdriver or Power Drill
power drill, materials, tools So you’ve decided to take on a DIY project, but now you’re faced with the question of whether to use a screwdriver or a power drill. Both tools have their pros and cons, so it’s important to gather the necessary materials and tools before making a decision. Firstly, let’s talk about the materials you’ll need.
If you’re working with screws, you’ll obviously need some screws. Make sure you have the right size and type for your project. Additionally, you may need some wall anchors if you’re working with drywall or other fragile materials.
It’s always a good idea to have some extra screws and anchors on hand, just in case. Next, let’s move on to the tools you’ll need. If you choose to use a screwdriver, you’ll obviously need a screwdriver set that includes various sizes and types of screwdrivers.
This will ensure you have the right tool for the job. On the other hand, if you decide to use a power drill, you’ll need to have a drill bit set. Again, it’s important to have a variety of drill bits to accommodate different types and sizes of screws.
Now let’s talk about the pros and cons. Using a screwdriver is more traditional and can give you a greater sense of control and precision. It’s also a more affordable option if you don’t already own a power drill.
However, using a screwdriver can be tiring and time-consuming, especially if you’re working on a large project with lots of screws. On the other hand, using a power drill can make the job much quicker and easier. It can also provide more torque, making it easier to drive screws into tough materials.
Rope or Cord
rope or cord, gather materials, necessary tools
Awning Rail and Roller Tube
awning rail, roller tube, materials and tools. When it comes to installing an awning rail and roller tube, you’ll need to gather a few materials and tools before you get started. First and foremost, you’ll need the awning rail itself.
This is the strip of metal or plastic that the fabric of the awning will slide into. You can usually purchase an awning rail at a hardware store or online. Next, you’ll need the roller tube, which is the cylindrical tube that the fabric of the awning will roll onto.
Again, you can find roller tubes at a hardware store or online. Aside from the awning rail and roller tube, you’ll also need a few other materials and tools to complete the installation. You’ll need screws or bolts to secure the awning rail to your RV or other structure.
Be sure to choose screws or bolts that are appropriate for the material you’ll be attaching the awning rail to. You’ll also need a drill with the appropriate bit for the screws or bolts you’ll be using. In addition to these basic materials and tools, you may also need a few other items depending on the specific installation instructions for your awning rail and roller tube.
Some awning kits may come with additional hardware, such as brackets or end caps, that you’ll need to install. Be sure to read the instructions that come with your awning rail and roller tube to determine if there are any additional materials or tools you’ll need. Overall, gathering the necessary materials and tools for installing an awning rail and roller tube is an important first step.
By being prepared and having everything you need on hand, you’ll be able to complete the installation process smoothly and efficiently.
Step 3: Remove the Old Awning Fabric
Replacing the fabric on your RV patio awning can be a simple and cost-effective way to refresh the look of your outdoor space. The first step in this process is to remove the old awning fabric. This may seem like a daunting task, but with a few simple steps, you can easily remove the old fabric and prepare for the installation of the new one.
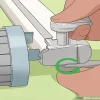
First, extend your RV patio awning fully to its open position. Next, locate the awning tube and find the slot where the fabric is inserted. Use a small flathead screwdriver to loosen the screws or fasteners that secure the fabric in place.
Slowly slide the fabric out of the slot, being careful not to damage it or the awning arms. Once the fabric is fully removed, you can begin the process of replacing it with a new one.
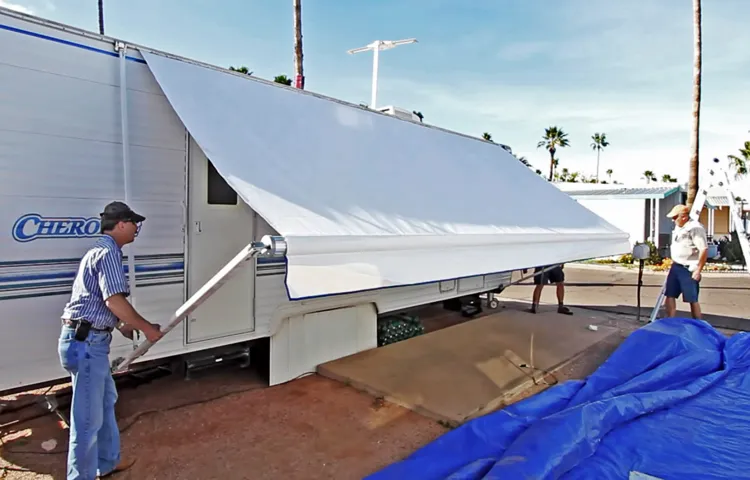
Unroll the Awning to its Maximum Extension
To begin replacing the fabric of your awning, the first step is to unroll it to its maximum extension. This will give you the space you need to work with and make the process easier. Start by locating the crank or lever that allows you to open and close the awning.
Use this mechanism to slowly and carefully unwind the awning until it is fully extended. Be sure to do this step with caution, as you don’t want to damage the awning or cause it to become tangled. Once the awning is fully extended, you can move on to the next step of removing the old fabric.
Secure the Awning in Place
Securing the awning in place is an essential step in making sure it stays intact and doesn’t get blown away by strong winds or storms. To do this, you will need to remove the old awning fabric first. This is necessary because over time, the fabric can become worn out, faded, or damaged, and it may not provide the necessary protection and aesthetics anymore.
So, by removing the old fabric, you can make room for a new and fresh one that will enhance the appearance of your awning and provide better durability. The process of removing the old fabric can be a bit tricky, but with the right tools and approach, you can get the job done efficiently. Once the old fabric is removed and you have a clean frame, you can then begin securing the new fabric in place.
Overall, this step is crucial in ensuring that your awning is properly installed and will last for a long time, adding value and functionality to your outdoor space.
Remove the Screws or Bolts Holding the Awning in Place
In order to remove the old awning fabric, you will first need to take out the screws or bolts that are holding the awning in place. This step is crucial to ensure that you have easy access to the fabric and can safely remove it without damaging the structure. Once you have located the screws or bolts, grab your screwdriver or wrench and start unscrewing them one by one.
Make sure to keep track of the screws or bolts so that you don’t lose them. Once all of the screws or bolts are removed, you should be able to easily lift off the awning and set it aside. Now you can move on to the next step of removing the old fabric and replacing it with a fresh new one.
Detach the Awning from the Roller Tube and Awning Rail
In this next step of replacing your awning fabric, it’s time to detach the awning from the roller tube and awning rail. This step is important because it allows you to easily remove the old fabric and replace it with the new one. To do this, you’ll need to locate the screws or bolts that secure the awning to the roller tube and awning rail.
These fasteners may be located on the end caps or brackets of the awning. Once you’ve located them, simply unscrew or unbolt them to detach the awning. Be sure to take note of how the awning is attached so that you can easily reattach it later.
Detaching the awning is an important part of the process, as it allows you to properly remove the old fabric and ensure a clean installation of the new one.
Step 4: Install the New Awning Fabric
Now that you’ve removed the old fabric, it’s time to install the new awning fabric on your RV patio. This is a relatively straightforward process that can give your RV a fresh new look. Start by laying out the new fabric on a clean surface and ensuring it is the correct size for your awning.
Next, align the fabric with the track on the awning roller tube and slide it into place. Make sure the fabric is straight and centered before proceeding. Once in place, secure the fabric using the awning’s bead or stitching channel.
Simply slide the bead or stitching into the channel and continue this process until the entire fabric is securely attached. Finally, extend the awning to its fully open position and double-check that the fabric is properly aligned and tensioned. Adjust as necessary to ensure a tight fit.
With the new awning fabric installed, you can now enjoy a renewed and functional outdoor space on your RV.
Attach the New Awning Fabric to the Roller Tube
When it comes to installing a new awning fabric, attaching it to the roller tube is a crucial step. This is the part of the awning that allows it to roll in and out. To begin, you’ll want to unroll the fabric and align it with the roller tube.
Once you have the fabric in the right position, you can start attaching it. The most common method is using a cord or rope that is threaded through the fabric’s hem or pocket and then tied or twisted onto the roller tube. This ensures a secure connection between the fabric and the roller tube.
It’s important to make sure the fabric is evenly distributed and properly tensioned before finalizing the attachment. This will ensure that your awning fabric rolls smoothly and stays in place when you want it to. Taking your time in this step will ensure a successful installation of the new awning fabric.
Thread the Rope or Cord Through the Awning Rail
awning fabric installation, cord through awning rail, new awning fabric. Installing new awning fabric can give your outdoor space a fresh and updated look. One important step in this process is threading the rope or cord through the awning rail.
This allows you to securely attach the fabric and ensure that it is properly fastened. To do this, start by gathering the necessary materials such as the new fabric, rope or cord, and any tools needed. Next, carefully thread the rope through the awning rail, making sure it is snug but not too tight.
This will provide the necessary support for the fabric and prevent it from sagging or coming loose. Once the rope is securely in place, you can then proceed to attach the new fabric to the rope using the appropriate fasteners or clips. By following these steps, you can successfully install your new awning fabric and create a beautiful and functional outdoor space.
Slowly Roll the Awning Fabric onto the Roller Tube
awning fabric, install new awning fabric, roller tube, slow roll, replace awning fabric, fabric replacement, fresh awning look, awning maintenance, awning installation tips. In step 4 of the awning installation process, it’s time to install the new awning fabric. After you have removed the old worn-out fabric and prepared the roller tube, it’s time to give your awning a fresh new look.
Start by slowly rolling the awning fabric onto the roller tube. Take your time with this step to ensure that the fabric is evenly and tightly rolled onto the tube. The key here is to go at a steady pace and make sure that the fabric is aligned properly as you roll it.
This will prevent any wrinkles or misalignments in the fabric and ensure a smooth and seamless installation. Remember, awning fabric replacement is not only about functionality but also about aesthetics. So take the time to carefully install the new fabric to give your awning a renewed and attractive appearance.
Step 5: Reassemble and Test the Awning
Once you have removed the old fabric from your RV patio awning and secured the new fabric in place, it’s time to reassemble and test the awning. Start by carefully rolling up the new fabric onto the roller tube, making sure it is aligned properly. Once the fabric is rolled up, reattach the end caps to the roller tube and secure them in place with screws or clips.
Next, extend the awning fully, checking for any fabric or roller tube misalignments. Adjust as necessary. Finally, test the functionality of the awning by opening and closing it a few times.
Make sure it rolls out smoothly and retracts properly. Also, check for any wrinkles or creases in the fabric and adjust if needed. Once you are satisfied with the reassembly and functionality of the awning, your replacement project is complete! Time to sit back, relax, and enjoy the shade provided by your newly replaced RV patio awning fabric.
Reattach the Awning to the Roller Tube and Awning Rail
In this step of reassembling and testing your awning, you will need to reattach the awning to the roller tube and awning rail. This is an important part of the process, as it ensures that the awning is securely attached and will function properly. To reattach the awning, start by positioning the awning fabric over the roller tube.
Make sure that the fabric is centered and lined up with the roller tube. Then, slide the awning fabric into the groove on the roller tube, ensuring that it is securely held in place. Once the awning fabric is attached to the roller tube, you can then slide the roller tube back into the awning rail.
Slowly and carefully push the roller tube into the rail, making sure that it is aligned properly. You may need to use some force to slide the roller tube into place, but be careful not to damage the fabric or the awning rail. Once the awning is securely reattached, it’s time to test it out.
Gently extend the awning by turning the awning crank or operating the motor, depending on the type of awning you have. Make sure that the awning extends smoothly and evenly, without any snags or resistance. Next, retract the awning back into its closed position to make sure that it operates correctly.
Again, make sure that the awning retracts smoothly and evenly without any issues. If everything looks and functions properly, congratulations! You have successfully reassembled and tested your awning. Now you can enjoy the shade and protection that your awning provides.
Secure the Awning with Screws or Bolts
In the last step of reassembling and testing your awning, it is crucial to make sure it is securely attached to your home. This can be done by using screws or bolts to fasten the awning to the wall. By doing this, you are ensuring that the awning will stay in place even during strong winds or heavy rain.
It’s like putting the final piece of a puzzle in its place, completing the picture and giving you peace of mind. Just like a bolt securing a door, these screws or bolts will keep your awning firmly attached, protecting it from any potential damage. So grab your screwdriver or wrench, and tighten those screws or bolts to secure your awning in place.
Once you are done, give it a test. Open and close the awning to make sure it is functioning properly and that it remains sturdy and stable. With this step complete, your awning is ready to provide shade and protection for years to come.
Extend and Retract the Awning to Ensure Proper Functioning
One important step in reassembling and testing your awning is to extend and retract it to ensure that it is functioning properly. This is an essential part of the process, as it allows you to check that all the components are aligned correctly and that the awning is moving smoothly. To do this, simply use the controls or manual crank to extend the awning fully.
Take note of any resistance or unusual sounds, as these could be indicators of a problem. Once the awning is fully extended, retract it back in and again listen for any issues. If everything goes smoothly and there are no strange noises or resistance, then it is likely that the awning has been reassembled correctly.
However, if you notice any abnormalities, it may be necessary to disassemble and reassemble it again, checking for any misalignments or loose parts. Ensuring the proper functioning of your awning is crucial to its longevity and usability, so taking the time to thoroughly test it is well worth the effort.
Conclusion
In conclusion, replacing the fabric on your RV patio awning is like giving your outdoor living space a stylish makeover. Not only does it protect you from the harsh sun and pesky raindrops, but it also adds a touch of elegance and charm to your home on wheels. Think of it as the fashion statement of the RV world; a bold new look that says, “I am not just any old camper, I am a mobile oasis of relaxation and style.
” But fret not, my adventurous friends, for I have shared with you the secrets to successfully tackle this DIY project. From gathering the necessary tools to carefully removing the old fabric, you are now equipped with the knowledge to conquer any awning fabric replacement challenge that comes your way. So channel your inner DIY guru, embrace the excitement of the unknown, and let your creative juices flow as you select the perfect fabric to adorn your outdoor haven.
Just remember, dear RV enthusiasts, that this endeavor requires a delicate balance of patience, precision, and a pinch of pizzazz. Take your time, follow the steps with care, and before you know it, you’ll be lounging in the shade of your brand new awning, sipping a cold beverage and marveling at the beauty you’ve created. So rally the troops, gather your supplies, and embark on this awning adventure.
With a little elbow grease and a whole lot of determination, you’ll be well on your way to a patio awning that will have your fellow RV dwellers green with envy. Happy fabric replacing, my fellow road warriors! May the winds of style and comfort always be in your favor.”
Enjoy Your Newly Replaced RV Patio Awning Fabric
RV patio awning fabric replacement can be a DIY project that saves you time and money. Once you have removed the old fabric and measured the new one, it’s time to reassemble and test the awning. This step may seem straightforward, but it’s important to take your time and double-check everything to ensure proper installation.
Start by attaching the new fabric to the roller tube, making sure it is centered and straight. As you roll out the awning, be careful not to snag the fabric or let it get tangled. Once fully extended, secure the fabric to the arms using the straps or screws provided.
Next, manually retract and extend the awning a few times to make sure it operates smoothly. Check for any signs of the fabric snagging, stretching, or coming loose. If everything looks good, give yourself a pat on the back for a job well done.
You can now enjoy your newly replaced RV patio awning fabric and bask in the shade and comfort it provides.
FAQs
How often should I replace my RV patio awning fabric?
It is recommended to replace your RV patio awning fabric every 3-5 years, or if it shows signs of wear and tear, such as tears, fading, or mold/mildew growth.
Can I replace the RV patio awning fabric myself?
Yes, replacing the RV patio awning fabric can be a DIY project. However, it requires some level of skill and may be time-consuming. It is recommended to follow the manufacturer’s instructions or seek professional help if you are unsure.
What tools do I need to replace my RV patio awning fabric?
To replace your RV patio awning fabric, you will typically need a ladder, a tape measure, a screwdriver, pliers, a utility knife, a staple gun, and new awning fabric. Additionally, you may need a helper to assist with removing and installing the fabric.
How do I measure the size of my RV patio awning fabric for replacement?
To measure the size of your RV patio awning fabric, extend the awning fully and measure from one end of the roller tube to the other end. Ensure you measure the fabric only and not the roller tube as well. Round the measurement to the nearest foot or inch for ordering the replacement fabric.
Can I choose a different color or pattern for my replacement RV patio awning fabric?
Yes, there are various color and pattern options available for RV patio awning fabrics. Consider your personal preferences and the overall aesthetics of your RV when selecting a new fabric. However, it is recommended to choose a fabric that is specifically designed for outdoor use and provides adequate shade and protection.
What are the signs of wear and tear in an RV patio awning fabric?
Signs of wear and tear in an RV patio awning fabric may include tears or rips, faded color, excessive sagging, mold or mildew growth, or visible fabric deterioration. If you notice any of these signs, it is time to replace the fabric.
Can I repair small tears in my RV patio awning fabric instead of replacing it?
Yes, small tears in the RV patio awning fabric can be repaired using a patch kit or adhesive specifically designed for awning fabric. However, keep in mind that repairing small tears may not provide a long-term solution, and it is recommended to replace the fabric if the tears are significant or widespread.”””