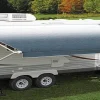
Are you tired of your RV power awning fabric looking worn out and outdated? It’s time to consider a replacement! Your RV power awning fabric is essential for providing shade and protection from the elements. However, over time, it can become faded, torn, and weathered. This not only affects the aesthetics of your RV, but it can also compromise the functionality of the awning itself.
Replacing the fabric of your RV power awning is a relatively straightforward process that can be done by most RV owners. By following a few simple steps, you can give your awning a fresh new look and ensure that it continues to provide you with the shade and protection you need. In this blog post, we will walk you through the process of RV power awning fabric replacement.
We will discuss the reasons why you may need to replace your awning fabric, the tools and materials you will need for the job, and the step-by-step process to get the job done. So, if you are ready to give your RV power awning a makeover and enjoy the benefits of a fresh and functional awning, keep reading. We will guide you through the process and help you get your RV ready for your next adventure.
Say goodbye to that worn-out fabric and hello to a brand-new awning that will make your RV look as good as new!
Table of Contents
What is an RV power awning fabric?
So, you’re looking to replace your RV power awning fabric, huh? Well, you’re in the right place! An RV power awning fabric is the material that covers and protects your awning. It’s like a giant, sturdy blanket that shields you from the elements and provides shade on those hot summer days. Over time, this fabric can become worn out or damaged, and that’s when it’s time for a replacement.
But don’t worry, it’s not as complicated as it sounds! With a few simple steps and some basic tools, you’ll have your new awning fabric installed in no time. So, let’s get started on giving your RV a fresh new look and protecting yourself from the sun and rain!
Why would you need to replace the fabric?
If you own an RV with a power awning, you may find yourself needing to replace the fabric at some point. There are a few reasons why you might need to do this. Firstly, over time, the fabric can become worn or warped from exposure to the elements.
This can lead to tears or holes in the fabric, making it less effective at shading and protecting you from the sun or rain. Secondly, if you’ve had your RV for a while, you may simply want to update the look of your awning by replacing the fabric with a new color or pattern. Whatever the reason, replacing the fabric on your RV power awning is a fairly straightforward process that can usually be done by the average DIY-er.
By following a few simple steps and using the right tools, you can have your awning looking brand new in no time.
Preparation
If you’re a proud owner of an RV, you know that the awning is an essential part of your outdoor living space. However, over time, the fabric of your RV power awning might start to show signs of wear and tear. Don’t worry though, replacing the fabric is a relatively straightforward process that you can do yourself.
First, you’ll need to gather the necessary materials, such as a replacement fabric and a ladder. It’s also a good idea to have a friend or family member assist you, as some steps require an extra pair of hands. Once you have everything you need, start by extending the awning fully.
Next, remove the screws or brackets that hold the fabric in place. Carefully detach the fabric from the roller tube and slide it out. Take note of the orientation of the old fabric to ensure you install the new one correctly.
Now, it’s time to install the replacement fabric. Begin by sliding it into the roller tube, making sure it’s aligned properly. Secure the new fabric to the roller tube and reattach the screws or brackets.
Finally, extend and retract the awning a few times to ensure everything is in working order. Congratulations! You’ve successfully replaced the fabric of your RV power awning and can now enjoy your outdoor adventures with a refreshed and functional awning.
Tools and materials needed
“Tools and materials needed for your DIY project” Before you dive headfirst into your DIY project, it’s important to gather all the necessary tools and materials. So, what exactly do you need? Well, the answer depends on the type of project you’re tackling, but there are a few staples that every DIYer should have in their arsenal. First and foremost, a good set of basic hand tools is a must.
Things like a hammer, screwdrivers, pliers, and a tape measure will come in handy time and time again. Additionally, you’ll want to invest in some power tools if you haven’t already. A drill, circular saw, and cordless screwdriver are essential for many projects.
And don’t forget about safety equipment! Protective goggles, gloves, and a respirator are crucial for keeping yourself safe while working. Finally, gather all the necessary materials for your specific project. Whether it’s paint, lumber, or plumbing supplies, make sure you have everything you need before you start.
By being prepared with the right tools and materials, you’ll set yourself up for success and ensure a more enjoyable DIY experience.
Safety precautions
When it comes to safety precautions, preparation is key. Taking the time to prepare for any potential danger or emergency can make all the difference in keeping yourself and others safe. One important aspect of preparation is having a safety plan in place.
This includes knowing the nearest exits, emergency contact information, and designated meeting points in case of a fire, earthquake, or other emergency situation. It’s also important to have emergency supplies readily available, such as a first aid kit, flashlights, and non-perishable food. By having these items on hand, you can be better equipped to handle any unexpected events that may arise.
Additionally, it’s important to regularly review and practice your safety plan with family members or colleagues to ensure everyone is familiar with the procedures. By being prepared, you can have peace of mind knowing that you have taken the necessary steps to keep yourself and others safe.
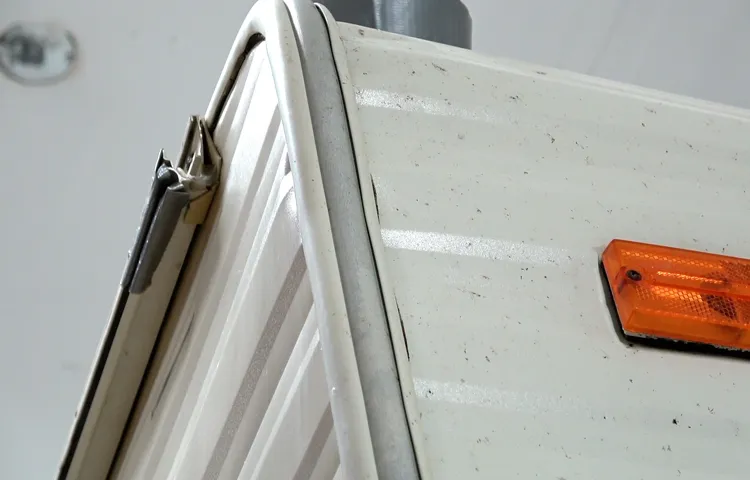
Removing the old fabric
Replacing the fabric on your RV power awning may seem like a daunting task, but with a little know-how, it can actually be quite simple. The first step is to remove the old fabric from the roller tube. Start by extending the awning fully and securing it in place.
Next, locate the screws or rivets that are holding the fabric in place on the roller tube. Use a screwdriver or drill to remove them, being careful not to damage the roller tube. Once all the screws or rivets are removed, carefully slide the old fabric off of the roller tube.
It may be helpful to have a friend assist you in holding the fabric as you slide it off. Once the old fabric is removed, you’re ready to move on to the next step of installing the new fabric.
Unrolling the awning
awning fabric, unrolling the awning, removing the old fabric
Removing the screws and brackets
“Removing the screws and brackets” When it comes to giving your furniture a fresh new look, one of the first steps you’ll need to take is removing the old fabric. Before you can do that, though, you’ll need to take out any screws and brackets holding the fabric in place. These pesky little things can be a bit tricky to deal with, but with a little patience and the right tools, you’ll have them out in no time.
Grab your trusty screwdriver and carefully remove each screw, making sure to keep them safe so you don’t lose them. Once the screws are out, you can move on to the brackets. These are usually attached to the frame of the furniture and can be a bit more stubborn to remove.
You may need to use a bit of force or a pair of pliers to loosen them up. Just remember to take your time and be gentle to avoid damaging the frame. Once all the screws and brackets are removed, you’ll be one step closer to giving your furniture a brand new look.
Cutting the fabric
cutting fabric. So, you’ve decided to give your favorite armchair a fresh new look by reupholstering it with a brand new fabric. That’s a great idea! But before you can start covering your chair with the beautiful new fabric, you need to remove the old fabric first.
Cutting the fabric is the first step in this process, and it’s essential to do it correctly to ensure a smooth and clean finish. Start by carefully examining the chair and determining where the seams are located. These are the areas where you’ll need to make your cuts.
Using a pair of sharp fabric scissors, start by cutting along the seams and removing any stitching that is holding the old fabric in place. Take your time and be careful not to rip or tear the fabric. Remember, you want to preserve as much of the old fabric as possible, as you will use it as a template for cutting the new fabric.
Once you’ve removed all the stitching and the old fabric is free, you can start cutting it into smaller pieces. This will make it easier for you to work with and will also help preserve the fabric’s integrity. Make sure to label each piece as you cut it, so you know where it belongs when you start attaching the new fabric.
Cutting the old fabric may seem like a simple task, but it’s an important step in the reupholstering process. Taking your time and being cautious will ensure that you have the best possible starting point for covering your chair with the new fabric. So, grab your scissors and get ready to give your armchair a fresh new look!
Installing the new fabric
So, you’ve noticed that your RV power awning fabric is looking a bit worn and weather-beaten, and you’re ready to replace it. Well, you’ve come to the right place! Replacing the fabric on your RV power awning is not as complicated as it may seem. With a few simple tools and a little bit of know-how, you’ll have your awning looking brand new in no time.
First, you’ll need to gather your materials. You’ll need a replacement fabric for your awning, which you can purchase at an RV supply store or online. You’ll also need a ladder or step stool, a tape measure, a drill, and a few screws.
Next, you’ll want to remove the old fabric from your awning. Start by retracting your awning completely to make the removal process easier. Using your ladder or step stool, carefully remove the screws that hold the fabric in place.
Once the screws are removed, gently pull the fabric out of the track on the awning roller. Be careful not to damage the fabric or the awning itself. Now that the old fabric is removed, it’s time to install the new fabric.
Start by measuring the width and length of your awning roller, as well as the length of the arms. This will ensure that your new fabric is the correct size. Once you have your measurements, lay your new fabric out flat and align it with the awning roller.
Make sure the fabric is centered and even on both sides. Using your drill, attach the fabric to the awning roller using the screws that you removed earlier. Be sure to tighten the screws securely to ensure that the fabric stays in place.
Measuring and cutting the new fabric
“Installing the new fabric is the exciting part of the upholstery process. Once you have measured and cut the new fabric, it’s time to bring it to life on your furniture. Begin by starting at the center of the piece and working your way outward.
This helps ensure an even and symmetrical appearance. Use a staple gun to secure the fabric to the frame, making sure to pull it taut for a smooth finish. As you go along, regularly check the fabric to make sure it is aligned properly and doesn’t have any wrinkles or bubbles.
Take your time and be patient as you work your way around the piece, securing the fabric with staples every few inches. Don’t worry if you make a mistake or need to make adjustments – upholstery is all about trial and error. Simply remove any staples and make the necessary adjustments before continuing.
With each staple, you are one step closer to transforming your furniture and giving it a whole new look.”
Attaching the fabric to the roller tube
Attaching the fabric to the roller tube is the final step in installing new fabric for your roller blind. This step is crucial for ensuring that your blind operates smoothly and looks neat. To start, you will need to unroll the new fabric and lay it flat on a clean and smooth surface.
Make sure the fabric is facing the correct way, with the pattern or color side facing outward. Next, take the roller tube and position it at the edge of the fabric. Starting from one end, roll the fabric tightly around the tube, making sure it is even and straight.
You can use a staple gun or adhesive tape to secure the fabric to the tube, ensuring it stays in place. Finally, gently pull the fabric to ensure it is taut and smooth before attaching the blind back onto the brackets. Once completed, your roller blind will have a fresh and stylish look, ready to enhance your space.
Securing the new fabric to the brackets
Securing the new fabric to the brackets is a crucial step in installing the new fabric for your project. After measuring and cutting the fabric to fit, you’ll need to attach it securely to the brackets to ensure a smooth and professional-looking finish. Begin by lining up the fabric with the brackets and make sure it is centered and straight.
Use a staple gun or upholstery tacks to secure the fabric to the brackets. Start by securing the fabric along the top edge, then work your way down, pulling the fabric taut as you go. Make sure to space the staples or tacks evenly to distribute the tension evenly across the fabric.
Once all the fabric is attached, check for any wrinkles or sagging and make any necessary adjustments. With the new fabric securely in place, you’re one step closer to transforming your space.
Testing the new fabric
Replacing the fabric on your RV power awning may seem like a daunting task, but with a little patience and some basic tools, it can be a relatively easy DIY project. The first step is to carefully remove the old fabric from the roller tube and arms of the awning. This can usually be done by removing a few screws or pins and then sliding the fabric off.
Once the old fabric is removed, you can then measure it to determine the size of the new fabric you will need. Make sure to take accurate measurements, as a properly fitting fabric is crucial for the awning to function properly. Once you have your new fabric, you can then attach it to the roller tube and arms using the appropriate hardware.
Take your time and make sure everything is securely fastened, as you don’t want your awning to come loose while you’re on the road. Once the new fabric is attached, make sure to test the awning to ensure it is operating correctly. If you encounter any issues, refer to the manufacturer’s instructions or consult a professional for assistance.
With a little bit of effort and some careful attention to detail, you can have your RV power awning looking and functioning like new in no time.
Manually rolling and unrolling the awning
If you have ever tried manually rolling and unrolling an awning, you probably know how frustrating it can be. It’s one of those tasks that seems simple enough, but can quickly turn into a tangle of fabric and frustration. However, when it comes to testing the new fabric for your awning, manual rolling and unrolling is actually quite useful.
By physically manipulating the fabric, you can get a sense of its durability and flexibility. Does it roll smoothly? Does it unroll without getting stuck or twisted? These are important questions to answer before you install the fabric on your awning. So, while it may be a bit tedious, taking the time to manually roll and unroll the awning can save you headaches down the road.
After all, you want to make sure your awning fabric will hold up against the elements and stand the test of time.
Checking for any loose ends or defects
After the new fabric has been manufactured, it is essential to conduct thorough testing to ensure that there are no loose ends or defects. This step is crucial in ensuring the quality of the fabric and preventing any potential issues down the line. The testing process involves checking the fabric for any loose threads, faulty stitching, or any other imperfections that may affect its durability or appearance.
By carefully examining the fabric, the manufacturer can identify and address any problems before the fabric is used in the production of garments or other products. This process not only helps to maintain the high standards of the fabric but also ensures customer satisfaction. Additionally, by testing the fabric, manufacturers can determine its suitability for different applications and make any necessary adjustments to improve its performance.
Overall, testing the new fabric is an important step in the manufacturing process to ensure that the fabric meets all quality standards and is free from any defects or loose ends.
Tips and tricks for maintaining your RV power awning fabric
If you own an RV with a power awning, chances are you’ll need to replace the fabric at some point. While the process might initially seem daunting, it’s actually quite simple if you follow a few steps. First, you’ll need to measure the existing fabric to determine the size you’ll need for the replacement.
Then, carefully remove the old fabric by unscrewing it from the roller tube and removing any support arms. Once the old fabric is removed, you can attach the new fabric by sliding it onto the roller tube and securing it with screws. Finally, reattach the support arms and test the awning to ensure it opens and closes smoothly.
By following these steps, you can easily replace your RV power awning fabric and keep your awning looking and functioning its best.
Regular cleaning
Regular cleaning is an essential part of maintaining your RV power awning fabric. Over time, dirt, grime, and other debris can accumulate on the fabric, which not only looks unsightly but can also cause damage if left unchecked. Luckily, there are some simple tips and tricks you can follow to keep your awning fabric clean and in good condition.
Firstly, it’s important to regularly sweep or brush off any loose dirt or debris from the awning fabric. This can be done with a soft-bristle broom or brush, making sure to gently sweep in the direction of the fabric’s grain. Next, you can use a mild soap and water solution to clean the fabric.
Avoid using harsh chemicals or abrasive cleaners, as these can cause damage to the fabric. Gently scrub the fabric using a sponge or soft cloth, paying extra attention to any particularly dirty or stained areas. Once you have thoroughly cleaned the fabric, rinse it off with clean water to remove any soap residue.
Make sure to completely dry the fabric before retracting the awning, as moisture can lead to mold or mildew growth. In addition to regular cleaning, it’s also a good idea to periodically inspect the awning fabric for any tears or damage. If you notice any small tears, they can often be repaired using an awning repair tape or patch kit.
However, for larger tears or extensive damage, it may be necessary to replace the fabric altogether. By following these tips and tricks for regular cleaning and maintenance, you can help prolong the life of your RV power awning fabric and ensure that it stays looking its best for years to come.
Inspecting for any signs of wear or damage
One of the key ways to maintain your RV power awning fabric is by regularly inspecting it for any signs of wear or damage. Over time, exposure to the elements and frequent use can take a toll on the fabric, causing it to fray or tear. By actively examining the fabric on a regular basis, you can catch any potential issues before they become major problems.
Start by looking for any areas that seem thinner or more worn than others. These spots are often the first to show signs of damage. Additionally, check for any tears or holes in the fabric.
These can easily occur from branches, wind, or other objects that may come into contact with the awning. If you notice any issues, it’s important to address them promptly to prevent further damage.
Proper storage during the off-season
RV owners know that proper storage during the off-season is essential for preserving the condition of their vehicles. One crucial aspect of storage is taking care of the power awning fabric. The fabric of an RV’s power awning is exposed to various elements, such as sun, rain, and wind, which can lead to wear and tear over time.
To keep the power awning fabric in top shape, there are a few tips and tricks to follow. Firstly, make sure to clean the fabric thoroughly before storing it. This can be done by using a mild detergent and warm water to remove any dirt or stains.
Additionally, it is essential to let the fabric dry completely to prevent mold or mildew growth. After cleaning, consider applying a fabric protector spray to further shield the fabric from future damage. Another important aspect of maintaining the power awning fabric is proper storage.
It is recommended to roll up the awning fabric tightly and secure it in a designated storage bag or container. This will protect the fabric from being damaged by rodents or other pests. Additionally, storing the fabric in a cool, dry place, away from direct sunlight, will help prolong its lifespan.
By following these tips and tricks, RV owners can ensure that their power awning fabric stays in excellent condition, ready to provide shade and protection on their next adventure.
Conclusion and final thoughts
In conclusion, replacing the fabric on your RV power awning is not as daunting of a task as it may seem. With some patience, a few basic tools, and a little bit of wit, you’ll have your awning looking brand new in no time. So go ahead, tackle that ratty old fabric and show it who’s boss.
After all, a clever RVer like yourself deserves nothing less than a witty and stylish power awning!”
FAQs
How often should RV power awning fabric be replaced?
The frequency of RV power awning fabric replacement will depend on factors such as usage, weather conditions, and overall maintenance. However, it is generally recommended to inspect the fabric regularly for signs of wear and tear, and replace it every 5-7 years or as needed.
Can I replace the RV power awning fabric myself?
Yes, replacing the RV power awning fabric can be a DIY project for those with basic handyman skills. There are various tutorials and guides available online that provide step-by-step instructions on how to replace the fabric. However, it is important to exercise caution and follow the manufacturer’s guidelines to ensure proper installation and safety.
What tools and materials are needed to replace RV power awning fabric?
The tools and materials needed to replace RV power awning fabric may include a ladder, screwdriver or drill, awning rail lubricant, new fabric, awning pull strap, and replacement fasteners. It is important to consult the specific instructions provided by the awning manufacturer for a comprehensive list of required tools and materials.
How much does it cost to replace RV power awning fabric?
The cost of replacing RV power awning fabric can vary depending on factors such as the size of the awning, the quality of the fabric chosen, and whether professional installation is required. On average, the cost can range from $200 to $500. It is recommended to obtain quotes from different suppliers or service providers to get an accurate estimate for your specific situation.
How long does it take to replace RV power awning fabric?
The time required to replace RV power awning fabric will depend on factors such as the size of the awning, the experience of the person performing the replacement, and any potential complications encountered during the process. In general, it can take anywhere from a few hours to a full day to complete the replacement.
Are there different fabric options available for RV power awning replacement?
Yes, there are various fabric options available for RV power awning replacement. This includes different colors, patterns, and materials. The most common fabric types used for RV awnings are vinyl and acrylic, each offering its own benefits and considerations. It is important to choose a fabric that is durable, UV-resistant, and suitable for the specific climate and usage conditions.
Can I repair a damaged RV power awning fabric instead of replacing it?
In some cases, minor damages or tears in RV power awning fabric can be repaired rather than replaced. This can involve patching the damaged area with specialized repair tape or glue. However, it is important to assess the extent of the damage and consult the manufacturer’s guidelines to determine if repair is a viable option. In many cases, particularly for larger or more severe damages, replacement may be the more suitable solution.