Are you tired of a worn-out winch cable on your ATV? It can be frustrating to have a winch that doesn’t perform its best when you need it the most. But don’t worry! Replacing your warn ATV winch cable is easier than you think. In this blog, I will guide you through the steps to replace your winch cable so that you can get back on track in no time.
Think of your winch cable as the lifeline of your ATV. Just like how a superhero relies on their trusty sidekick, your winch relies on its cable to save the day. Over time, the cable may wear out, become frayed, or lose its strength.
This can happen due to frequent use, exposure to harsh weather conditions, or improper handling. Replacing your winch cable is essential for the safety and functionality of your ATV. By doing so, you ensure that your winch is ready to tackle any off-road adventure or rescue mission that comes its way.
Plus, a new winch cable will provide peace of mind, knowing that you have a reliable tool at your disposal. In the next sections, I will walk you through a step-by-step process of replacing your warn ATV winch cable. From removing the old cable to installing the new one, you will be equipped with the knowledge and skills needed to perform this task confidently.
So, let’s dive in and get your winch back in top shape!
Table of Contents
Introduction
If you own an ATV with a warn winch, chances are you’ll need to replace the winch cable at some point. Whether it becomes frayed, breaks, or just wears out over time, replacing the cable is a relatively simple process that you can do yourself. In this blog post, we’ll walk you through the steps of how to replace a warn ATV winch cable, so you can get back out on the trails in no time.
So, let’s dive in and get started on this DIY project!”
Why replace your Warn ATV winch cable
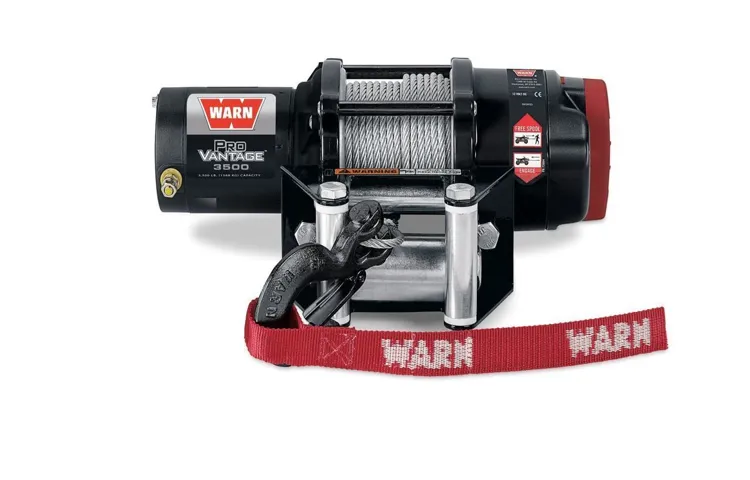
Warn ATV winch cable
The importance of choosing the right replacement cable
replacement cable
Step 1: Gathering the necessary tools
When it comes to replacing a warn ATV winch cable, it’s important to gather all the necessary tools beforehand. This will make the process much smoother and efficient. The tools you’ll need include a winch cable, a pair of pliers, a screwdriver, and a socket wrench set.
Make sure the winch cable you choose is compatible with your ATV model and has a suitable weight capacity. It’s also a good idea to have a friend or two to help you with the process, as some parts can be heavy and difficult to maneuver on your own. Once you have all the tools ready, you’re ready to move on to the next step in replacing your warn ATV winch cable.
List of tools required
To start your DIY home repair project, it’s important to gather all the necessary tools. Having the right tools on hand will make the process much smoother and ensure you have everything you need to get the job done correctly. Some common tools you may need include a hammer, screwdrivers (both flathead and Phillips), a tape measure, a level, a utility knife, pliers, an adjustable wrench, and a cordless drill.
These tools will be your go-to for a variety of tasks, from hanging pictures to fixing leaky faucets. It’s also helpful to have a toolbox or tool bag to keep everything organized and easily accessible. By having all the tools you need before you start your project, you’ll be able to work efficiently and effectively.
Choosing the right replacement cable
When it comes to choosing the right replacement cable, there are a few steps you need to take. The first step is gathering the necessary tools. Having the right tools on hand will make the process much easier and ensure a successful replacement.
Some essential tools you may need include a screwdriver, wire cutters, and a wire stripper. These tools will help you remove the old cable and install the new one. It’s important to have the correct size and type of screwdriver for the screws on your device to avoid causing any damage.
Wire cutters are necessary for cutting the old cable, and a wire stripper will help you remove the insulation from the new cable. By having these tools ready, you’ll be prepared to move on to the next step in the process.
Step 2: Removing the old winch cable
So, you’ve decided it’s time to replace the old winch cable on your ATV. Good call! A worn or damaged winch cable can be not only a safety hazard but also affect the performance of your ATV winch. Luckily, replacing the cable is a fairly straightforward process that you can do yourself with just a few tools and some patience.
In this second step, we’ll walk you through how to remove the old winch cable so you can get started on installing the new one. First, make sure your ATV winch is fully retracted and the power is turned off. This will prevent any accidental engagement of the winch while you’re removing the cable.
Next, locate the winch drum, which is the spool that holds the cable. On most ATV winches, you’ll find a small hole in the drum. Insert a small Allen wrench or similar tool into this hole to lock the drum in place.
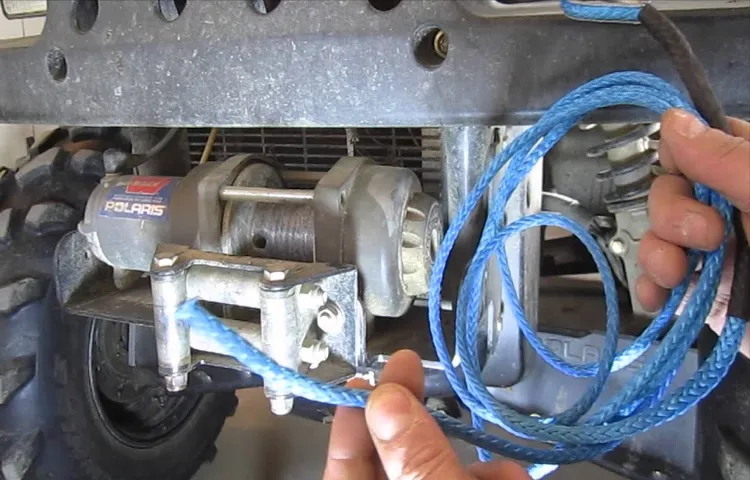
Now, it’s time to remove the old winch cable. Locate the attachment point of the cable on your ATV. This is typically a hook or a loop that secures the cable to the winch drum.
Using a pair of pliers, remove any retaining clips or bolts that are holding the cable in place. Once these are removed, you should be able to freely pull the old cable out from the winch drum. Be careful not to let the cable snap back, as this can cause injury or damage to your ATV.
Slowly and carefully guide the cable off the winch drum, making sure it doesn’t tangle or snag on any other parts. Once the cable is completely removed, double-check that there are no remaining attachments or clips still attached to the winch drum. Congratulations! You’ve successfully removed the old winch cable from your ATV.
Identifying the connection points
In step 2 of replacing your winch cable, we need to identify and remove the old cable from the winch drum. This is an important step as it allows us to start fresh with a new, reliable cable. To do this, we first need to locate the connection points where the cable is attached to the winch drum.
These connection points are usually secured with a set of bolts or clamps. Once we have located them, we can begin loosening and removing the bolts or clamps to free the old cable. It’s important to be cautious during this process, as the old cable may be under tension and could snap back if not handled properly.
So, take your time and ensure that you have a firm grip on the cable as you remove it from the drum. With the old cable removed, you are now ready to move on to the next step in the process – installing the new winch cable.
Removing the cable from the winch drum
winch cable, removing the cable from the winch drum
Detaching the cable from the fairlead
In the second step of detaching the winch cable from the fairlead, we will be focusing on removing the old winch cable. This step is crucial in the process of replacing or repairing the winch cable as it requires disconnecting it from the fairlead. This can be done by locating the attachment point of the winch cable on the fairlead and carefully removing any fasteners or bolts that hold it in place.
Once the fasteners are removed, you can gently pull the winch cable away from the fairlead, taking care not to damage any surrounding components. It is important to note that the winch cable may be under tension, so it is advisable to wear gloves and handle it with caution. By following these steps, you will be able to successfully detach the winch cable from the fairlead and proceed with the replacement or repair.
Inspecting the old cable for damage
In our step-by-step guide to replacing a winch cable, the next important task is inspecting the old cable for any signs of damage. This is crucial because a damaged cable can pose a safety risk and may need to be replaced immediately. To do this, start by carefully unwinding the cable from the winch drum.
Look closely for any kinks, fraying, or corrosion, as these can weaken the cable and make it unsafe to use. It’s also important to check the end fittings for any signs of wear or damage. If you notice any issues with the cable, it’s best to err on the side of caution and replace it rather than risking a potential failure during operation.
By taking the time to inspect the old cable, you’ll ensure that your winching operations are safe and reliable.
Step 3: Installing the new winch cable
If you are looking to replace the cable on your WARN ATV winch, you’ve come to the right place. Installing a new winch cable is a relatively simple process that can be done in just a few steps. First, gather all the necessary tools and materials, including a new winch cable and any necessary hardware.
Start by removing the old cable from the winch drum. This may require loosening or removing any retaining bolts or clips. Once the old cable is removed, attach the new cable to the winch drum, making sure it is properly seated and secured.
Then, route the new cable through the fairlead and attach it to the anchor point on your ATV. Be sure to check the cable tension and adjust it as needed. Finally, give the new cable a test run to make sure it is working properly before using it in any real-world situations.
With just a few simple steps, you can have a brand new winch cable installed on your ATV and be ready for any off-road adventures that come your way.
Threading the new cable through the fairlead
Installing a new winch cable can seem like a daunting task, but with a little guidance, it’s easier than you might think. One crucial step in the installation process is threading the new cable through the fairlead. The fairlead is a component that guides the cable and prevents it from rubbing against sharp edges or getting tangled.
To begin, you’ll want to locate the fairlead on your winch, typically found on the front of the winch drum. Carefully remove the old cable if necessary, and make sure the fairlead is clean and free of any debris. Now, take one end of the new cable and feed it through the fairlead.
It’s best to start from the bottom and work your way up, ensuring that the cable is securely positioned and won’t slip out. Keep a firm grip on the cable as you thread it through, being careful not to snag it on any sharp edges. Once you’ve successfully threaded the cable through the fairlead, you’re one step closer to completing the installation process.
Attaching the cable to the winch drum
winch cable Installing a new winch cable is a crucial step in ensuring the smooth and efficient operation of your winch. Once you have removed the old cable, it’s time to attach the new one to the winch drum. This may seem like a daunting task, but with the right technique, it can be easily accomplished.
First, thread the end of the cable through the hole in the drum, making sure it is securely in place. Next, wrap the cable around the drum, ensuring that it is evenly distributed and tightly wound. This will prevent any slippage or damage during operation.
Once the cable is securely wrapped around the drum, use a cable clamp to secure the end of the cable to itself. This will ensure that the cable stays in place and does not unravel while in use. It is important to tighten the clamp securely to prevent any accidents or mishaps.
Once the cable is securely attached to the winch drum, you can begin using your winch with confidence, knowing that you have installed a new, reliable cable. Enjoy the peace of mind that comes with a properly functioning winch, ready to assist you in any situation.
Securing the cable properly
Securing the cable properly is an essential step in installing a new winch cable. Once you have measured the cable and selected the appropriate length, it’s time to attach it to your winch drum. Begin by attaching the hook end of the cable to the drum, making sure it is secured tightly.
Use a winch cable retaining clip or a cable clamp to ensure that the cable does not come loose during use. This will prevent any accidents or damage to your vehicle. It’s important to follow the manufacturer’s instructions and guidelines when securing the cable to your winch drum.
By doing so, you can be confident that your winch will function properly and provide the necessary pulling power when you need it. So, take the time to secure the cable properly, and you’ll be ready to tackle any off-road adventure with ease.
Step 4: Testing the new winch cable
So you’ve decided to replace your warn ATV winch cable? Great choice! It’s always a good idea to regularly inspect and replace worn-out or damaged cables to ensure the safety and efficiency of your winch. Now, let’s talk about how to test your new winch cable to make sure it’s working properly. Before you connect the new winch cable to your ATV, it’s important to test it to ensure it’s working as intended.
Start by unspooling the cable from the winch drum and laying it out on a flat, clean surface. Inspect the cable for any visible defects such as fraying or kinks. Next, attach a suitable weight or tension gauge to the end of the cable.
This can be a sandbag or any other heavy object that is within the weight capacity of your winch. Slowly start winding the cable back onto the winch drum while keeping an eye on the weight or tension gauge. Make sure to apply steady pressure to the cable as it winds back onto the drum.
The weight or tension gauge should not exceed the recommended weight or tension specified by the manufacturer. If it does, you may need to adjust the tension settings or seek professional assistance. Once the cable is fully wound back onto the drum, carefully disconnect the weight or tension gauge.
Now it’s time to test the pulling capacity of the winch. Find a suitable anchor point and securely attach the winch hook to it. Slowly engage the winch and apply slight tension to the cable.
The winch should operate smoothly and pull the weight without any issues. If you notice any abnormalities or issues during the testing process, it’s important to address them immediately. It could be a sign of a faulty cable or a problem with the winch itself.
Activating the winch
winch cable As you wrap up the installation of your brand new winch, it’s crucial to test the winch cable for maximum safety and functionality. This step, known as activating the winch, is essential to ensure that the cable is properly installed and ready for use. Start by engaging the winch switch and slowly pulling out the cable.
Watch closely as the cable unspools, checking for any kinks, twists, or frays. These can weaken the cable and diminish its pulling power, so it’s important to catch any issues before they become a problem. Once you’ve inspected the cable, it’s time for the real test.
Hook the winch cable onto a solid anchor point, such as a sturdy tree or post, and engage the winch. Gradually increase the tension to see how the cable performs. Does it smoothly retract or does it jerk and stutter? Is the tension consistent throughout the retrieval process? Take note of any irregularities or concerns as you test the winch cable’s capabilities.
This step is important because it ensures that your winch is not only installed correctly but also that the cable is in good condition and capable of handling heavy loads. Don’t rush through this step, as it can save you from potential mishaps or accidents down the road. So take your time, test thoroughly, and enjoy the peace of mind that comes with knowing your winch and cable are working flawlessly.
Ensuring proper cable tension
winch cable tension, winch cable testing
Conclusion
In conclusion, replacing a warn ATV winch cable is just like changing your wardrobe – it requires some effort, but the result is worth it. Just like swapping out an old, worn-out outfit for a snazzy new ensemble, swapping out a frayed winch cable for a fresh one ensures that you’ll be ready for any adventure that comes your way. But it’s not just about looking good – it’s about functionality too.
A new winch cable means you can pull yourself out of any sticky situation with ease, whether it’s pulling your ATV out of a deep mud bog or rescuing a friend’s vehicle from a treacherous ditch. So, grab your tools and get to work! Replace that worn winch cable and become the hero of your off-road excursions. And who knows, maybe you’ll inspire others to upgrade their winch cables too.
..because friends don’t let friends get stuck! Remember, it’s all about being prepared, and with a shiny new winch cable, you’ll be ready to tackle any obstacle and conquer the terrain like a true ATV champion.
So, go forth and winch on!”
Maintenance tips for your new winch cable
Now that you have installed your new winch cable, it’s time to test it out and make sure it’s working properly. This is an important step in the maintenance process as it allows you to identify any issues or defects before you need to rely on the cable in a critical situation. To test the new winch cable, start by attaching it to the winch drum and securing the other end to a stable anchor point.
Make sure the cable is properly wound onto the drum and that there are no kinks or tangles. Next, engage the winch and slowly begin to reel in the cable. Pay close attention to how the cable performs during this process.
Does it unwind smoothly? Does it make any strange noises? Is there any noticeable resistance or jerking? As the cable reaches its full length, continue to watch for any signs of wear or damage. Look for frayed or broken strands, as well as any discoloration or signs of corrosion. These could indicate that the cable is not in optimal condition and may need to be replaced.
Once you have fully reeled in the cable, repeat the process a few times to ensure consistent performance. Keep an eye out for any issues that may arise during the testing process, and address them promptly to prevent further damage or potential accidents. Remember, testing the new winch cable is an essential part of the maintenance process.
By taking the time to carefully evaluate its performance, you can ensure that it is in good working order and ready to tackle any tough job or off-road adventure.
Ensuring your winch is in good working condition
winch cable, testing winch cable, winch maintenance, winch safety Once you have replaced your winch cable, it is important to thoroughly test it before putting it to use. Testing the new winch cable ensures that it is in good working condition and will perform reliably when you need it most. To test the winch cable, start by connecting it to a fixed object or anchor point.
Then, gradually apply tension to the cable by engaging the winch. Observe the cable as it winds onto the drum, making sure there are no kinks, twists, or frayed strands. Next, slowly release the tension to ensure the cable unwinds smoothly and without any hang-ups.
It’s also a good idea to visually inspect the cable for any signs of wear or damage. If everything looks and functions as it should, you can be confident that your winch cable is ready for action. Regularly testing and maintaining your winch cable is a crucial part of winch safety and ensuring your equipment is in optimal condition.
So, take the time to perform these tests regularly and keep your winch in top shape for all your towing and recovery needs.
FAQs
How do I replace an ATV winch cable?
To replace an ATV winch cable, follow these steps:
1. Disconnect the power source and remove any tension from the winch cable.
2. Locate the connection point where the cable is attached to the winch drum and disconnect it.
3. Slide the old winch cable out of the winch drum, making sure to remove any hooks or attachments along the way.
4. Take the new winch cable and thread it through the winch drum, making sure it is properly aligned and tight.
5. Securely attach the new winch cable to the winch drum and test the tension to ensure it is securely in place.
6. Reconnect the power source and test the winch cable to ensure proper functionality.
What tools do I need to replace an ATV winch cable?
To replace an ATV winch cable, you will need the following tools:
– Wrench or socket set
– Pliers
– Winch cable replacement
– Safety gloves
– Safety glasses
How often should I replace my ATV winch cable?
The frequency of replacing an ATV winch cable depends on several factors, such as usage, storage conditions, and maintenance. It is recommended to visually inspect the winch cable regularly for any signs of wear or damage. If you notice any fraying, kinks, or other forms of damage, it is advised to replace the winch cable immediately for safety reasons. As a general guideline, it is recommended to replace the ATV winch cable every 1-2 years or as needed.
Can I replace an ATV winch cable on my own or do I need professional help?
While it is possible to replace an ATV winch cable on your own, it is recommended to have some mechanical knowledge and experience to ensure proper installation and safety. If you are unsure or have never performed this task before, it is advised to seek professional help or guidance. Hiring a professional can ensure that the winch cable is properly replaced and reduce the risk of accidents or equipment damage.
Where can I purchase a replacement ATV winch cable?
Replacement ATV winch cables can be purchased from various sources, including ATV dealerships, automotive parts stores, online retailers, and specialty ATV accessory shops. It is recommended to purchase a high-quality winch cable that is compatible with your ATV model and meets your specific needs and requirements.
What are the signs that indicate I need to replace my ATV winch cable?
Some signs that indicate it is time to replace your ATV winch cable include:
– Visible signs of wear, such as fraying, kinks, or stretching.
– Difficulty in winching or retracting the cable smoothly.
– Unusual noises or vibrations during winching.
– Failure to hold tension properly.
– Any signs of damage or rust on the winch cable.
If you notice any of these signs, it is best to replace the winch cable to ensure safe and efficient operation.
How do I maintain an ATV winch cable to extend its lifespan?
To maintain an ATV winch cable and extend its lifespan, follow these tips:
– Regularly clean the winch cable with soap and water to remove dirt and debris that can cause damage.
– Protect the winch cable from exposure to extreme temperatures, moisture, and direct sunlight.
– Lubricate the winch cable periodically with a silicone-based lubricant to reduce friction and prevent rust.
– Inspect the winch cable for any signs of wear or damage, and replace it if necessary.
– Store the winch cable properly when not in use, coiling it neatly and avoiding any sharp bends or kinks.