If you’re someone who loves to hit the road in your RV, you know what a blessing a good awning can be. But as important as it is to set up the awning properly, it is just as important to retract it safely when it’s time to move on. Not only can retracting an awning improperly damage it, it can also cause injuries if not done correctly.
So, how do you retract your RV awning safely? We’re here to help. In this blog post, we’ll be walking you through step-by-step instructions on how to retract your RV awning easily and safely. Whether you’re a seasoned RVer or a first-timer, this guide will ensure that you’re retracting your awning like a pro.
So, grab a cup of coffee, pull up a seat, and let’s get started!
Table of Contents
Prepare Your RV for the Retraction Process
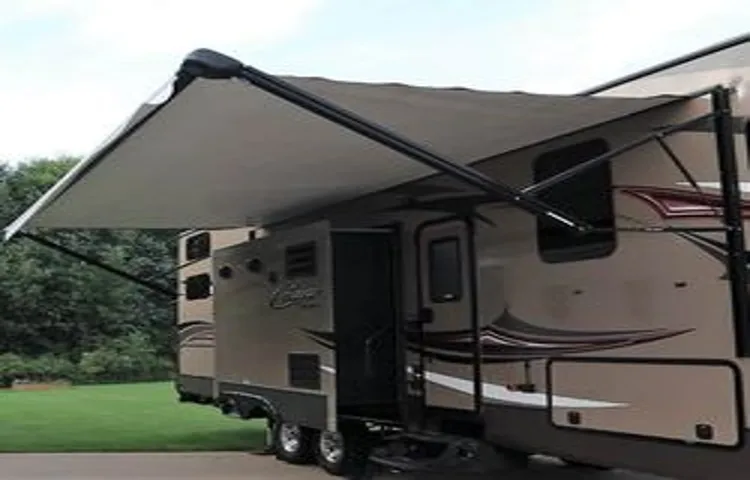
If you’re planning on retracting your RV awning, there are a few things you should do to prepare your vehicle beforehand. First, make sure you’ve securely fastened any loose items inside and outside of the RV to avoid damages during the retraction process. Additionally, retract your awning during a calm day, as retracting it during strong winds can cause damage to both the awning and your RV.
Now, when it comes to retracting your awning, the process is generally easy and straightforward. Start by releasing the tension on the awning arms, then slowly roll the awning towards the RV until it’s completely retracted. Ensure that the awning is aligned and flush with the side of your RV before locking it into place.
Overall, retracting your RV awning isn’t a complicated process as long as you take the necessary precautions beforehand. By following our tips, you can ensure a successful awning retraction and keep your RV in good condition for your next adventure.
Turn Off the Power Supply
When preparing your RV for the retraction process, it’s important to start by turning off the power supply. This may seem like a no-brainer, but forgetting to turn off your RV’s power can lead to potentially dangerous situations. Before you begin retracting your RV, make sure to unplug all electronic devices and turn off the generator.
This will prevent any electrical mishaps from occurring, such as shock or sparks. It’s also important to double-check that all windows and doors are closed and locked before retracting your RV. Once you’ve got the power supply sorted, you can move on to the next step of preparing your RV for the retraction process.
Remember, safety should always be your top priority when handling your RV.
Check if the Awning is Dry
Retracting an RV awning may seem like a simple task, but it is important to properly prepare before beginning the process. One crucial step is to check if the awning is dry. If it’s wet, it could cause mold or mildew to form if it’s rolled up for an extended period.
Before retracting the awning, use a towel or cloth to dry it off completely. Even if it doesn’t appear wet, it’s best to err on the side of caution. Taking this precaution will help ensure the longevity of your awning and prevent any potential damage or odor issues down the line.
So, always make a habit of inspecting the awning for moisture before retracting it, and take the extra time to dry it off if needed. By doing so, you’ll have peace of mind knowing that your RV is in good condition, and you’ll be able to enjoy it for many years to come.
Secure Loose Items
When getting ready to retract your RV, it’s important to prepare it properly for a smooth and safe process. One of the most important steps to take is securing loose items. Before hitting the road, take some time to double-check all the cabinets and drawers to ensure nothing is going to shift around while in transit.
It’s also a good idea to invest in some organizational tools like bins or nets to help keep things in place. Another helpful tip is to store heavier items on the floor or low shelves and secure them with bungee cords or straps. By taking these simple steps, you can avoid accidents and damage during the retraction process and enjoy a worry-free ride to your next destination.
Don’t let loose items ruin your travel experience – take the time to prepare your RV properly and travel with confidence!
Locate the Awning Control
Retracting an RV awning can be daunting if you’re not familiar with the process. The first step is to locate the awning control, which can typically be found near the entry door or on the side of your RV. Once you’ve found the control, make sure to turn off the power supply to prevent any accidents during the retraction process.
Most awnings come with a manual override option, which can be used if the automatic function fails. Before retracting the awning, make sure to remove any debris or loose items that may have accumulated on top of it. Once you’ve cleared the awning and ensured that the arms are secure, you can start retracting it.
Carefully press the button on the awning control and hold it until the awning is fully retracted. Remember to check that the awning is properly secured before hitting the road to ensure the safety of everyone on board. With these steps, you’ll be able to retract your RV’s awning with ease.
Find the Switch or Crank Handle
When you’re ready to extend or retract your awning, the first thing you need to do is locate the awning control. Depending on the type of awning you have, the control could be a switch, crank handle, or some other mechanism. Look around the perimeter of your awning and see if you can find any kind of control device.
If you have an electrically operated awning, you’re likely to see a switch or button located somewhere on the wall, near the awning itself. For manually operated awnings, you’ll need to look for a crank handle that attaches to a gear mechanism on the side of the awning. Once you’ve located the control, you’ll be ready to start operating your awning and enjoying the shade and comfort it provides.
Remember to always follow the manufacturer’s instructions to ensure proper use and maintenance of your awning.
Check for Safety Locks or Brackets
When getting ready to use your awning, safety should always come first. One crucial step in preparing your awning for use is to ensure that it has safety locks or brackets in place. These fixtures will help keep your awning securely attached to your RV, preventing accidents or damage from occurring.
It’s also important to locate the awning control before you start extending or retracting the awning. Usually, the control will be situated on the side of the RV or underneath the awning itself. Looking for the control beforehand can save you time and effort and make the process of operating your awning much smoother.
Keep these tips in mind to ensure that your awning experiences are safe and enjoyable. Remember, the keyword here is “safety locks and brackets.”
Retract the Awning
Retracting an RV awning can seem daunting at first, but with a little practice, it becomes second nature. One crucial step before retracting the awning is to make sure it’s completely dry and free of any debris. Next, locate the retracting mechanism, which is usually found on the side of the RV or in some cases, on the awning itself.
Depending on the type of awning, you may need to release the tension by pulling down on the release mechanism or pushing a button. Once the awning is released, use both hands to guide it slowly back into its housing. Make sure it’s completely secured before traveling, as an improperly retracted awning can cause serious damage to your RV and pose a safety hazard on the road.
With these simple steps, you’ll have your awning retracted in no time, and be ready for your next adventure on the road.
Use the Control to Bring the Awning In
Retracting your awning is an important task that every homeowner should know how to do. Luckily, it’s a simple process that can be done with just the push of a button. First, locate the control panel for your awning.
Depending on the model, this can be located either inside or outside your home. Once you’ve found it, press the button for “retract”. You should see the awning start to come in slowly.
It’s important to keep an eye on it during this process to make sure it’s moving smoothly and not getting stuck on anything. If you encounter any problems, stop the process and inspect the awning for anything that might be obstructing its path. Once the awning is fully retracted, give it a once-over to make sure everything is in order.
With these steps, you’ll be able to safely and effectively retract your awning and protect it from unforeseen weather conditions. Keyword: Retracting an Awning.
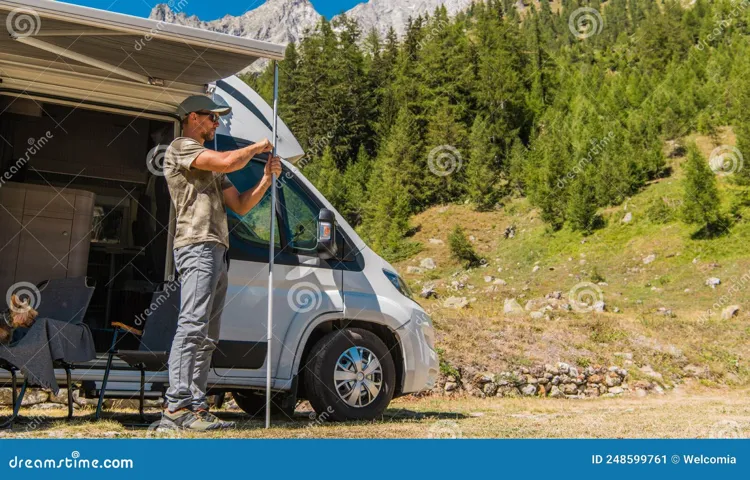
Crank the Awning in Manually (If Needed)
Retracting the awning is an important step in securing it, especially during bad weather or when you’re not using it. If your awning has an electric motor, you can easily retract it with the push of a button. However, if the motor malfunctions or the power goes out, you’ll need to retract it manually.
Don’t worry, it’s not as complicated as you think. First, make sure to detach any awning accessories like lights or curtains before proceeding. Then locate the hand crank that came with your awning.
Usually, it’s located in a small compartment at the end of the awning or in the motor housing. Insert the crank into the hook on the motor and start turning it. Keep cranking until the awning is fully retracted.
Make sure to store the crank in a safe place so you can quickly access it when needed in the future. By following these steps, you can rest easy knowing your awning is safely retracted, preventing any potential damage or accidents.
Secure the Awning
Retracting an RV awning is an important task that every RV owner needs to master. One of the first things to consider when retracting an awning is to make sure the awning is secure. This means checking that all the support arms are locked in place and that the awning is properly attached to the RV.
It’s also important to check the weather conditions before retracting the awning. If it’s windy or rainy, it’s best to wait until the weather clears up before retracting the awning. To retract the awning, you should start by releasing the tension on the awning fabric, then use the retracting mechanism to roll it up.
Once the awning is fully retracted, make sure it’s securely latched in place to prevent any movement during transit. With these simple steps, retracting an RV awning can be done safely and securely, making your road trip much more enjoyable.
Lock the Awning into Place
Locking your awning into place is an essential part of ensuring the safety and stability of your outdoor space. Nobody wants to worry about their awning flapping in the wind or suddenly collapsing while hosting a backyard gathering. To secure your awning properly, make sure to check that it is level and properly positioned before beginning.
Then, use the locking mechanism on your awning to secure it into place. This may involve twisting a knob or sliding a lever, depending on your specific awning model. Once you’ve firmly locked it into position, double-check that it is stable and won’t budge if you give it a gentle push.
By taking the time to lock your awning properly, you can enjoy your outdoor space and all it has to offer with peace of mind.
Check for Proper Alignment
Proper alignment is crucial to the security of your awning. Before installing an awning, it’s essential to make sure that you have measured and marked the placement accurately. Make sure that your awning is straight and level.
An improperly placed awning can cause water pooling, damage to the structure and mounting bracket, and uneven wear and tear. Remember to use a level and plumb line to verify your installation angles. Improper installation of your awning can cause it to sag in the center and collect rainwater, snow, or debris.
By checking for proper alignment, you will ensure that your awning is secure and will last for years to come.
Conclusion
Retracting your RV awning may seem like a daunting task, but fear not fellow travelers! With a little patience, a steady hand, and some helpful tips, you’ll be rolling up that awning like a pro in no time. Remember, practice makes perfect! So, get out there and show that awning who’s boss!”
FAQs
Why retracting an RV awning is important?
Retracting an RV awning is important to prevent damages from winds, rain, and other environmental factors.
What are the steps to retract an RV awning?
The steps to retract an RV awning are as follows:
– Make sure the area is clear from obstacles
– Lower the support arms
– Release the tension in the awning
– Roll the fabric into the barrel
– Secure the awning with straps or bungees
What tools are required to retract an RV awning?
The tools required to retract an RV awning are typically a wrench or a cordless drill to turn the support arm knobs.
How long does it take to retract an RV awning?
Retracting an RV awning typically takes around 5-10 minutes, depending on the complexity of the awning, and the user’s experience.
Can I retract an RV awning manually?
Yes, most RV awnings can be retracted manually by turning the support arm knobs.
What should I do if I can’t retract my RV awning?
If you can’t retract your RV awning, try to troubleshoot the problem or seek help from a professional RV service technician.
Is it safe to retract an RV awning in wind?
No, it is not safe to retract an RV awning in wind. You should always retract your RV awning when the weather forecast calls for high winds or storms.