
So you’ve been enjoying your time in your RV, relaxing under the shade of your awning. But now it’s time to pack up and hit the road again. The only problem is, you’re not quite sure how to retract your RV awning.
Don’t worry – we’ve got you covered. Retracting your RV awning may seem like a daunting task at first, but with a little bit of instruction, it can be a breeze. Just think of it like folding up a giant umbrella.
You’ll need to locate the awning controls, which are usually found on the exterior of your RV. These controls will allow you to retract and extend the awning with ease. Once you’ve located the controls, it’s time to get started.
First, make sure that the awning is completely dry. This will help prevent any mold or mildew from forming when you roll it up. Next, unlock the awning arms by releasing the clips or turning the knobs, depending on the type of awning you have.
Now, it’s time to retract the awning. Slowly and gently, use the controls to roll the awning back up to its original position. Make sure to keep an eye on any fabric or cords that may get caught or tangled as you roll.
If you encounter any resistance, stop and check for any obstructions before proceeding. Once the awning is fully retracted, lock the awning arms back into place to secure it for travel. Double-check that everything is locked and secure before hitting the road.
Table of Contents
Introduction
If you’re new to the world of RVing, retracting the awning might seem like a daunting task. But fear not, it’s actually quite simple once you know the steps. First, make sure all the support arms are folded up and latched securely.
Then, locate the awning wand, which is a long pole with a hook on the end. Insert the hook into the small loop on the awning and pull it towards you. As you do this, the awning will start to roll up.
Keep pulling until the awning is fully retracted and the fabric is tight against the RV. Finally, secure the awning in place with the latches or straps provided. With a bit of practice, retracting your RV awning will become second nature and you’ll be able to do it effortlessly.
So, go ahead and enjoy your camping adventures without worrying about the awning!
What is an RV awning?
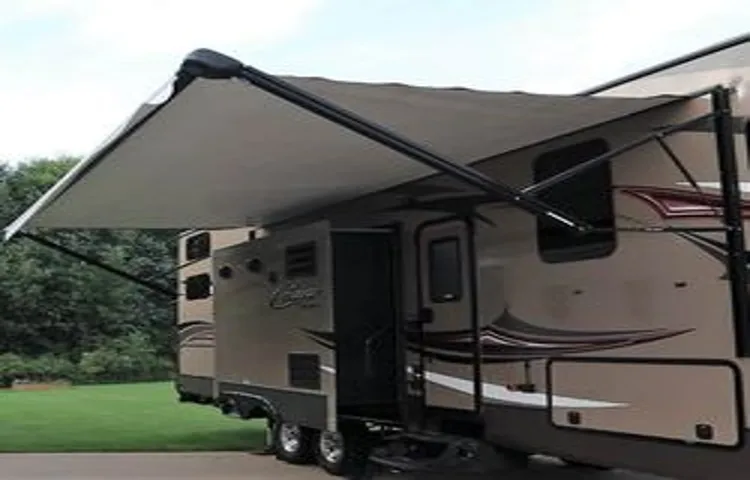
RV awnings are a fantastic addition to any recreational vehicle. They are typically made from durable materials like vinyl or acrylic, and they provide shade and protection from the elements. An RV awning is like a mini shelter that extends out from the side of your RV, creating an outdoor living space.
It can be easily rolled out when you want to enjoy the fresh air, and just as easily rolled back in when it’s time to hit the road. Think of it as a portable porch for your RV. With an RV awning, you can relax outside in the shade, shielded from the sun’s rays or inclement weather.
It’s the perfect spot to sit back and enjoy a cool drink or to gather with friends and family. Awnings come in different sizes to fit the dimensions of your RV, and some even have optional attachments like sidewalls or screens for added privacy and protection. So, if you’re looking to enhance your camping experience, an RV awning is definitely worth considering.
Why retract your RV awning?
retract RV awning, RV awning, roll up awning, retractable awning Introduction: Retracting your RV awning may not be something you think about on a daily basis, but understanding why it’s important can make a big difference in the lifespan of your awning and the overall enjoyment of your RV trips. Whether you have a roll-up awning or a retractable awning, knowing when and why to retract it can help prevent damage from unexpected weather conditions, maximize its functionality, and ensure a safer and smoother travel experience. In this article, we’ll explore the reasons why retracting your RV awning is crucial and how it can benefit you in the long run.
So, let’s dive in and uncover the importance of retracting your RV awning!
Step 1: Prepare for Retraction
So, you’re ready to retract your RV awning. Whether it’s because you’re getting ready to hit the road or you simply need to protect it from inclement weather, retracting your awning is an important step in maintaining its longevity and functionality. First, make sure you have cleared any branches or debris from the area around your awning so that it can retract smoothly.
Next, locate the awning’s control mechanism, which is usually a handle or switch located on the side of your RV. Gently twist or push the handle or flip the switch in the designated direction to retract the awning. Be sure to do this slowly and evenly, as a jerky or uneven retraction could potentially damage the awning.
Once the awning is fully retracted, double-check that it is securely fastened in place. This will prevent it from unfurling during travel or unexpected wind gusts. Taking the time to properly retract your RV awning will help to ensure that it stays in good working condition for years to come.
Check the weather conditions
weather conditions, prepare, retraction In order to fully prepare for a retraction, it’s important to check the weather conditions beforehand. After all, weather plays a crucial role in determining whether it’s safe to retract or not. Imagine if you were all set for a retraction but suddenly, the sky darkens and heavy rain starts pouring down.
It becomes impossible to follow through with the plan. That’s why checking the weather conditions is the first step before making any preparations. You don’t want to waste your time and effort, only to have it ruined by unfavorable weather.
Checking the weather forecast will give you a good idea of what to expect on the day of the retraction. Will it be sunny and clear, or will there be a chance of rain or thunderstorms? Knowing this will help you make an informed decision and take the necessary precautions to ensure a safe and successful retraction. So, make it a habit to always check the weather conditions before embarking on any retraction adventure.
Secure any loose items
When preparing for the retraction of a boat’s sails, it’s important to secure any loose items on board. This step is crucial for ensuring safety and preventing potential damage to both the boat and its contents. Loose items such as clothing, equipment, or personal belongings can become hazardous in high winds or rough seas.
Imagine how easily these items could get swept overboard or become projectiles that could injure someone or cause damage. Just like securing loose objects in a car before driving, it’s essential to stow away any loose items on a boat to ensure a smooth and hazard-free sailing experience.
Clear the area around the awning
awning, prepare for retraction, clear the area One of the first steps in preparing your awning for retraction is to clear the area around it. This may seem like a simple task, but it is an important one to ensure the safety of both the awning and those around it. Begin by removing any furniture, plants, or other objects that may be blocking the path of the awning as it retracts.
This will help to prevent any damage to the awning or the surrounding area. Additionally, clearing the area will make it easier to retract the awning smoothly and without any obstructions. So, take a few moments to clear the area around your awning before beginning the retraction process.
It’s a small step that can make a big difference in the overall functionality and lifespan of your awning.
Step 2: Release the Awning Lock
If you’re ready to pack up and hit the road after enjoying some time in your RV, retracting the awning is an essential step to take. To do this, you’ll first need to release the awning lock. The awning lock is typically located near the base of the awning arm on the outside of your RV.
It’s designed to keep the awning securely in place, so you’ll need to disengage it before retracting the awning. To release the awning lock, you may need to use a tool such as a screwdriver or an awning rod. Simply insert the tool into the locking mechanism and rotate it counterclockwise until the lock disengages.
Once the lock is released, you’ll be able to retract the awning smoothly and safely. Remember to store the awning properly to protect it during travel and prevent any damage.
Locate the awning lock
awning lock
Unlock the awning
unlock the awning Once you have safely set up your RV or camper and are ready to relax under the shade of your awning, it’s time to unlock it! The awning lock is a mechanism that keeps your awning securely in place while you are on the road. To release the awning lock, start by locating the lock lever, which is usually located near the awning roller. The lock lever will have a clear indication of “lock” and “unlock” positions.
Simply pull the lever towards the “unlock” position to release the lock. Once the lock is released, you can then begin to unfurl your awning and enjoy the shade and comfort it provides. It’s important to remember to always lock your awning when you are not using it or when you are ready to hit the road again.
This will ensure that your awning stays securely in place and doesn’t cause any damage while you are on the move. So, remember to unlock your awning lock and soak up the relaxation and enjoyment that your outdoor space provides!
Ensure the lock is fully released
awning lock, release, ensure, fully released When it’s time to open up your awning and let the sun shine in, it’s important to make sure that the lock is fully released before attempting to extend the awning. This may sound like common sense, but it’s a step that is often overlooked. The lock is there for a reason – to keep the awning securely closed when it’s not in use.
If you try to extend the awning before the lock is fully released, you could risk damaging the mechanism or even causing injury to yourself or others. So, take a few seconds to double-check that the lock is completely disengaged before moving on to the next step. It’s a simple precaution that can save you a lot of trouble in the long run.
Step 3: Retract the Awning
So you’ve had a great time relaxing under your RV awning, but now it’s time to pack up and hit the road. Retracting your RV awning can seem like a daunting task, especially if you’re new to the world of RVing. But don’t worry, I’m here to walk you through it step by step.
First, make sure all your belongings are clear of the awning and the area underneath it. You don’t want anything getting caught or damaged when you retract it. Next, locate the awning handle or switch.
This is usually found near the area where the awning is attached to your RV. If you have a manual awning, simply grab the handle and start turning it in the direction indicated by the arrow on the handle. This will retract the awning slowly and evenly.
Keep turning until the awning is fully retracted and secure against the side of your RV. If you have a motorized awning, locate the switch and press the retract button. The awning should start moving automatically and retracting into its housing.
Make sure to keep an eye on the awning as it retracts to ensure it’s moving smoothly and evenly. Once it’s fully retracted, you can release the switch. After retracting the awning, take a moment to inspect it for any damage or wear.
Look for any tears or holes in the fabric, as well as any loose or damaged components. If you notice any issues, it’s best to address them before your next camping trip. Retracting your RV awning may take a bit of practice, but once you’ve got the hang of it, it will become second nature.
Finding the retract button or handle is the next step in retracting your awning. This button or handle is typically located on the side or underside of the awning, depending on the type of awning you have. It may be labeled with an arrow or the word “retract” to help you easily identify it.
Once you locate the button or handle, simply push or pull it to retract the awning. It’s important to note that some awnings may require you to hold the button or handle down until the awning is fully retracted, while others may have a locking mechanism that keeps the awning in place once it’s retracted. Make sure to familiarize yourself with the specific instructions for your awning to ensure proper retraction.
awning retract button, retracting the awning, retract button, handle, awning, retracting process Step 3 in retracting your awning is to press the retract button or pull the handle. This step is crucial in safely and smoothly retracting your awning back into its compact position. Most awnings are equipped with either a retract button or a handle that you need to engage in order to start the retracting process.
Pressing the button or pulling the handle will activate the motor or mechanism that will slowly and steadily reel in the fabric of the awning. Make sure to hold on to the handle or keep your finger on the retract button until the awning is fully retracted to prevent any sudden movements or mishaps. This step requires a bit of strength and concentration to ensure that the awning is retracted evenly and without any issues.
So, take a deep breath, press that retract button or pull that handle, and watch as your awning smoothly rolls back up into its neat and compact position.
Monitor the awning as it retracts
retract the awning.
Step 4: Secure the Retracted Awning
When it comes to retracting your RV awning, it’s important to follow a few steps to ensure it is securely stored. First, make sure the awning is fully extended and locked into place. Next, locate the retracting mechanism, which is usually a hand crank or an electric switch.
Begin by slowly retracting the awning using the provided tool or switch. Keep a close eye on the awning as it retracts, making sure it is folding evenly and not getting stuck on any obstructions. If you encounter any resistance, stop immediately and inspect the awning for any potential issues.
Once the awning is fully retracted, secure it in place using the designated latches or straps. This will prevent it from accidentally unfurling while you’re on the road. Remember to always double-check that the awning is securely stored before driving off to ensure a safe and worry-free journey.
By following these simple steps, you can easily retract and secure your RV awning for travel.
Lock the awning in place
“Lock the awning in place” Step 4: Secure the Retracted Awning Once you have successfully retracted your awning, the next step is to lock it in place securely. This is an important step to ensure that your awning does not accidentally extend while you are traveling or during bad weather. There are a few different ways to secure your awning, depending on the type you have.
If you have a manual awning, you will typically have two options for securing it. The first is to use awning straps. These straps are typically made of strong, durable material and are designed to hold your awning tightly in place.
Simply wrap the strap around the rolled-up awning and secure it tightly. Some awnings also have a buckle system that allows you to tighten the strap even further for added security. Another option for securing a manual awning is to use a lock pin.
This is a pin that is inserted through a hole in the awning arm and into a corresponding hole in the mounting bracket. This prevents the awning from extending, even if it is accidentally bumped or jostled. Lock pins are simple to use and provide a reliable means of keeping your awning secure.
If you have an electric or motorized awning, it may come equipped with a security lock feature. This feature is typically activated using a key or remote control and works by locking the awning in place electronically. It is important to consult your awning’s user manual to determine how to engage the security lock feature, as it may vary depending on the brand and model.
In addition to securing your awning, it is also a good idea to inspect it regularly for any signs of wear or damage. This includes checking the straps or lock pins for any fraying or weakness and ensuring that the locking mechanism is functioning properly. By taking these precautions, you can enjoy the convenience and comfort of your awning while also ensuring its long-term durability and safety.
Check the awning is securely retracted
When it comes to securing your awning, one important step is to check that it is securely retracted. This means ensuring that the awning is fully closed and folded up against the side of your house or building. Why is this important? Well, an awning that is not properly retracted can be at risk of getting damaged in windy or stormy weather.
Imagine a sail on a boat that is left unfurled in a strong wind – it could easily get torn or damaged. The same principle applies to an awning that is not securely retracted. So, before leaving your home or going to bed at night, take a moment to check that your awning is properly closed and secured.
If you’re not sure how to do this, consult the manufacturer’s instructions or consider reaching out to a professional for assistance. By taking this simple step, you can help ensure the longevity and durability of your awning.
Conclusion
And there you have it, my fellow adventurers! With these simple steps, retracting your RV awning will feel like a breeze. Remember, practice makes perfect, so don’t be discouraged if it takes a few tries to get the hang of it. Just like a trusty sidekick, your RV awning is there to protect you from the elements and provide a shady oasis on your travels.
So the next time you find yourself at a campground, impress your neighbors with your awning-retracting finesse and let them marvel at your ultimate RV prowess. Happy retracting!”
Properly retracting your RV awning is essential for its longevity and your safety.
Once you have successfully retracted your RV awning, it is important to secure it properly to ensure its longevity and your safety. One of the easiest and most effective ways to do this is by utilizing awning straps or bungee cords. These straps or cords can be attached to the roller tube of the awning and then secured to the side of your RV or any nearby structure.
By doing this, you can prevent your awning from unfurling while you are on the road or in inclement weather. Additionally, securing your awning can prevent damage from wind gusts or unexpected movements of your RV. It is always better to be safe than sorry, so take the extra step to secure your retracted awning before hitting the road.
Follow these steps to retract your awning correctly and keep it in good condition.
To ensure the safety and longevity of your awning, it is essential to secure it properly once it has been retracted. Step 4 of retracting your awning includes securing it in place. This step is crucial because it prevents the awning from being damaged or blown away by strong winds.
When securing your awning, you should use the appropriate straps or fasteners provided by the manufacturer. These straps or fasteners are designed to hold the awning securely in place, even during harsh weather conditions. By securing your retracted awning correctly, you can have peace of mind knowing that it is protected and will be ready for use the next time you want to enjoy some quality time outdoors.
So, make sure not to skip this important step in the awning retraction process.
FAQs
How do I retract my RV awning?
To retract your RV awning, start by ensuring that it is fully extended and that all support arms are locked in place. Then, locate the awning crank or button and use it to slowly retract the awning. Be careful not to rush the process to avoid any damage.
Can I retract my RV awning in windy conditions?
It is generally recommended to retract your RV awning in windy conditions to prevent any potential damage. Strong winds can cause the awning to flap and potentially rip or break. It is always better to be safe and retract the awning when wind speeds exceed the manufacturer’s recommendations.
What should I do if my RV awning gets stuck while retracting?
If your RV awning gets stuck while retracting, it is important to remain calm and avoid forcing it. Check for any obstructions or debris that may be preventing the awning from retracting properly. If you cannot identify the issue, it is best to contact a professional to avoid causing further damage.
Is it necessary to lock the arms of my RV awning when retracting?
Yes, it is important to lock the arms of your RV awning when retracting to ensure its stability and prevent any accidental opening. The locking mechanism helps keep the awning securely in place while it is being retracted, reducing the risk of damage or injury.
How long does it take to retract an RV awning?
The time it takes to retract an RV awning can vary depending on the specific model and size. On average, it can take anywhere from a few minutes to around 15 minutes to fully retract an RV awning. It is important to take your time and follow the manufacturer’s instructions to avoid any issues.
Can I retract my RV awning partially?
Yes, most RV awnings allow for partial retraction. This can be useful if you want to create some shade while still maintaining visibility or if you want to protect the awning from strong winds. Check your RV awning’s manual or instructions for specific guidance on how to partially retract it.
Are there any safety precautions I should take when retracting my RV awning?
When retracting your RV awning, always be mindful of your surroundings and ensure there are no obstacles in the way. Keep a safe distance from the awning and avoid placing any body parts or objects underneath it while retracting. Additionally, make sure all occupants are clear of the awning area to prevent accidents.