
Have you ever had a pesky tire that simply won’t hold air? It’s frustrating, isn’t it? Don’t worry, you’re not alone. A common culprit of leaky tires is a poorly sealed bead. But fear not, sealing a tire bead is a simple process that can be done in just a few steps.
Essentially, the tire bead is the edge of the tire that sits snugly against the wheel rim. When this seal is compromised, it can cause a leak, resulting in a flat tire. So, to avoid being stranded on the side of the road or constantly filling up your tire with air, it’s essential to know how to properly seal a tire bead.
In this quick step-by-step guide, we’ll cover everything you need to know to get your tire back to tip-top shape, including the tools you’ll need, the steps to follow, and some tips for preventing future leaks. By the end of this guide, you’ll be a tire sealing pro – and hopefully, you’ll never have to deal with a leaky tire again! Ready to get started? Let’s dive in!
Table of Contents
What You’ll Need
When it comes to fixing a tire bead, the first thing you’ll need is a jack to lift the vehicle off the ground. Once the wheel is elevated, you can release the air from the tire and remove it from the rim using tire spoons. After inspecting the tire for any damage or leaks, clean the bead surface and the rim thoroughly.
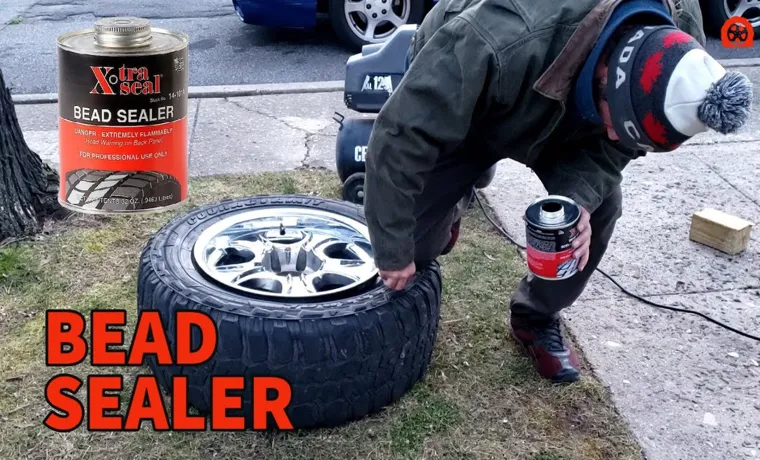
Then, apply a bead sealer to the tire and the rim to prevent any air from escaping. Once you’ve installed the tire back onto the rim and inflated it to the recommended pressure, you’ll need to check that the seal is tight and no air leaks are present. Repeat these steps for each tire that needs sealing to ensure a safe and comfortable ride.
Remember, with the right tools and a little bit of patience, sealing a tire bead can be done effectively and efficiently.
Tire Sealant
If you’re planning on using tire sealant, there are a few things you’ll need to make sure you have on hand. First and foremost, you’ll need the sealant itself – there are a variety of options available on the market, so it’s important to choose one that is right for your vehicle and the type of driving you do. You’ll also need a tire gauge to measure your tire pressure accurately, as well as a valve core removal tool to allow you to access the inside of the tire.
Finally, it’s a good idea to keep a spare tire or two on hand, just in case the sealant isn’t able to fix your tire completely. With these items at the ready, you’ll be able to use tire sealant effectively and ensure that you’re prepared for any unexpected flat tires. So, next time you’re hitting the road, make sure you have the necessary tools and equipment to keep your tires in top shape!
Compressor
When it comes to compressors, there are a few key things you’ll need to have on hand in order to use them effectively. First and foremost, you’ll need the compressor itself. There are many different types of compressors, from portable models that you can take with you on the go to larger, stationary models that are best for workshops and other industrial settings.
You’ll also need an air hose and fittings to connect the compressor to the tools or other equipment you’ll be using it with. It’s important to make sure that the fittings you choose are compatible with both the compressor and the tools you’ll be using, as not all fittings are universal. Additionally, you may want to invest in some accessories to help you get the most out of your compressor, such as pressure gauges, regulators, and lubricators.
By having all of these things on hand, you’ll be better equipped to tackle all sorts of projects with your compressor, whether it’s inflating tires or powering pneumatic tools.
Tire Pressure Gauge
One of the essential tools every driver should have in their car is a tire pressure gauge. Checking your tire pressure is crucial to ensure that you have a safe and comfortable driving experience. To use the gauge, you’ll need to park your car on a level surface and wait for the tires to cool off before testing.
You’ll also want to make sure that you have the correct tire pressure levels for your vehicle, which can be found in the owner’s manual or on the tire certification label. Once you have these details, you can firmly press the gauge onto the tire valve stem to get a reading. It’s important to check the pressure in all four tires and make necessary adjustments.
In general, it’s recommended to check your tire pressure once a month and before long drives. By keeping your tires properly inflated, you’ll extend their lifespan and have a safer driving experience.
Valve Core Tool
The Valve core tool is a must-have for anyone who likes to spend time tinkering with their bike. You’ll need several things to complete this task, including the tool itself, a valve core, and a valve stem. The tool, which looks like a small screwdriver with a pronged end, is used to remove the valve core from the valve stem.
This is a crucial step in the process because it allows you to replace the old valve core with a new one. The valve core, which is a small screw-like component, is what creates the seal between the valve and the stem. Over time, it can become worn or even damaged, which can cause air to leak out of the tire.
The valve stem, meanwhile, is what connects the tube to the rim of the wheel. To complete this task, you’ll need to unscrew the valve core with the tool, being careful not to damage the valve stem in the process. Once you’ve removed the old valve core, you can replace it with the new one, making sure that it’s securely fastened.
Finally, you’ll need to reattach the valve stem to the rim, being careful not to overtighten it. Overall, the valve core tool is a simple but essential piece of equipment for anyone who takes their cycling seriously. With just a few basic tools and a bit of know-how, you can keep your tires in top condition and ensure a smoother, more enjoyable ride.
So why not invest in a valve core tool today and enjoy the benefits for yourself?
Rubber Mallet
If you’re planning on working with wood or assembling furniture, a rubber mallet is an essential tool to have in your arsenal. Unlike a metal hammer, a rubber mallet won’t damage your workpiece, making it perfect for tasks where you need a little more force without risking any dents or scratches. To use a rubber mallet, you’ll need the mallet itself.
Look for one with a comfortable grip and a head that’s the appropriate size for the task at hand. You may also want to keep a few other tools on hand, such as a tape measure, a saw, and some sandpaper. If you’re working on larger projects, a workbench will also come in handy.
With these tools at the ready, you’ll be able to tackle woodworking projects with ease, knowing that you have everything you need to get the job done. So, invest in a quality rubber mallet today, and start crafting!
Preparing the Tire
If you’re wondering how to seal a tire bead, the first step is to prepare the tire. Before attempting to seal the bead, it’s important to inspect the tire for any visible damage or wear. If there are any cracks or punctures in the tire, it’s best to replace it before attempting to seal the bead.
Once you’ve determined that the tire is in good condition, the next step is to clean the bead area. Use a wire brush or sandpaper to remove any rust or debris from the rim, ensuring that the surface is clean and smooth. This will allow for a tighter seal between the tire and rim, reducing the risk of air leaks.
Additionally, applying a small amount of soapy water to the bead area will make it easier to slide the tire onto the rim. By properly preparing the tire before attempting to seal the bead, you can ensure a safe and effective repair that will keep you on the road without any unexpected mishaps.
Remove the Wheel
When it comes to removing a tire, the first step is to prepare it properly. Start by deflating the tire completely and removing any weights or counterbalances. Then, loosen the lug nuts on the wheel but don’t remove them just yet.
It’s important to loosen them while the tire is still on the ground to prevent the wheel from spinning. Once the lug nuts are loose, it’s time to raise the vehicle and remove the wheel completely. Be sure to use proper safety measures, such as jack stands or wheel chocks, to prevent the car from moving while you work on it.
By taking your time and properly preparing the tire, you’ll make the process of removing it much smoother and less frustrating.
Clean the Bead Area
When preparing a tire, one of the crucial steps is to clean the bead area. The bead area is the part of the tire that makes contact with the rim of the wheel. It’s essential to prepare this area properly to ensure a secure fit between the tire and the wheel.
To clean the bead area, you’ll need a wire brush or sandpaper. Start by removing any dirt, debris, or rust from the bead area using the wire brush. You can also use sandpaper to smooth out any rough spots.
If the bead area is particularly dirty or greasy, you may need to use a degreaser to clean it thoroughly. Make sure to dry the bead area completely before installing the tire. A clean and dry bead area will help prevent any leaks and ensure a better seal between the tire and the wheel.
By taking this simple and easy step of cleaning the bead area, you can ensure a safe and smooth ride. So, don’t forget to prepare your tire correctly by cleaning the bead area before installing it.
Deflate the Tire
Deflating the tire is a crucial step in preparing your vehicle for a safe and smooth drive. Whether you’re changing a flat tire or simply adjusting the pressure, it’s important to know how to deflate the tire properly. First, locate the valve stem on the tire and remove the cap.
Then, use a tire pressure gauge to check the current pressure of the tire. Once you’re ready to deflate, press the valve stem down with the end of your pressure gauge and wait for the hissing sound to subside. This indicates that all the air has been released from the tire.
It’s essential to only deflate the tire to the recommended pressure designated by the manufacturer to ensure safe driving conditions. Always remember to keep a close eye on the tire pressure and check it routinely to prevent any mishaps on the road.
Applying the Sealant
If you’re wondering how to seal a tire bead, it’s important to note that it’s a relatively straightforward process that can save you from having to take your vehicle to a professional mechanic. The first thing you’ll need to do is thoroughly clean the area around the bead. This will ensure that the sealant has a clean and dry surface to adhere to.
Next, apply the sealant to the bead area and massage it in with a tire brush. Be sure to spread the sealant evenly around the entire bead. Once you’ve applied the sealant, let it sit for a few minutes to dry before inflating the tire back to the recommended pressure.
It’s important to note that not all sealants are created equal, so be sure to choose a high-quality one that will stand up to high temperatures and other environmental stressors. By following these steps, you’ll be well on your way to ensuring that your tire bead stays sealed, keeping you safe on the road.
Shake the Sealant
When it comes to applying sealant, one of the essential steps is shaking it thoroughly. The reason behind this is to ensure that the sealant is well-mixed so that it can work effectively. If the sealant has been sitting for a while, it’s likely that it has separated into its components.
Shaking the tube or container will help mix all the components evenly so that you can apply the sealant uniformly. Be sure to shake the sealant for at least a minute to ensure that everything is properly mixed. However, do not shake too vigorously as this could cause air bubbles to form.
These air bubbles will create gaps and weaken the sealant’s effectiveness. Shaking is a simple but crucial step that can make all the difference in achieving a proper seal. So, make sure you shake well before you start applying.
Apply the Sealant to the Bead Area
To ensure your bead area is sealed tightly, it’s important to apply the correct amount of sealant. Applying too little can result in leaks, while applying too much can create an unsightly mess. Start by wiping down the bead area to remove any dust or debris that could prevent the sealant from adhering properly.
Then, using a sealant gun, carefully apply the sealant in a steady, consistent line. Be sure to cover the entire bead area, as any gaps could lead to leaks. Keep a damp rag nearby to quickly clean up any excess sealant before it dries.
Once the sealant has been applied, allow it to dry completely before testing for leaks. By taking the time to apply the sealant correctly, you can ensure a tight, leak-free seal that will keep your project intact for years to come.
Reinstall the Valve Core
After adding the sealant to your tire, it’s time to reinstall the valve core. This small but crucial component is responsible for controlling the airflow in and out of your tire. Firstly, ensure that the sealant has been evenly distributed within the tire, preventing air from escaping.
Then, use a valve core remover tool to insert the valve core back into the valve stem. Make sure it’s screwed in tightly to prevent any leaks. It’s important to note that excess sealant may seep out during this process, but don’t worry, it won’t damage your tire or affect its performance.
By reinstalling the valve core, you’re securing the sealant and ensuring that your tire remains properly inflated.
Seating the Bead
Seating the bead is an essential step in tire maintenance to ensure safety and optimum performance. When changing a tire, you need to make sure that the bead properly sits onto the rim. Otherwise, the tire pressure won’t hold, resulting in vibrations, loss of control, and even accidents.
To seal a tire bead, you need to lubricate the rim and the tire’s inner edges with soapy water or a specialized tire lubricant. Then, position the tire onto the rim, align the valve stem, and inflate the tire gradually. As you inflate, listen to a popping sound, which indicates that the bead has seated evenly around the rim.
Then, check the pressure with a gauge, and adjust it according to the manufacturer’s recommendations. Remember to recheck the tire’s pressure regularly to avoid underinflation or overinflation, which can affect the tire’s lifespan and fuel economy. By following these simple steps, you can safely seal your tire bead and enjoy a smooth ride.
Attach the Compressor Hose
When it comes to seating the bead, attaching the compressor hose is an essential step. But before you do that, make sure the tire is properly positioned on the wheel. You want to make sure that both beads are in the drop-center of the rim and that the valve stem is facing outwards.
Once you’ve done that, attach the chuck of the compressor hose to the valve stem. You should hear a hissing sound as air is released from the tire. Keep a close eye on the pressure gauge and make sure you don’t overinflate the tire.
Slowly increase the pressure until the bead pops into place. This can be a tricky step, so don’t hesitate to ask for help if needed. Remember, safety is the top priority when dealing with compressed air, so make sure you wear protective gear and keep a safe distance from the tire as it inflates.
By following these steps, you’ll be able to successfully seat the bead and get back on the road in no time.
Inflate the Tire
When it comes to inflating a tire, the crucial step is seating the bead. This means that the tire bead, the inner edge of the tire, needs to be firmly seated against the rim of the wheel. Without a properly seated bead, the tire won’t hold air pressure and you won’t be able to use your vehicle.
To seat the bead, start by lubricating the tire bead and rim with soapy water or tire lubricant. Then, attach the valve stem and inflate the tire until it is a few pounds below the recommended pressure. Using a safety cage or strap, press down on the tire sidewalls to force the bead into place against the rim.
Listen for two distinct “pops” as the bead seats in place. Finally, inflate the tire to the recommended pressure and check the bead visually to ensure it’s properly seated. The key to successfully seating a tire bead is patience and attention to detail.
Take your time and be sure to use the appropriate safety equipment to prevent injury.
Listen for the Bead to Seat
If you’re trying to seat the bead of a tire properly, listening for the sound of the bead seating is crucial. The bead is the edge of the tire that holds it in place on the rim, and if it doesn’t seat properly, you could end up with an unsafe situation. So, what should you listen for? When you inflate the tire, pay close attention to the sound of the bead “popping” into place.
You should hear a distinct “pop” sound when the bead seats properly against the rim. It’s important not to over-inflate the tire to try and force the bead to seat, as this can lead to a dangerous blowout. Instead, use a tire pressure gauge to check the pressure and make sure it’s at the recommended level for your tire.
In summary, seating the bead of a tire is a delicate process that requires patience and attention to detail. Listening for the bead to seat is one of the most important things you can do to ensure a safe and secure tire. With the right tools and technique, you can seat the bead properly and get back on the road with confidence.
Check Tire Pressure
Seating the bead is an essential part of checking your tire pressure. If your tire bead is not properly seated, you may not be able to accurately measure your tire pressure and ultimately end up with a flat tire. To seat the bead, simply remove your tire valve caps and use a tire gauge to check the air pressure.
If the pressure is too low, inflate the tire until the bead pops into place. Be careful not to over-inflate as this can cause damage to your tire. Once you have seated the bead, check the pressure again to ensure it is at the recommended level.
Remember, regularly checking your tire pressure and seating the bead will not only keep you safe on the road, but also improve your car’s fuel efficiency.
Remount the Tire and Wheel Assembly
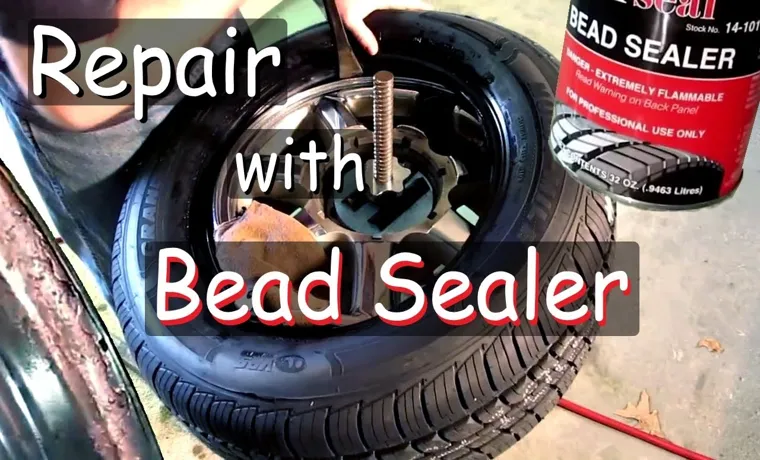
If you’re wondering how to seal a tire bead, the first step is to remount the tire and wheel assembly. Before doing so, it’s important to clean the tire bead area with a wire brush, removing any rust or debris that could prevent a secure seal. Once the area is clean, apply a bead sealer to the tire bead and inside of the wheel rim.
This can help to fill in any gaps or imperfections and provide a tight seal. Next, carefully mount the tire and wheel assembly, making sure to align the valve stem with the valve hole in the rim. Inflate the tire to the recommended pressure and, if necessary, adjust the balance of the tire with weights.
With the proper application of a bead sealer and proper mounting techniques, you can ensure a secure and long-lasting tire seal. Remember, regular maintenance and inspections of your tires can help to prevent any issues from occurring in the first place, keeping you safe on the road.
Tighten the Lug Nuts
When you’ve finished changing a tire, your next step is to remount the tire and wheel assembly. To do this, carefully line up the wheel studs with the holes in the rim and slide the wheel onto the studs. Make sure it’s centered properly before you hand-tighten the lug nuts.
Don’t tighten them all the way just yet! You want to make sure that the wheel is positioned correctly before bringing out the torque wrench. Once you’re certain the wheel is correctly positioned, grab your torque wrench and tighten the lug nuts in a criss-cross pattern. Start with one nut, then move to the one opposite and continue the pattern until all the nuts have been torqued.
Be sure to follow the recommended torque specs for your specific vehicle, as over- or under-tightening the lug nuts can lead to safety risks. Once you’ve torqued all the nuts, verify their tightness by rechecking them with the torque wrench. In conclusion, remounting a tire and wheel assembly requires precision and care.
Make sure the wheel is centered properly and hand-tighten the lug nuts before using a torque wrench to fully tighten them in a criss-cross pattern. By taking the time to properly mount the wheel, you can ensure your safety while driving on the road.
Check Tire Pressure Again
When it comes to tire maintenance, checking the tire pressure is crucial for optimal vehicle performance and safety. After mounting the tire and wheel assembly, it’s essential to recheck the tire pressure to ensure that everything is properly balanced. When tires are underinflated, it can lead to inefficient fuel consumption, decreased stability, and even blowouts in severe cases.
On the other hand, overinflated tires can negatively affect ride comfort and increase the risk of hydroplaning on wet roads. By checking tire pressure regularly, you can avoid these issues and prolong the lifespan of your tires. So, make sure to remount the tire and wheel assembly correctly and always double-check the tire pressure before driving off.
It’s a simple but important step that can make a significant difference in your overall driving experience.
In Conclusion
Sealing a tire bead may seem like a daunting task, but with the right tools and technique, it can be as easy as pie (or tire pie, if you will). Remember to always clean the bead and lubricate it with a good tire mounting paste, apply even pressure, and inflate the tire to the recommended pressure. And voila! Your tire will be as snug as a bug in a rug, or as snug as a tire on a rim.
Happy sealing, folks!”
FAQs
What is a tire bead and why is it important for sealing?
The tire bead is an inner edge of the tire that forms a tight seal with the rim. It is important for sealing to prevent air from escaping and to maintain proper tire pressure.
How do I know if my tire bead is damaged or leaking air?
If you notice your tire losing air consistently, it may be a sign of a damaged or leaking tire bead. You can inspect the tire and rim area for any visible damage or contact a professional to perform a more thorough inspection.
Can a damaged tire bead be repaired or does it need to be replaced?
It depends on the extent of the damage. Minor damage may be able to be repaired using a tire sealant, while more severe damage may require a complete replacement of the tire.
Should I attempt to seal a tire bead myself or seek professional help?
It is recommended to seek professional help for sealing a tire bead, as it requires special tools and expertise. Attempting to do it yourself may lead to further damage or incorrect sealing.
What is the process of sealing a tire bead?
The process of sealing a tire bead involves removing the tire from the rim, cleaning the area thoroughly, applying a sealant or lubricant to the bead, and reseating the tire onto the rim using special tools to ensure proper sealing.