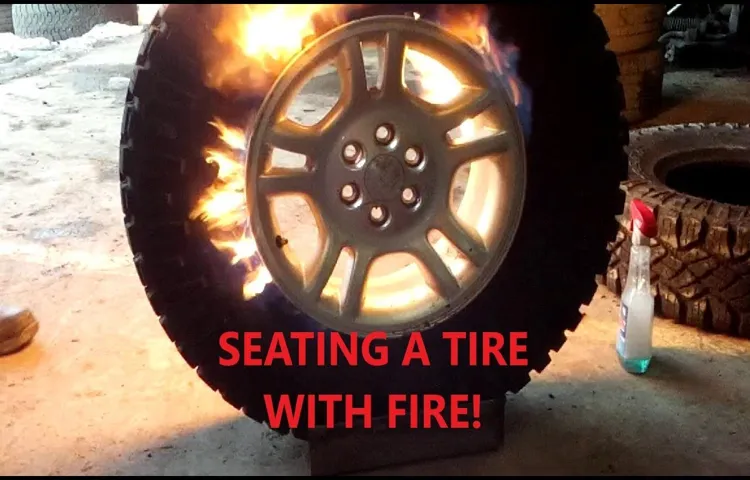
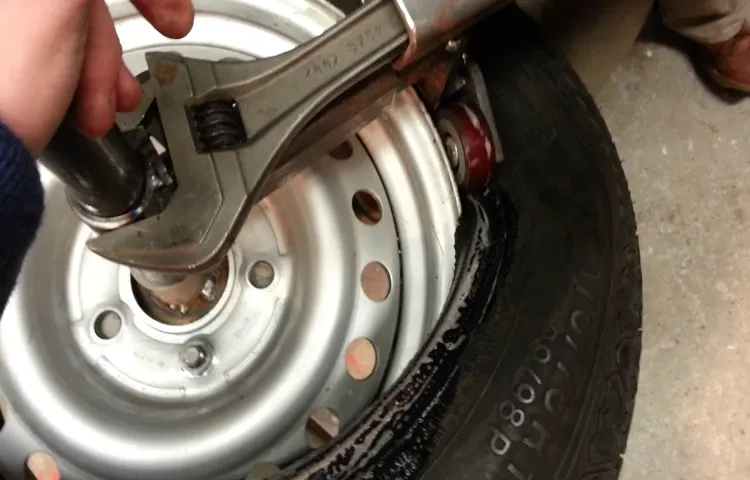
Do you have a flat tire and need to replace it with a new one? Or have you recently purchased a new tire that needs to be mounted on your rim? Either way, seating a tire on a rim can be a daunting task, even for experienced mechanics. But don’t worry, we’ve got you covered with this step-by-step guide on how to seat a tire on a rim. First, it’s essential to have the right equipment, including a tire iron, a valve stem, and a new tire.
Once you have all of the necessary tools, remove the old tire from the rim using the tire iron and place the new tire on the rim, starting at the valve stem. After placing the tire on the rim, use your hands to push the bead of the tire down into the rim’s groove. Make sure it is evenly spaced around the circumference of the rim.
Then, use a tire iron to push the tire bead over the rim flange. Next, inflate the tire slightly, so it is easier to manipulate. Then, use a tire iron to work your way around the rim’s circumference, pushing the tire bead over the flange until it is fully seated on the rim.
Be sure to keep an eye on the tire’s sidewalls to ensure they don’t get damaged in the process. Once the tire is seated on the rim, fill it with air, and ensure that it is seated evenly on the rim. Check the tire pressure and adjust it as needed, and you’re good to go! Seating a tire on a rim may seem challenging, but with the right tools and proper technique, it’s a task that anyone can accomplish.
So next time you need to seat a tire on a rim, follow these steps, and you’ll have your car back on the road in no time.
Table of Contents
Preparation
Seat a tire on a rim can be a challenging task, and preparation is key. Before getting started, ensure that you have all the necessary tools, including a tire lever or two, lubricant, a valve stem, and a properly sized tire. Begin by cleaning both the rim and tire bead thoroughly to remove any dirt or debris.
It is essential to take extra care when working with tubeless tires, so make sure to inspect the bead for any damage or defects. Applying some lubricant to the bead and rim can help make the process easier. Carefully mount the tire onto the rim, gently pushing down on the bead and using the tire lever to hook the edge over the rim.
Once the first side is complete, add the valve stem and insert the tube if necessary. Finally, work on seating the other side of the tire onto the rim, being cautious not to pinch the tube with the tire lever. With these steps followed, the tire should be seated properly, ready to be inflated to the correct pressure.
Gather the necessary tools and equipment
When it comes to any project, preparation is key. The same goes for gathering the necessary tools and equipment. To avoid delays or mishaps during the project, make sure you have everything you need before you start.
Start by listing all the required tools and equipment you need to complete the task. Check each item off the list as you collect them. This process ensures that you don’t forget any important tools or equipment.
Don’t be afraid to invest in good quality tools and equipment as they can make all the difference in the end result of the project. Keep in mind that good quality doesn’t always mean expensive. You can find quality tools and equipment at an affordable price.
To sum it up, proper preparation before starting a project is crucial. Gather the necessary tools and equipment beforehand to ensure the success of your project.

Clean the rim and tire to remove any dirt or debris
Preparation is key when it comes to cleaning the rims and tires of your vehicle. Before you begin, it’s important to have the right cleaning tools and materials on hand. Start by gathering a bucket of warm water, a mild soap, a scrub brush, and a hose.
Once you have your materials ready, take a moment to inspect the rims and tires for any dirt or debris that may be stuck on. Use a stiff-bristled brush to loosen any stubborn dirt and debris, paying close attention to the crevices of the rims. After you’re satisfied that you’ve removed any loose debris, it’s time to begin the cleaning process.
Using your mild soap and scrub brush, gently clean the rims and tires, being careful not to scratch or damage them in the process. Pay close attention to the areas around the valve stem as dirt can accumulate here, causing damage in the future. Rinse the rims and tires thoroughly with a hose and dry them with a clean cloth or towel.
By taking the time to properly prepare and clean your rims and tires, you’re not only helping to maintain their lifespan but also improving the overall appearance of your vehicle.
Mount the Tire on the Rim
When it comes to mounting a tire on a rim, there are a few important steps to follow to ensure a safe and successful outcome. First, make sure the tire is properly aligned with the rim by matching the labeled “bead” of the tire with the corresponding valve hole on the rim. From there, use a tire lever or specialized tool to work the tire onto the rim, being sure to spread the tire evenly around the circumference of the rim.
Once the tire is in place, inflate it gradually and inspect the seating process closely, looking for any bulges or uneven spots. It’s also a good idea to use soapy water or a specialized bead sealant to assist in the process, as this can help lubricate the tire and make it easier to mount successfully. With a little patience and attention to detail, you’ll be able to seat a tire on a rim like a pro in no time.
Step 1: Align the tire with the rim
When it comes to mounting a tire on a rim, the first step is to align the tire with the rim. This may seem like a simple task, but it’s actually an important one. The proper alignment ensures that the tire will fit properly onto the rim, which is key for safety and performance.
To begin, place the tire onto the rim and ensure that the bead is seated properly. Then, adjust the tire so that it’s perfectly in line with the rim. It may take some trial and error to get it just right, but the end result will be worth it.
Remember that proper alignment is essential for the tire to function properly, so take your time and get it right. With this step complete, you’re ready to move on to the next step in the tire mounting process.
Step 2: Apply lubricant to the bead of the tire
Mounting a tire on a rim can seem daunting, but with the right technique and tools, it’s a straightforward process. Once you’ve cleaned the rim and positioned the tire with the valve stem aligned, it’s time to apply lubricant to the bead of the tire. This step is essential as it reduces friction and helps the tire slide smoothly onto the rim.
You can use any lubricant designed for tires, but it’s best to avoid oils or grease as they can damage the rubber. Apply a generous amount of lubricant to the bead of the tire, spreading it evenly around the circumference. You can use your fingers or a brush to ensure the lubricant is evenly distributed.
Once the bead is lubricated, you can proceed with pressing the tire onto the rim, using the tire irons to lever the bead over the edge. With the right amount of lubrication, the process should be smoother and more manageable, allowing you to achieve a tight fit without damaging the tire or the rim.
Step 3: Push the tire onto the rim starting at the valve stem
When it comes to mounting a tire on a rim, there are a few key steps you’ll need to follow. The third step is to push the tire onto the rim, starting at the valve stem. This is where things can get a bit tricky, so it’s important to take your time and do it carefully.
First, make sure the tire is properly aligned with the rim. You can do this by positioning the tire so that the valve stem lines up with the valve hole on the rim. Then, start at the valve stem and use your hands to gradually work the tire onto the rim.
Be sure to apply even pressure all the way around the tire, making sure it’s fully seated on the rim. Once the tire is in place, you can move on to the next step. Remember, this process requires some elbow grease- you may have to use a bit of force to get the tire onto the rim, but don’t overdo it.
With patience and careful attention, you’ll have your tire mounted on the rim in no time!
Step 4: Use tire levers to pull the remaining bead onto the rim
To mount a tire on a rim, you’ll need to use tire levers. First, you need to ensure that the tire is correctly seated in the rim’s center channel. Next, position one tire lever between the tire bead and the rim and use it to pry the bead up until the rest can be moved with your hands.
Then position another lever about four inches (10 cm) away from the first and repeat the process. Continue this process until the entire bead is free. Once the first bead is free, flip the tire over to tackle the other side.
Start by inserting one lever between the tire bead and the rim and then spoon the bead onto the rim until it is fitted. Now, position the second lever a few inches away from the first and push the bead on the rim. Repeat this action until the bead is mounted securely.
Remember, the tire bead should sit entirely inside the rim without any bulges or creases. Check the tire around the rim on both sides to ensure there are no areas where the tire is not mounted correctly. If everything looks good, inflate the tire to the recommended pressure level.
Congratulations, you’ve mounted the tire on the rim, and you are ready to roll.
Inflate the Tire and Seat the Beads
Seating a tire on a rim can be a challenge, but it’s not impossible. The first step is to inflate the tire to the recommended pressure. This makes the tire more pliable and easier to work with.
Then, apply lubricant to the inside of the tire bead and the rim. This helps the tire bead slide into place and reduces the risk of damage. Next, place the tire onto the rim.
Start at the valve stem and work your way around in both directions, pushing the tire bead over the rim edge. Be sure to keep the tire centered as you go. Once the tire is in place, it’s time to seat the beads.
This is usually done with an air compressor. With the valve core removed, apply a large burst of air to the tire. This should pop the beads into place against the rim.
Check to see if the tire is evenly seated all the way around. If not, deflate the tire and adjust it as needed before re-inflating. Remember that seating the tire on the rim can be dangerous if not done correctly.
Be sure to follow all safety precautions, such as wearing eye protection and standing to the side of the tire during inflation. With patience and careful attention to detail, you’ll have the tire seated securely in no time.
Step 1: Inflate the tire to about 40 psi
If you’ve ever had the frustrating experience of a flat tire, you know that the first step in fixing it is inflating the tire back to its proper pressure. However, when dealing with tubeless tires, it’s not just a matter of pumping up the tire and being done with it. In order to properly seat the beads of the tire, you need to inflate it beyond its normal pressure.
The recommended pressure for seating the beads is around 40 psi, but it’s important to check your specific tire manufacturer’s guidelines for the maximum inflation pressure. Once you’ve inflated the tire to the correct pressure, you will need to use some elbow grease to get the beads to seat properly. This can be done by bouncing the tire off the ground or using a tire inflator with a burst valve.
Seating the beads can take a fair amount of effort, but it’s a crucial step in getting your tubeless tire ready for the road ahead.
Step 2: Listen for the popping sound as the beads seat
Inflating a tire is not as simple as it may seem. It’s important to pay attention to the details in order to ensure a safe and smooth ride. Once you’ve added the appropriate amount of air to the tire, it’s time to seat the beads.
To do this, listen carefully for the popping sound that indicates the beads have properly settled into place. This can take a bit of patience and focus, but it’s essential for preventing dangerous blowouts and keeping your ride smooth and comfortable. By inflating the tire and seating the beads correctly, you can be sure that your vehicle is ready for whatever the road may bring.
So next time you fill up your tires, don’t forget to take these crucial steps to keep yourself and your passengers safe on the road.
Step 3: Check the tire pressure and adjust as necessary
When it comes to checking tire pressure, it’s essential to ensure that your tires are inflated to the right level. It not only ensures a smoother ride but also improves fuel economy and extends the life of your tires. But before you check the tire pressure, it’s crucial to inflate the tire and seat the beads correctly.
You can do so by placing the tire on the rim and adding air until the tire starts to take shape. Then, you can adjust the tire’s position by hitting it with a rubber mallet until it sits snugly on the rim. Once you’ve seated the beads, you can adjust the tire pressure according to the vehicle’s manufacturer recommendations.
Overinflating or underinflating the tires can lead to poor handling, uneven wear, and even blowouts at high speeds. So, make sure to use a reliable tire pressure gauge and inflate the tire to the recommended level. It’s better to check your tire pressure regularly and adjust it as necessary rather than waiting for the tire to lose air pressure and affect your driving experience.
By taking this step, you’ll ensure a safer and more comfortable ride for you and your passengers.
Final Touches
Seating a tire on a rim can be a challenging and frustrating task, but with the right techniques, it can be done with ease. One of the most important steps is to make sure that the tire is properly lubricated to prevent any damage to the rubber. A tire mounting lubricant can be used to make the process smoother.
Additionally, it’s essential to make sure that the tire is properly aligned with the rim before inflating it. This can be done by placing the tire onto the rim and gradually working it onto the bead. Using a tire iron can help in this process.
It’s also important to inflate the tire to the recommended pressure and check for any leaks or abnormalities before hitting the road. By following these steps, you can confidently seat your tire on a rim and ensure a safe and smooth ride.
Step 1: Clean the tire and rim to remove any lubricant or debris
When it comes to giving your tires and rims that final touch of cleanliness, it’s important to start with a clean slate. This means removing any debris or leftover lubricant that may be clinging to your tire or rim. One way to do this is to use a degreaser on the rim to break down any grease or built-up grime.
After that, a simple soap and water solution can effectively cleanse both the tire and the rim. If you’re dealing with particularly stubborn stains or debris, a specialized tire cleaner can be used to get rid of even the toughest grime. By taking the time to thoroughly clean your tire and rim, you’ll be setting the stage for a truly polished final result.
So don’t be afraid to give your wheels the attention they deserve!
Step 2: Install the valve stem and cap
After successfully attaching the tire to the rim, it’s time to install the valve stem and cap. The valve stem is responsible for allowing air to enter and exit the tire, making it a crucial component. First, take the valve stem and insert it into the small hole in the rim’s valve stem hole.
Using a wrench, tighten the valve stem’s nut to ensure it’s secure. Next, attach the valve cap, which helps to prevent any debris from entering the valve stem and causing damage. Ensure the cap is tight enough to prevent air leaks, but not so tight that it’s difficult to remove when needed.
It’s as simple as that – with the valve stem and cap in place, the repair job is complete! Don’t forget to double-check that the tire is inflated to the correct pressure before heading out on the road.
Step 3: Test the tire for leaks and make any necessary repairs
Now that you have repaired your tire, it’s time to test it for leaks before hitting the road. The last thing you want is to find yourself stranded with a flat tire in the middle of nowhere. To test for leaks, fill the tire with air and apply a solution of soapy water to the surface of the tire.
Check carefully for any bubbles, indicating a leak. If you find any, mark the spot and remove the tire from the wheel. Use a tire repair kit or take it to a professional to make the necessary repairs.
Once you’ve fixed the leak, fill the tire again and check for any additional leaks. Repeat this process until you’re confident there are no leaks, and the tire is safe to drive on. It’s important to note that if the tire has been repaired multiple times or is severely damaged, it may not be safe to use, and it’s best to replace it.
Always prioritize safety over convenience when it comes to your vehicle.
Conclusion
In conclusion, seating a tire on a rim may seem like rocket science, but with the right tools and a bit of elbow grease, anyone can do it. It’s all about finding that sweet spot where the tire and rim meet and coaxing them to interlock in perfect harmony. Just remember to take your time, stay focused, and don’t be afraid to give those tires a little love tap! After all, a well-seated tire means a smooth ride, and who doesn’t love that?”
FAQs
What tools do I need to seat a tire on a rim?
You need a tire mounting machine, a bead seater, and valve stem tools to seat a tire on a rim.
How much air pressure do I need to seat a tire on a rim?
Generally, you need around 40 to 60 psi of air pressure to seat a tire on a rim. However, the required pressure may vary depending on the type of tire and rim.
Can I seat a tire on a rim manually?
It is possible to seat a tire on a rim manually, but it may require a lot of effort and may not be safe. It’s best to use specialized tools and equipment to seat a tire on a rim.
Why won’t my tire seat on the rim?
There could be several reasons why your tire won’t seat on the rim, including improper lubrication, damaged or worn parts, or incorrect alignment of the tire and rim.
How do I know if my tire has been properly seated on the rim?
You can check if your tire has been properly seated on the rim by inspecting the tire’s bead. The bead should be evenly seated all the way around the rim.
Can I reuse a tire that previously failed to seat on a rim?
It’s generally not recommended to reuse a tire that previously failed to seat on a rim. The tire may have sustained damage during the previous seating attempt, which can lead to dangerous tire failure.
How often do I need to seat my tires on the rim?
You typically only need to seat your tires on the rim when mounting new tires or replacing damaged ones. It’s not necessary to do this regularly as part of your vehicle’s maintenance.


