
Do you want to learn how to seat a tubeless tire? Whether you’re a seasoned cyclist or a newbie, knowing how to seat a tubeless tire is crucial for a safe and efficient ride. Tubeless tires have become increasingly popular amongst the biking community due to their puncture resistance and lower rolling resistance. However, seating a tubeless tire can be challenging and intimidating at first.
But don’t worry, we’ve got you covered. In this blog, we will guide you step-by-step on how to seat a tubeless tire so that you can confidently hit the trails without any worries. So, fasten your helmet, grab your tools, and let’s get started!
Table of Contents
Introduction
If you’re new to tubeless tires, seating them properly can be a bit of a challenge. There are a few different methods you can try, but one of the simplest is to use an air compressor. Start by removing the valve core from the tubeless valve stem, and then inflate the tire until the beads are seated on the rim.
If this doesn’t work, try adding a bit of sealant to help lubricate the bead and make it easier to seat. Another option is to use a tube to help seat the tire, but this can be a bit messier and more time-consuming. No matter which method you choose, be patient and keep trying until the tire is properly seated.
With a little practice, you’ll be able to seat tubeless tires like a pro!
What is Tubeless Tire?
Tubeless tire is a type of tire that has become increasingly popular in recent years. Unlike traditional tires that require a tube to hold air, tubeless tires do not require any inner tubes. Instead, the air is held inside the tire itself, preventing punctures from affecting the tire’s air pressure.
This is because tubeless tires come equipped with a special bead that locks onto the rim, effectively sealing the tire. The advantages of this design are numerous, including reduced risk of flats, better cornering and handling, and increased comfort due to the ability to run lower tire pressures. Furthermore, tubeless tires also tend to be lighter, which can translate to better performance and efficiency on the road.
Overall, tubeless tires have become the go-to choice for many cyclists, thanks to their superior performance, durability, and convenience.

Types of Tubeless Tires
Tubeless tires are an innovation in the world of tires that have been gaining steady popularity in recent years. These tires are designed differently from their traditional counterparts and have several advantages over them. Tubeless tires do not require an inner tube to keep the tire inflated, and instead, the inner lining of the tire holds the air.
This makes the tire puncture-resistant and significantly reduces the chances of a flat tire. There are various types of tubeless tires available in the market, each with its unique features and benefits. The most common types of tubeless tires are road tubeless, mountain tubeless, and gravel tubeless.
Road tubeless tires are designed for high-performance road bikes, providing lower rolling resistance and higher speeds. Mountain tubeless tires come with increased grip and traction, making them suitable for off-road terrain, while gravel tubeless tires are designed for mixed terrain, including pavement, dirt, and gravel. Overall, tubeless tires are a reliable and practical alternative to traditional tires that every cyclist should consider.
Preparation
When it comes to seating a tubeless tire, preparation is key. First, make sure you have all the necessary tools and equipment, such as tire levers, a floor pump, sealant, and a valve core remover. Next, clean the rim and tire bead thoroughly to ensure proper sealing.
It’s also important to inspect the tire for any visible damage, such as cuts or punctures. Before inserting the valve stem, apply a small amount of sealant to the inside of the tire bead. When inflating the tire, use a rapid burst of air to seat the bead, then add more air as needed.
Keep in mind that seating a tubeless tire can take several tries, so don’t get discouraged if it doesn’t work on the first attempt. Overall, taking the time to properly prepare for seating a tubeless tire can save you time and frustration in the long run.
Tools and Materials
Tools and materials are essential for any preparation, ensuring efficiency and smooth execution. Depending on the task or project, the required tools and materials vary, but having a basic set of tools is a must for any DIY enthusiast. A hammer, screwdriver, pliers, level, and tape measure are some of the essential tools in a DIY toolkit.
When it comes to materials, it is best to have a well-stocked inventory, so you don’t have to run to the store every time you need something. Some of the must-have materials include screws, nails, nuts, bolts, adhesives, tapes, sandpaper, and paint. A well-prepared DIYer will also ensure they have the right safety equipment such as gloves, glasses, and masks.
Overall, having the necessary tools and materials beforehand is crucial for any successful DIY project.
Removing the Old Tire
Before removing the old tire, it is crucial to prepare yourself and your vehicle. Start by parking your car on a flat surface and turning off the engine. Engage the parking brake and loosen the lug nuts with a lug wrench, but don’t take them off just yet.
Next, position the jack in the designated area, which is usually next to the damaged tire, and raise your car slowly using a hydraulic jack. Once your vehicle is lifted, remove the lug nuts and take the old tire off carefully. It’s essential to exercise caution when removing the tire, especially if it’s damaged, as it may be hot or under pressure.
Place the old tire aside and take a moment to inspect your vehicle’s brake components to make sure that they’re in good working condition before installing the new tire. Proper preparation will help you remove the old tire with ease and keep you safe while doing it.
Cleaning the Rim
Cleaning the rim of a toilet bowl may seem like a daunting task, but with the right preparation, it can be an easy and effective job. The first step is to gather all of the necessary cleaning supplies, including gloves, a toilet brush, a disinfectant cleaner, and a bucket filled with hot water. It’s important to wear gloves to protect your hands from germs and bacteria.
Next, lift the lid of the toilet and spray the disinfectant cleaner around the rim and under the seat. Allow the cleaner to sit for a few minutes before using the toilet brush to scrub the inside of the rim and the area around the water jets. After scrubbing, flush the toilet to rinse away the cleaning solution and use a clean cloth or paper towel to wipe down the outside of the toilet bowl.
Finally, dip the toilet brush in the bucket of hot water and use it to clean around the rim one more time to ensure that all germs and bacteria are eliminated. With these simple steps for preparation, you can easily and effectively clean the rim of your toilet bowl to maintain a clean and hygienic bathroom. Remember to repeat this cleaning process on a regular basis to keep your toilet bowl looking and smelling clean.
Mounting the Tire
Seating a tubeless tire can be a tricky task, but with the right technique it can be done fairly easily. First, make sure the tire is the correct size and style for your wheel. Then, clean the rim thoroughly and inspect it for any damage or sharp edges that could puncture the tire.
Next, inflate the tire to a moderate pressure to help it seat properly on the rim. Use a tire lever to push the tire bead into the rim, starting at the valve stem and working your way around the tire. This will help create a seal between the tire and the rim.
Once you’ve installed the tire, deflate it slightly and apply a bead-sealing liquid around both sides of the tire. Re-inflate the tire and listen for the distinct popping sound as the tire seats itself on the rim. Continue inflating the tire until it reaches the recommended pressure, and you’re good to go! Remember to take precautions when handling the tire and always wear protective eyewear.
Seating a tubeless tire may take some practice, but with a little patience and perseverance, you’ll be able to do it like a pro.
Lubricating the Beads
When it comes to mounting a tire, lubricating the beads is an essential step in the process. The beads are the parts of the tire that sit on the rim and create a seal, which keeps the tire properly inflated. Applying a small amount of lubricant to the beads can make all the difference in getting the tire onto the rim smoothly and evenly.
Not only does it make the process easier, but it also reduces the risk of damaging the tire or the rim during installation. However, it’s important to use a lubricant that is specifically designed for tires and rims, as using the wrong type of lubricant can be detrimental. Overall, taking the extra time to lubricate the beads before mounting the tire can ensure the longevity and proper functionality of the tire in the long run.
Using a Tire Lever
Using a tire lever can make mounting your tire a much easier task. When it comes to fitting your new tire, a tire lever can help you get the job done quickly and effectively. The first step is to remove the old tire and tube.
Then, fit the new tire onto the rim, starting from one side, and working your way to the other. When you reach the final section, you may need to use a tire lever to stretch the tire over the rim. Be sure to use a plastic or rubber-coated lever to avoid damaging the rim or the tire.
Additionally, take care not to pinch the inner tube when using the lever. Once the tire is mounted, inflate it and give it a spin to ensure it’s seated correctly. With a little practice, using a tire lever can make mounting tires a breeze.
Inflating the Tire
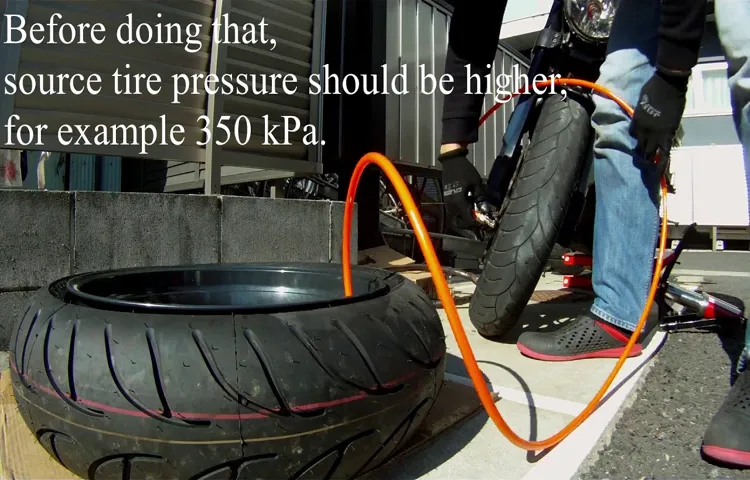
Seating a tubeless tire is a bit different than seating a traditional tire. First, make sure the tire is properly aligned on the rim and the valve stem is in place. Then, you need to inflate the tire with a high volume of air in order to seat the bead correctly.
Using a floor pump or a compressor, pump the tire up to a high pressure, but not the maximum pressure listed on the tire. You will hear a distinct pop or snap sound once the tire is seated, and you will notice the tire bead is evenly seated around the rim. If the tire doesn’t seat on the first attempt, make sure to release all of the air and try inflating again.
Seating tubeless tires can be a bit tricky, but with a little practice, you’ll become a pro in no time!
Using a Compressor
Using a compressor to inflate your tires is an easy task that can save you a lot of time and money in the long run. You will need to start by checking the recommended air pressure for your tires which can usually be found in the owner’s manual or on a sticker inside the driver’s door. Once you know the required pressure, you can connect the compressor to your tire valve using the appropriate attachment.
Before inflating, it’s important to make sure the compressor is properly grounded and turned off. Slowly add air to your tire and periodically check the pressure with a tire gauge until you reach the recommended level. Remember to check all four tires and the spare regularly to ensure they are properly inflated.
Over or under-inflated tires can cause uneven wear, poor handling, and decreased fuel efficiency. Keeping your tires properly inflated will not only improve their longevity but also your safety on the road.
Using a Hand Pump
Inflating your tires using a hand pump can be a bit of a workout, but it’s worth it to ensure your tires are properly inflated. First, remove the valve cap from your tire and attach the pump head to the valve stem. Make sure it’s securely attached before starting to pump.
Begin pumping with a steady and consistent motion, using your arms and body weight to push down on the pump. Keep pumping until you reach the recommended pressure for your tire. This information can usually be found in your vehicle’s owner manual or on the tire itself.
Remember to periodically check the pressure gauge on the pump to ensure accuracy. Once you’ve reached the appropriate pressure, remove the pump head from the valve stem, and reattach the valve cap. Check the pressure again using a separate air pressure gauge to ensure accuracy and safe driving.
With a little effort, you can easily get the hang of using a hand pump to keep your tires properly inflated and your vehicle running smoothly.
Conclusion
In the world of cycling, seating a tubeless tire can be a daunting task, but by following these simple steps, you’ll soon be rolling on your way. Remember, patience and perseverance are key, as sometimes it takes a little trial and error to get that seal just right. And when your friends ask how you became a tubeless tire seating master, you can proudly tell them that you’ve gone from amateur to pro, one bead at a time.
“
FAQs
What tools do I need to seat a tubeless tire?
You will need an air compressor, a tubeless tire valve stem, tire sealant, tire levers, and a tubeless tire inflator.
Why is it important to seat a tubeless tire properly?
Seating a tubeless tire properly ensures that the tire bead is fully seated against the rim, reducing the risk of a blowout or a loss of air pressure.
Can I seat a tubeless tire without an air compressor?
Although it is technically possible to seat a tubeless tire using a floor pump, an air compressor is recommended for best results.
How much tire sealant do I need to use?
The recommended amount of tire sealant depends on the size of your tire. Check the manufacturer’s instructions for guidance.
How do I know if the tire bead is seated properly?
You will hear a loud “pop” sound as the tire bead seats against the rim. Additionally, you can inspect the tire and rim to make sure there are no gaps or bubbles.
Should I inflate the tire to maximum pressure before seating the bead?
No, it is recommended to seat the tire bead at a lower pressure, usually around 20-30 psi, then inflate to the recommended pressure after the bead is seated.
Do I need to use a special valve stem for tubeless tires?
Yes, tubeless tires require a specific valve stem that is designed to create a tight seal with the rim and prevent air leaks.