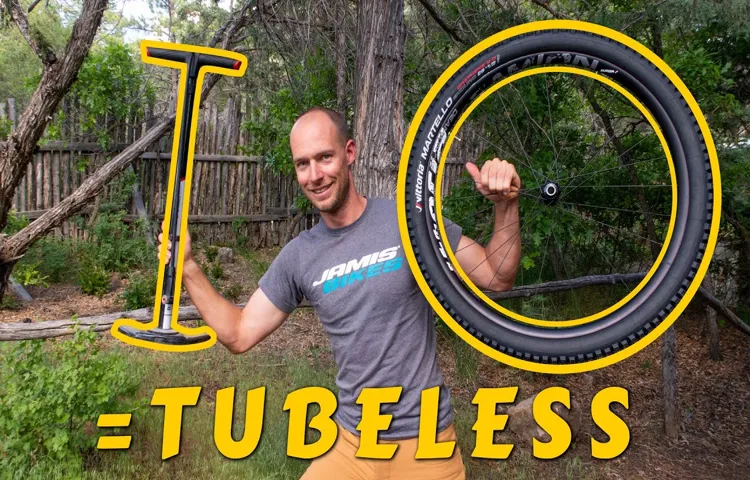
Tired of dealing with the hassle of compressors every time you need to seat tubeless tires? Whether you’re new to the world of tubeless tires or a seasoned veteran, seating them can be a pain, especially if you don’t have access to a compressor. But fear not, there are alternative methods to get that tire secured and sealed. In this blog, we’re going to explore some tricks on how to seat tubeless tire without a compressor.
Get ready to say goodbye to bulky machines and hello to a stress-free tire installation process.
What You Will Need
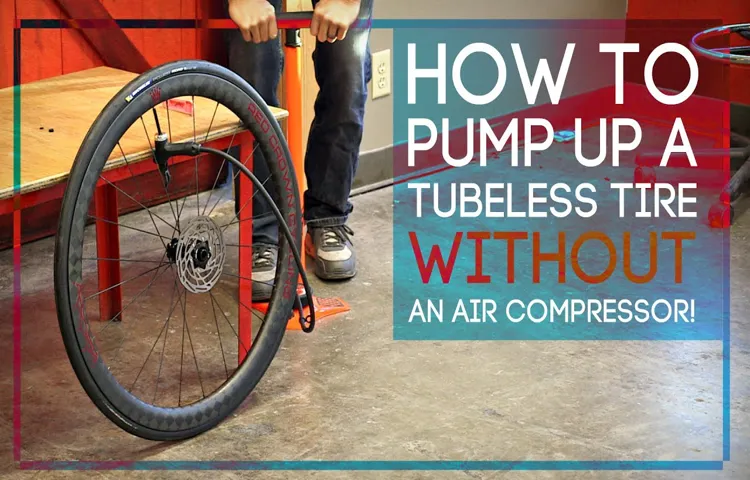
If you’re tired of struggling to seat a tubeless tire without a compressor, you’re not alone. While compressors can make the process much easier, they’re not always accessible for everyone. Fortunately, there are alternative ways to seat a tubeless tire without a compressor.
To start, you’ll need a high-volume floor pump, sealant, tire levers, and patience. The first step is to remove the valve core and pour your sealant into the tire. Then, use your tire levers to help the beads of the tire sit deeper in the rim bed.
Before you inflate the tire with your pump, make sure you’ve lubricated both the tire beads and the rim. This will help the tire seat properly when you inflate it. Finally, pump the tire to the recommended psi and wait for the sealant to do its magic.
With a little bit of elbow grease and a lot of patience, you can seat your tubeless tire without a compressor.
Tubeless Tire Sealant
Tubeless tire sealant is essential for maintaining the proper air pressure of your tubeless tires. To install the sealant, you will need a tubeless valve stem, tire sealant injector, tubeless tire sealant, and a measuring cup. The tubeless valve stem allows air to pass through and is essential for the tire to inflate properly.
A tire sealant injector will help you inject the sealant into the valve stem and tire. It is recommended to use the manufacturer’s recommended amount of sealant, which is usually measured with a measuring cup. Using these tools and materials will help you keep your tubeless tires inflated and ready to ride.
Floor Pump or CO2 Inflator
When it comes to inflating your bicycle tires, you have two main options: a floor pump or a CO2 inflator. While both have their advantages and disadvantages, one may be better suited for your cycling needs than the other. A floor pump is a more traditional method of inflating your tires, and it offers a more reliable and consistent pressure.
It takes a bit longer to inflate your tires with a floor pump, but it gives you more control over the process. On the other hand, a CO2 inflator is a faster, more compact option that is perfect for on-the-go repairs or race situations. However, it can be less reliable than a floor pump, and it’s not as environmentally friendly since the canisters are disposable.
Ultimately, the choice between a floor pump and a CO2 inflator comes down to personal preference and the type of cycling you’re doing. If you’re a casual rider who values convenience and reliability, a floor pump is likely the best choice. However, if you’re a more competitive cyclist who needs to make quick repairs during races, a CO2 inflator may be a better option.
Inflation Canister or Jar
If you’re looking to create an inflation canister or jar, there are a few things you’ll need to ensure that it works properly. First and foremost, you’ll need a container that can hold air pressure safely without leaking. A mason jar or PVC pipe can work well for this purpose.
You’ll also need a tire valve stem that can be mounted onto the lid of the container. This will allow you to fill the container with compressed air. Additionally, you’ll need a pressure gauge to ensure that you don’t overinflate the container.
Once you’ve assembled all of the necessary materials, you’ll need to drill a hole in the lid of the container and mount the tire valve stem. From there, you can fill the container with compressed air and use it for inflation purposes. With the right materials and careful attention to detail, you can create a reliable and effective inflation canister or jar for your needs.
Step by Step Guide
Are you tired of struggling to seat your tubeless tire without a compressor? Well, fear not because here is your step-by-step guide to get the job done. First, remove the valve core and pour sealant into the tire. Then, place the tire onto the rim and make sure the bead is in the proper position.
Use a tire lever to push one side of the tire bead into the center of the rim. Next, take a strap or zip tie and tightly wrap it around the circumference of the tire, compressing the bead into the rim. This is where the magic happens – start vigorously shaking and bouncing the tire, encouraging the tire bead to seat into the rim.
Depending on your tire and rim combination, this process can take a few minutes or up to an hour. Once the tire is seated, remove the strap or zip tie, and re-install the valve core. Give your tire a spin to evenly distribute the sealant and voila! You have successfully seated your tubeless tire without a compressor.
Step 1: Remove Existing Tire
Removing an old tire from your vehicle may seem like a daunting task, but with a little bit of know-how, it can be done quickly and easily. The first step in the process is to remove the existing tire from your vehicle. This involves loosening the lug nuts that hold the tire in place, but before you do this, it’s important to make sure that your vehicle is in a safe position.
Ideally, you’ll want to park on a level surface and engage your emergency brake to prevent the car from rolling while you’re working on it. Once you’ve secured your vehicle, use a lug wrench to loosen the nuts on the tire. Depending on the type of vehicle you have, you may need to use a special adapter to fit the wrench onto the lug nuts.
After you’ve loosened the nuts, use a jack to lift the vehicle off the ground and remove the tire. Make sure to keep the lug nuts in a safe place so that you don’t lose them. With the old tire removed, you’re ready to move onto the next step in the process of replacing it.
Step 2: Add Sealant
After you clean and prep the surface of your project, the next step is to add the sealant. Choosing the right sealant is essential for the longevity and durability of your project. The type of sealant you use depends on the project’s material, environmental factors, and the desired finish.
Some sealants may provide a glossy finish, while others offer a matte or satin look. Applying the sealant is relatively easy, and you can use brushes, rollers, or sprayers. However, you must apply the sealant evenly, following the manufacturer’s instructions carefully.
Otherwise, you may end up with a patchy or uneven finish. Once you have applied the sealant, allow it to dry completely before handling or using the finished product. The drying time varies depending on the type of sealant and environmental conditions.
For best results, follow the manufacturer’s recommended drying time before handling your project. Remember, the sealant will help protect your project from weathering, moisture, and wear and tear. Make sure to choose the right sealant and apply it correctly to ensure your project lasts for years to come.
Step 3: Position the Bead
When it comes to placing beads, the position is crucial to achieve the desired look. First, ensure that the bead is in position where it will not budge. If the bead is on a wire, gently slide it into place before securing it with pliers.
If the bead is on thread, make sure it sits snugly in place without being too tight. Once the bead is in position, you can begin thinking about its placement in relation to the rest of the design. Start by considering the color and size of the bead, as well as its shape and texture.
Is it going to be the focal point of the design, or will it be a subtle accent? Will you be using similar beads to create symmetry, or will you mix and match to create a more eclectic look? Take your time with this step, as it can impact the overall outcome of your project. Remember, the bead should enhance the design, not overpower it. With a little practice, you’ll be able to quickly and confidently position your beads like a pro!
Step 4: Inflate the Tire
After you have removed the valve cap and hooked up your tire pump, it’s time to inflate the tire. First, you want to check the recommended PSI (pounds per square inch) listed on the tire’s sidewall or in your owner’s manual. Be sure not to overinflate the tire, as this can cause it to burst.
Slowly pump air into the tire while keeping an eye on the pressure gauge. You can periodically stop to check that you’re getting close to the recommended PSI. Once you’ve reached the appropriate PSI, remove the pump from the valve stem and quickly replace the valve cap.
It’s important to make sure the valve cap is secure as it will help prevent dirt and debris from getting inside the tire and causing damage. Using a tire gauge to regularly check your tire pressure can prevent potential flat tires and improve the overall lifespan of your tires. Remember to always properly dispose of any old or damaged tires to help keep our environment clean and safe.
Tips and Tricks
Are you tired of bringing out the bulky compressor every time you need to seat a tubeless tire? Well, fear not, because there are some simple tips and tricks that can help you seat a tubeless tire without using a compressor. Firstly, try using a high-volume floor pump to achieve enough air pressure to seat the tire. This method requires a bit of practice and patience, but it can be done with ease once you get the hang of it.
Secondly, use a CO2 inflator that can provide a quick and powerful blast of air to seat the tire. However, be aware that CO2 can be quite expensive and not as eco-friendly as using a pump. Finally, you can try using a tire bead jack tool that will help you lift and position the tire beads into place, making it easier to inflate the tire with your floor pump or CO2 inflator.
With these simple tips and tricks, you can easily seat your tubeless tires without the need for a compressor, making your maintenance tasks more convenient and enjoyable.
Use Soap and Water
If you’re wondering how to keep your hands clean throughout the day, the answer is simple: use soap and water. Yes, it might sound basic, but it’s the most effective way of killing germs and bacteria. By washing your hands with soap and water for at least 20 seconds, you’ll be able to eliminate dirt, grease, and bacteria that have accumulated on your hands.
The best part is, you don’t need any fancy soaps or expensive hand sanitizers to do this. Any ordinary soap will do the trick. It’s all about the technique – make sure you cover all the surfaces of your hands, including between your fingers and under your nails.
Once you’ve washed your hands, dry them using a clean towel or air-dry them. You’ll find that by making this a habit throughout the day, you’ll be able to reduce the risk of spreading diseases and maintain good hygiene. So, whenever in doubt, reach for some soap and water.
Use a Compressed Air Tank
If you’re looking for a more efficient way to power your air tools, using a compressed air tank might be just what you need. These tanks are a great addition to any workspace, providing a portable and compact solution for compressed air needs. Plus, they come with a variety of features that make them easy to use and maintain.
For example, most compressed air tanks have an automatic shut-off valve that prevents overfilling. This not only keeps you safe but also protects the tank from damage. Additionally, some models come equipped with a pressure gauge, allowing you to keep track of the tank’s pressure and adjust it accordingly.
Overall, using a compressed air tank can make your job easier, safer, and more efficient than ever before. So why not give it a try and experience the benefits for yourself?
Try a Bead Jack or Tire Lever
If you’re a cyclist or a bike enthusiast, you know how frustrating and time-consuming it can be to remove a tire from the rim. That’s where a bead jack or tire lever comes in handy. A bead jack is a useful tool that makes removing a tire a breeze.
It works by holding the bead in place and pushing it down into the center of the rim, thus loosening the tire. A tire lever, on the other hand, is a small, handheld tool that helps you pull the tire off the rim. It’s especially useful when you need to replace an inner tube or patch a hole.
The key to using both of these tools is to work slowly and carefully. Slowly pry the tire away from the rim, and use leverage to break the bead loose. It may take some practice, but once you get the hang of it, you’ll wonder how you ever lived without one.
So, if you’re looking for a quick and easy way to remove a tire from the rim, try using a bead jack or tire lever. Your fingers will thank you!
Conclusion
In conclusion, seating a tubeless tire without a compressor requires a little bit of patience, creativity, and elbow grease. While it may seem daunting, it’s a task anyone can accomplish with the right tools and mindset. Remember to stay calm, take breaks when needed, and don’t be afraid to ask for help.
Whether you’re using a floor pump, a CO2 inflator, or a homemade contraption, the key is to generate enough pressure to pop the tire bead onto the rim. So go ahead, channel your inner MacGyver, and impress your friends with your newfound DIY skills. Happy riding!”
FAQs
What tools do I need to seat a tubeless tire without a compressor?
To seat a tubeless tire without a compressor, you will need a tubeless tire sealant, a tubeless valve stem, a high-pressure floor pump, and tire levers.
Can I use a CO2 inflator to seat a tubeless tire?
Yes, you can use a CO2 inflator to seat a tubeless tire. However, it may not provide enough pressure to fully seat the tire and could potentially damage the rim.
How much sealant do I need to use when seating a tubeless tire?
The amount of sealant required will depend on the size of the tire, but a general rule of thumb is to use 2-3 ounces for road tires and 4-5 ounces for mountain bike tires.
How long does it take to seat a tubeless tire without a compressor?
Seating a tubeless tire without a compressor can take anywhere from 10-30 minutes depending on the size of the tire and the efficiency of the tools being used.
Is it possible to seat a tubeless tire without any tools?
No, you will need at least a tubeless tire sealant and a valve stem to seat a tubeless tire, as well as a high-pressure pump or inflator to provide air pressure.
What should I do if my tubeless tire won’t seat?
Try adding more sealant or using a larger amount of pressure when inflating the tire. If the tire still won’t seat, check for any damage or debris in the rim or tire.
Can I seat a tubeless tire on a non-tubeless rim?
It is not recommended to seat a tubeless tire on a non-tubeless rim as it can cause the tire to slip or blow off the rim, potentially causing injury.