
Setting the bead on a tire is a crucial task that every vehicle owner must know. It is a process that involves inflating the tire to ensure that it seats firmly and effectively on the rim. However, if this process is not done correctly, it can result in an unstable ride and reduced tire lifespan.
So, whether you are a beginner or experienced car enthusiast, learning how to set the bead on a tire is essential. In this blog, we will be discussing the different ways you can set the bead on a tire and how to do it correctly. So, let’s dive in and learn the easiest way to set the bead on a tire!
Table of Contents
Gather Tools and Supplies
When it comes to setting the bead on a tire, having the right tools and supplies on hand is crucial to getting the job done correctly and safely. Some of the key items you’ll need include a rubber mallet, bead sealer, valve core tool, tire gauge, and a tire mounting lubricant. Additionally, it’s important to make sure you have a sturdy, level work surface to work on and a good quality air compressor to inflate the tire once the bead is set.
Before you begin, take the time to ensure that all of your tools are in good working order and that you have all the necessary supplies on hand. This will help ensure that the process goes smoothly and that you can complete the job with confidence. With the right tools and a bit of know-how, you’ll be able to set the bead on your tire quickly and easily, ensuring your vehicle is ready for the road ahead.
Tire Irons and Bead Seaters
When it comes to changing a tire, having the right tools and supplies is crucial. Two essential tools for the job are tire irons and bead seaters. Tire irons, also known as tire spoons, are used to remove the tire from the wheel and install a new one.
Bead seaters, on the other hand, help to seat the tire onto the wheel’s bead. It’s important to gather these tools before attempting to change a tire to avoid any unnecessary frustration and damage to your vehicle. Additionally, you’ll need a lug wrench and a jack to lift the car and loosen the lug nuts.
A spare tire and a tire gauge are also necessary to ensure the new tire is properly inflated to prevent any accidents on the road. Don’t forget to wear safety gloves and eye protection to stay safe during the process. Having these tools and supplies on hand can make changing a tire quick and easy, giving you peace of mind when you hit the road again.

Air Compressor and Tire Pressure Gauge
If you’re planning on using an air compressor and tire pressure gauge, it’s important to gather the necessary tools and supplies beforehand. First and foremost, you’ll need an air compressor with an appropriate PSI range for your tires. Many compressors also come with a variety of attachments, such as different nozzle sizes or an air hose, so be sure to check what’s included.
You’ll also need a tire pressure gauge, which can be either digital or analog. Make sure the gauge is accurate and easy to read. Additionally, make sure you have the necessary attachments to connect the gauge to the tire valve stem.
Finally, it’s a good idea to have a tire inflator spray on hand to make it easier to fill the tire with air. With these tools and supplies, you’ll be ready to properly and safely inflate your tires to the correct pressure.
Prepare the Tire and Rim
If you want to know how to set the bead on a tire, the first step is to prepare the tire and rim. Make sure that the rim is clean and free from any dirt or debris. This will help the tire to seal properly when you inflate it.
Next, apply a small amount of tire lubricant to both the bead of the tire and the rim. This will help the tire to slip over the rim more easily and make it easier to set the bead. Be sure to use a compatible lubricant that won’t damage the rubber of the tire.
With the lubricant applied, mount the tire onto the rim and position it so that the valve stem is in the correct position. Then, use a bead seater to push air into the tire and seat the bead against the rim. Be sure to follow the instructions carefully to ensure that you inflate the tire to the correct pressure and that the bead seals correctly.
With the bead set, you can finish mounting the tire onto the rim and get ready to hit the road.
Clean the Rim and Tire
When it comes to cleaning your car, preparing the tire and rim is an essential step to achieve a spotless finish. Before you start scrubbing the dirt and grime off your tires, it’s important to clean the rim and wheels first. This will prevent any debris from sticking onto the tire during the cleaning process.
Start by washing the rims with soap and water, ensuring to reach all the nooks and crannies. If the rims are severely stained, you can use a dedicated rim cleaner to eliminate stubborn dirt. Once you’ve cleaned the rims, dry them off with a microfiber towel to avoid water spots.
Preparing the tire and rim will make the cleaning process easier and ensure a sparkling finish. Don’t forget to use a tire cleaner and brush to scrub the tires before moving on to the rest of the vehicle. With the right preparation and cleaning tools, you can achieve a shiny, road-ready car in no time.
Check for Damage or Wear
When it comes to checking your tires for damage or wear, it’s important to properly prepare the tire and rim first. Start by cleaning the tire and rim with soap and water, then inspect the tread for any irregularities or signs of wear. Look for any cracks or cuts in the sidewall, and check the bead area for any damage or corrosion.
If you notice any damage or irregularities, it’s best to have a professional inspect the tire and make any necessary repairs. Before putting the tire back on the rim, make sure to check that the rim is free of any debris or corrosion. A damaged rim can cause the tire to wear unevenly or even cause a blowout, so it’s important to address any damage before mounting the tire.
By taking the time to properly prepare your tire and rim, you can help ensure your safety on the road and avoid costly repairs down the line. So, take a few extra minutes to inspect and clean your tires before hitting the road. Your safety is worth it! The main keyword used naturally is “tire and rim”.
Mount the Tire onto the Rim
Setting the bead on a tire can be a daunting task, especially if you are not familiar with tire repair. However, it is an essential skill that every driver needs to learn at some point. The first step in mounting a tire onto the rim is to ensure that the rim and the tire match in size.
You can confirm the size by checking the markings on both the tire and the rim. Once you’ve confirmed that the tire is the correct size, you need to start the process of setting the bead on the tire. The bead is the portion of the tire that sits on the rim, and it is crucial to ensure that it is properly set to prevent air leaks.
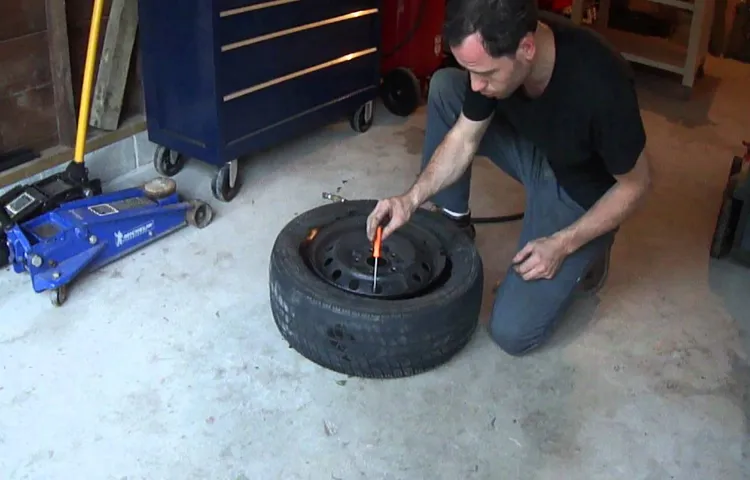
To do this, start by applying a small amount of soapy water or bead sealer around the bead area of the tire. With the help of a mounting machine or manual tire iron, use force to push the tire’s bead onto the rim. The tire will emit a loud popping sound once the bead is set on the rim.
It’s important to check the tire’s position and ensure that it’s properly seated, balanced, and inflated to the recommended pressure before driving.
Align the Tire over the Valve Stem
When it comes to mounting a tire onto a rim, there are a few essential steps that you must follow to ensure the tire stays securely in place while you drive. One of these steps is aligning the tire over the valve stem. This might seem like a small detail, but it can make a big difference in how well your tire performs.
The valve stem is where you add air to your tire, and if the tire isn’t aligned correctly, it can cause problems with tire pressure and balancing. To align the tire correctly, start by placing the tire onto the rim so that the outer edge of the tire lines up with the outer edge of the rim. Then, look for the valve stem on the rim and position the tire so that the valve stem hole on the tire lines up directly over it.
This will ensure that you can access the valve stem easily when it’s time to add air or check the pressure. By taking the time to align your tire over the valve stem correctly, you can be confident that your tire will perform optimally and keep you safe on the road.
Use Tire Irons to Set the Bead
When it comes to mounting your tire onto the rim properly, using tire irons can make all the difference. These handy tools come in a variety of shapes and sizes, but all serve the same purpose: helping to set the bead of the tire onto the rim. This can be a tricky process, but with a little patience and practice, anyone can master it.
Start by lubricating the edge of the rim with a tire mounting paste or soap solution, then position the tire onto the rim and hold it in place with your knees. Insert one tire iron between the tire and the rim, then use a twisting motion to pry the tire onto the rim. Repeat this process with a second tire iron, working your way around the tire until it is fully seated onto the rim.
Using tire irons allows you to apply even pressure throughout the process, which helps prevent damage to the tire or rim. With a little practice, you’ll be mounting your own tires like a pro in no time!
Inflate and Test the Tire
Setting the bead on a tire is a crucial step in ensuring that your tire is ready for the road. To do this, first, make sure that the valve stem is installed properly. Then, add a small amount of air to the tire and check that the tire is seated properly against the wheel rim.
To do this, you can use a tire spoon or a bead-buster tool to push the tire towards the rim. Once the tire is properly seated, it’s time to inflate it to the recommended pressure listed on the tire sidewall. As you inflate the tire, you may hear popping or cracking noises – don’t worry, this is just the tire settling into place.
Once the tire is fully inflated, check for any leaks by spraying soapy water around the tire and rim. If you see any bubbles forming, you may need to adjust the position of the tire before re-inflating. With the bead now set, you can rest assured that your tire is ready to hit the road safely and smoothly.
Use Air Compressor to Inflate the Tire
Inflating your tires to the correct pressure is crucial for safety and optimal performance. One of the easiest and most convenient ways to inflate your tires is by using an air compressor. First, check your vehicle’s manual or the tire sidewall for the recommended pressure.
Then, attach the air compressor nozzle to the tire valve stem and turn on the compressor. Keep an eye on the pressure gauge and stop once you reach the recommended pressure. Disconnect the nozzle and repeat for the other tires.
Finally, give each tire a quick test by pressing on the tread with your hand. If it feels too soft or too hard, adjust the pressure accordingly. With the help of an air compressor, inflating your tires can be a quick and simple task that will ultimately improve the safety and performance of your vehicle.
Check Tire Pressure and Adjust as Needed
One of the most important maintenance tasks for your car is checking tire pressure and adjusting it as needed. Properly inflated tires not only ensure a smoother ride but also improve fuel efficiency and extend the lifespan of your tires. To inflate and test the tire pressure, you will need a tire pressure gauge and an air compressor.
Start by removing the valve cap and attach the tire pressure gauge to the valve stem. The gauge will give you a reading of the current tire pressure. If the pressure is too low, use the air compressor to inflate the tire to the recommended PSI (pounds per square inch) level indicated on the side of the tire or in your car manual.
Once inflated, check the pressure again to ensure it’s within the recommended range. It’s important to adjust the tire pressure when the tires are cold, as heat from driving can cause the pressure to increase. Checking your tire pressure regularly, at least once a month, can help you catch any potential tire issues before they become bigger problems.
So, make it a habit to check your tire pressure and keep your car rolling smoothly down the road.
Conclusion
Setting the bead on a tire may seem daunting at first, but with the right technique and a bit of perseverance, it can be accomplished smoothly and efficiently. Just remember to properly lubricate the bead and rim, use a reliable air compressor, and be patient until you hear that satisfying “pop” sound. With these tips and tricks, you’ll be setting beads like a pro in no time – and who knows, you might even inspire some tire envy among your friends.
“
FAQs
What is the purpose of setting the bead on a tire?
The purpose of setting the bead on a tire is to ensure that it stays securely seated on the rim, preventing air leaks and potential accidents.
How do I know if the tire bead is not set properly?
You may notice air leakage or a hissing sound coming from the tire, or the tire may feel wobbly or unstable while driving.
Can I set the bead on a tire without special tools?
It is possible to set the bead on a tire without special tools, but it may require more time and effort. Using a tire bead sealer and a proper inflation method may help.
What is the ideal pressure to set the bead on a tire?
The ideal pressure to set the bead on a tire varies depending on the type and size of the tire and the rim. Refer to the manufacturer’s recommendations or seek professional advice.
What are the risks of not setting the bead on a tire properly?
Not setting the bead on a tire properly can lead to air leaks, loss of control, and accidents while driving.
Can a tire bead eventually lose its seal over time even if it was set properly?
Yes, a tire bead can lose its seal due to factors such as wear and tear, changes in temperature, and moisture exposure. Regular inspection and maintenance are recommended.
Is it necessary to deflate the tire completely before attempting to set the bead?
Yes, it is necessary to deflate the tire completely before attempting to set the bead. This allows the tire to properly align and sit on the rim.