

If you own a car, it’s essential to ensure that its coolant is functioning properly. A coolant system is critical in keeping your car’s engine from overheating, which could harm its components. When it comes to replacing or topping up your coolant, knowing how to remove it is just as important.
Not only does it help keep your engine cool, but it also helps prolong its lifespan. In this step-by-step guide, we’ll walk you through how to remove coolant from your car easily. So if you’re wondering how to remove coolant from your car and maintain its optimal performance, keep reading!
Table of Contents
Introduction
Taking out the coolant from your car is not as difficult as it seems. Here’s a simple guide on how to take coolant out of your car. Firstly, locate the coolant reservoir under the hood of your car.
It will have a cap on it with either a symbol or the word “coolant” on it. Make sure the engine is cold before starting. Open the cap and using a coolant siphon pump, remove the coolant and put it in a bucket.
You may need to suck the coolant out several times to get all of it. Once you have removed all the coolant, turn on the engine and let it run for a minute. This will help to circulate any remaining coolant in the engine.
Then repeat the process. Finally, close the cap and dispose of the used coolant properly. This is important as coolant can be hazardous to the environment and animals.
By following these simple steps, you can easily take the coolant out of your car.
What is coolant?
Coolant is a liquid that helps regulate the temperature of an engine by absorbing and dissipating heat. It circulates through the engine block, radiator, and hoses, keeping the engine at an optimal operating temperature. It is a crucial component of every vehicle cooling system that prevents the engine from overheating, which can cause significant damage.
Coolant is typically a mixture of water and antifreeze, which contains additives to enhance its cooling properties and prevent corrosion and rust. The ratio of water to antifreeze depends on the manufacturer’s recommendations and the climate in which the vehicle operates. Using the proper coolant is essential to the longevity and performance of your vehicle.
So, make sure to check your owner’s manual or consult a professional mechanic to determine the correct coolant for your vehicle.
Tools and Materials Needed
If you need to take coolant out of your car, you’ll need a few basic tools and materials to get the job done. Firstly, you’ll need a drain pan or bucket to catch the coolant as it drains out. Make sure it’s large enough to hold the fluid from your car’s coolant system.
You’ll also need a pair of pliers or a wrench to loosen the clamps that hold the hoses in place. Additionally, have a funnel handy to help you refill the system. Take note that coolant can be toxic and harmful to humans and pets, so make sure to handle it with care and dispose of it properly.
Lastly, it’s always a good idea to refer to your car’s owner manual on how to safe guard yourself when working around the coolant system. Safety first!
Safety gear
When it comes to working in potentially hazardous conditions, having the proper safety gear is vital. The tools and materials you’ll need will depend on the specific job you’re doing, but there are some basics that everyone should have. First and foremost, a hard hat is essential for protecting your head from falling objects.
Safety glasses or goggles are also necessary to keep your eyes safe from debris or dust. Earplugs or earmuffs can protect your hearing from loud noises, and a face shield can shield your face from flying debris. Additionally, you may need gloves, boots with good traction, high-visibility vests, and respiratory masks.
Remember, safety should always come first, so make sure you have the proper gear before starting any job.
Container
When it comes to container gardening, the tools and materials you’ll need are pretty straightforward. First up, you’ll need a container, of course. This can be anything from a traditional terra cotta pot to a recycled plastic bucket so long as it has drainage holes.
Next, you’ll need soil. Choose a high-quality potting mix that’s formulated for container plants. It should have good drainage and aeration properties to keep your plants healthy.
Fertilizer is also important in container gardening as it can be easy for nutrients to leach out with watering. Look for a balanced, slow-release fertilizer that will feed your plants over time. As for tools, you’ll need a trowel, watering can or hose, and pruners for maintaining your container garden.
Finally, consider adding mulch to help retain moisture and deter weeds. With these tools and materials on hand, you’ll be well on your way to creating a thriving container garden.
Pliers
When it comes to DIY projects, having the right tools can make all the difference in the world. Pliers are one of those must-have tools that every DIY enthusiast should have in their toolbox. Some of the different types of pliers include cutting pliers, wire stripping pliers, and needle-nose pliers among others.
The main materials used in making pliers include steel, chrome, and other durable materials. These materials ensure that the pliers are strong enough to handle whatever task they are needed for. One of the main advantages of pliers is their versatility.
Whether you are fixing an electrical problem or working on a carpentry project, pliers can be used for a wide range of tasks. So, if you’re thinking about starting a new DIY project or need to upgrade your toolbox, investing in a good pair of pliers is definitely worth it. Your pliers will quickly become one of your most reliable and versatile tools.
Funnel
When it comes to creating a funnel, having the right tools and materials is key. Firstly, you’ll need a landing page builder such as ClickFunnels or Leadpages. These platforms allow you to easily create visually appealing pages that will convert your leads into customers.
You’ll also need an email marketing service such as Mailchimp or ConvertKit to help you automate your email campaigns and keep in touch with your subscribers. In addition to this, having a reliable payment gateway such as PayPal or Stripe is essential for collecting payments from your customers. Finally, you may want to invest in a CRM system such as HubSpot or Salesforce to help you manage your leads and monitor your sales pipeline.
By incorporating these tools and materials into your funnel-building process, you’ll be able to create highly effective and profitable sales funnels that will help you grow your business. So, are you ready to start building your funnel today?
Step 1: Preparing Your Car
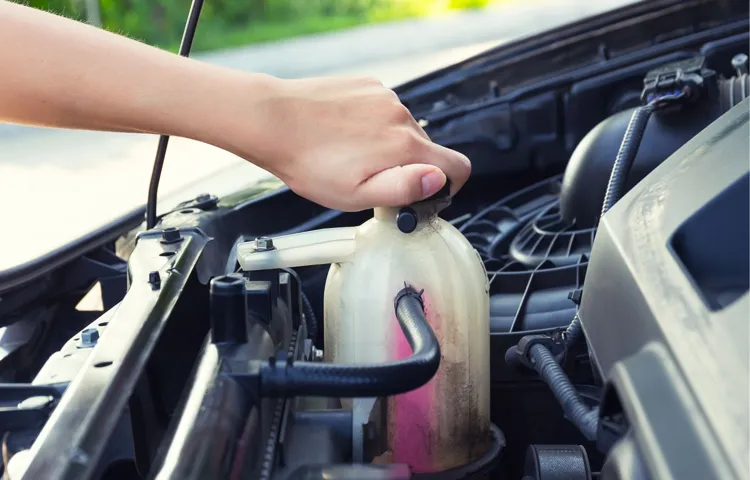
Before removing coolant from your car, it’s important to properly prepare your vehicle to ensure safe and effective removal. The first step to taking coolant out of your car is to make sure the engine is completely cool, as the coolant can reach high temperatures when the engine is running. Once the engine is cool, open the hood and locate the coolant reservoir.
The reservoir is typically clear and has a cap labeled “coolant.” Make sure the cap is cool to the touch before removing it to avoid any potential burns. Additionally, it’s important to wear gloves to protect your hands and avoid getting coolant on your skin.
Once you’ve done this, you’re ready to begin the process of removing the old coolant from your car’s system.
Consult your car manual
When you decide to tackle any maintenance or repair on your car, it’s always recommended to start by consulting your car manual. This invaluable resource will provide you with valuable information and guidelines specific to your make and model, including the recommended oil type, tire pressure, and fuel type. It will also provide you with important safety information, such as recommended procedures for working on your car and any precautions you should take to prevent injury.
Make sure to take the time to thoroughly read this document to ensure you have all the information you need before you start working on your car. By following the guidelines in your car manual, you can be confident that you are taking the necessary steps to keep your car running smoothly and safely.
Locate the coolant reservoir
When it comes to properly maintaining your car, it’s crucial to know where the coolant reservoir is located. This is because the coolant system is responsible for regulating the engine temperature, preventing it from overheating and causing damage. So, the first step in preparing your car for any kind of maintenance or upkeep is to locate the coolant reservoir.
You can typically find it under the hood near the radiator or on the side of the engine. It’s usually a translucent plastic container with markings indicating minimum and maximum levels of coolant. By checking this regularly, you can ensure your car is running smoothly and avoid any potential engine damage.
So, make sure to always keep an eye on your car’s coolant levels and top it up as needed using the manufacturer’s recommended coolant.
Step 2: Draining Coolant from the System
If you want to take coolant out of your car, the first step is to drain the coolant from your car’s system. First, locate the radiator drain plug at the bottom of the radiator. Look for a small bolt or screw that can be removed.
Usually, it is on the bottom of the radiator where it’s connected to the hoses. Then, get a container to catch the coolant. Place the container under the drain plug and unscrew the plug or bolt.
This will allow the coolant to slowly drain out of the radiator. Be careful, though, as the coolant is hot and may splash. Once all the coolant has been drained, reinstall the drain plug.
You can also remove the lower radiator hose if you prefer, but this may make a mess. Remember to dispose of your coolant properly, as it is toxic to animals. You can take it to an auto parts store or a recycling center for safe disposal.
It is essential to wear gloves and eye protection while working with the coolant, as it is hazardous to skin and eyes. This step is necessary before flushing or refilling the coolant, which we will cover in the next section.
Wait for the engine to cool down
When it comes to draining the coolant from your vehicle’s system, it’s essential to wait for the engine to cool down before getting started. Trying to work with hot liquid can lead to serious burns, so patience is key here. Once your engine has had time to cool, locate the radiator and look for the drain plug near the bottom.
Keep a pan or bucket handy, as the coolant will need to be collected and disposed of properly. Next, carefully open the drain plug and allow the coolant to flow out. Once it’s finished draining, tighten the plug back up and dispose of the used coolant.
This process is vital to keep your engine running smoothly and prevent overheating, so it’s important to make sure it’s done correctly. By taking the time to let your engine cool and following the proper steps for draining and disposing of the coolant, you’ll help ensure your vehicle runs as it should. So, take it slow, follow the steps, and make sure your car is running at its best!
Place container under the radiator drain valve
If you’re getting ready to tackle a coolant change on your car, it’s important to make sure you have a container in place before you start draining. This container will catch the old coolant as it runs out of the radiator drain valve. It’s important to use a container that’s large enough to hold all of the old coolant, so you don’t end up with a big mess on your hands.
If you’re not sure how much coolant your car holds, you can check your owner’s manual or consult with a mechanic. Once you’ve got your container in place, use a pair of pliers to turn the drain valve counterclockwise. Be ready, because the coolant will start flowing out pretty quickly! Remember to dispose of the old coolant in a safe and responsible manner, as it’s toxic to people and pets.
A good way to do this is to take it to a local auto parts store or mechanic, who can recycle it for you. With this step completed, you’re one step closer to a smoothly running engine!
Open radiator drain valve and drain coolant
After ensuring that the engine is cool, it’s time to begin the second step of flushing the coolant system: draining the coolant. The first step to draining the coolant is to locate the radiator drain valve, which can usually be found at the bottom of the radiator. Once located, open the valve and let the coolant flow into a drain pan placed underneath the vehicle.
This process can take several minutes, depending on the amount of coolant in the system. It’s essential to be careful during this process; the coolant can be hot and hazardous. Wearing gloves and safety glasses can protect you from any potential splashes.
Once all the coolant is drained, take a close look at the liquid to ensure that there isn’t anything unusual. If you spot particles or debris in the coolant, it may indicate a significant problem with the engine. Make sure that the drain valve is firmly closed before proceeding to the next step.
By emptying the coolant, it makes room for fresh coolant to be added, ensuring the engine runs smoothly and efficiently.
Step 3: Removing the Residual Coolant
Now that you have drained as much coolant as possible, it’s time to remove any remaining coolant. You can start by opening the radiator cap and pouring a bucket of water into the radiator. This water will help to flush out any residual coolant.
Next, replace the cap and start the engine for a few minutes to circulate the water. After running the engine, turn it off and let the water cool. Then, drain the water into a bucket and repeat this process two or three more times until the water runs clear.
Once the water is clear, you can wipe down the radiator and refill it with fresh coolant. Remember to dispose of the used coolant properly so that it doesn’t harm the environment. With this final step, you have successfully removed all the coolant from your car and can now fill it up with fresh coolant to keep it running smoothly.
Remove the reservoir cap
When it comes to changing a car’s coolant, removing the residual coolant is a crucial step. To successfully remove the residual coolant, the reservoir cap must be removed. The reservoir cap can be located in different areas depending on the make and model of the car, but it is usually found near the radiator.
It is essential to remove the cap slowly and carefully to avoid any splash back or burns that might happen when the coolant is hot. After removing the cap, the coolant can be drained and disposed of properly. This step is essential before adding new coolant to avoid contamination or mixing with the old coolant.
Once the residual coolant has been removed, the system can be refilled with fresh coolant to ensure the engine runs smoothly. So, take your time, be patient, and keep safety in mind while removing the reservoir cap to eliminate the residual coolant.
Disconnect the coolant hose
Disconnecting the coolant hose is a crucial step in removing residual coolant in your engine. This step ensures that all the coolant is drained out of the system, preventing any damage that stagnant coolant can cause. To carry out this step, locate the coolant hose, which is usually attached to the radiator and the engine block.
Once you identify the hose, disconnect it from the engine block by loosening the clamp. It’s important to be cautious and not pull the hose out forcefully as it can cause damage. Instead, gently twist and pull to separate it.
You may notice some residual coolant spilling out of the hose, and it’s recommended to dispose of it appropriately to protect the environment. At this stage, you’re one step closer to achieving a clean and well-maintained engine.
Use pliers to remove the clamp from the hose
Removing coolant from your car’s engine is a crucial part of maintaining its health and longevity. One major step in this process is removing the residual coolant from the engine block. To do this, you’ll need to use pliers to remove the clamp from the hose connected to the engine.
Once the clamp is off, gently wiggle the hose back and forth until it comes loose from the engine block. Be sure to have a container ready to catch the residual coolant that will begin to drain from the hose. Once all the coolant has drained out, reattach the hose to the engine block and use the pliers to secure the clamp back into place.
By removing residual coolant, you’ll prevent any old or contaminated coolant from mixing with fresh coolant and causing damage to your engine. Remember to always consult your car’s manual and wear protective gear when handling engine coolant.
Step 4: Disposing of Coolant
Once you have drained the old coolant from your car, it’s important to dispose of it properly. Coolant can be very toxic and harmful to the environment, so you should never just pour it down the drain or on the ground. One option is to take it to a local recycling center or hazardous waste collection site.
Many of these locations will accept used coolant and dispose of it safely. Another option is to consult with your local government to find out if they offer any hazardous waste disposal programs. Whatever option you choose, be sure to carefully transport the used coolant in a sealed container and follow all safety guidelines to avoid any accidents or spills.
Taking the steps to properly dispose of your old coolant is not only good for the environment, but it also ensures that you are being a responsible car owner.
Put the used coolant in a sealed and labeled container
When it comes to disposing of used coolant, it’s important to handle it properly to avoid any environmental harm. Step 4 in the process is to put the used coolant in a sealed and labeled container. This step is crucial because old coolant can contain harmful chemicals that can be dangerous if not disposed of correctly.
Make sure to use a container that can seal tightly to prevent any leakage and label it with the type of coolant, the date it was used, and the date it was disposed of. This will help you keep track of when it was last used and ensure that it’s properly disposed of. Remember, hazardous waste should never be poured down the sink or thrown away with regular trash.
Always follow local regulations for disposing of hazardous waste, including used coolant. By taking the necessary steps to handle used coolant correctly, you can help protect the environment and prevent any damage to yourself or others.
Contact your local waste management facility for disposal
When it comes to disposing of coolant, it’s important to remember that it should never be poured down the drain or simply thrown in the trash. Instead, it needs to be handled properly to prevent harm to the environment. The best way to do this is to contact your local waste management facility.
They can provide guidance on how to safely dispose of coolant and may even offer specific services for this purpose. In some cases, they may require you to bring the coolant to their facility for disposal. While this may seem like an inconvenience, it’s crucial to remember that proper disposal of coolant is necessary to protect our planet.
By taking this step, you can ensure that your coolant is handled in an environmentally responsible manner and that you are doing your part to protect the earth’s natural resources.
Conclusion
In conclusion, removing coolant from your car is no rocket science, but it does require a little bit of know-how and the right tools. So, grab your gloves, get under the hood, and drain your coolant with confidence! Just remember to dispose of it properly- don’t dump it in the sink or down the drain. Saving your engine from overheating is a great feeling, and you’ll definitely feel like a coolant-removing superhero after this!”
Importance of proper coolant maintenance
Disposing of coolant is an essential step in proper coolant maintenance. Coolant can become contaminated with various chemicals and pollutants, making it harmful to both humans and the environment. It’s important to dispose of old coolant properly, and it’s illegal to dump coolant down the drain.
Instead, take it to a certified disposal facility that can properly handle and dispose of the hazardous waste. Some local auto parts stores may also accept used coolant for recycling. Remember, disposing of coolant improperly can lead to fines and damage to the environment, so always make sure to follow the appropriate procedures when disposing of your old coolant.
By doing so, you’re not only protecting the environment, but you’re also protecting yourself and others.
Safety precautions to keep in mind
When it comes to disposing of coolant, there are some important safety precautions to keep in mind. Firstly, always wear protective gloves, goggles, and a face mask to prevent any contact with the coolant. You should also make sure that the container you are using to dispose of the coolant is properly labeled and is made of a suitable material.
It is crucial to avoid mixing the coolant with any other chemicals or liquids as it can result in dangerous reactions. Additionally, never pour coolant down the drain or dispose of it in the trash as it can harm the environment. Instead, look for specialized recycling programs that accept coolant or contact your local waste management authority for advice on proper disposal methods.
By following these safety tips, you can safely and responsibly dispose of coolant without risking your health or the environment.
FAQs
What are the steps to take coolant out of a car?
First, wait for the engine to cool down. Then, locate the radiator cap and remove it. Drain the coolant into a pan by opening the drain valve. Replace the cap and dispose of the old coolant properly.
Can I remove the coolant from a hot engine?
No, it’s not safe to remove coolant from a hot engine as it can cause burns. Wait for the engine to cool down before attempting to drain the coolant.
How often should I replace the coolant in my car?
It’s recommended to replace the coolant in your car every 2-3 years or according to the manufacturer’s guidelines.
How do I check the coolant level in my car?
Locate the coolant reservoir under the hood and check the level gauge. The coolant level should be between the minimum and maximum marks. If it’s low, add more coolant.
What type of coolant should I use for my car?
Refer to your car’s owner manual or consult a mechanic to determine the recommended coolant type and brand for your car.
What are the signs of a low coolant level?
A low coolant level can cause the engine to overheat, produce strange sounds, or emit a sweet odor. Check the coolant level and add more if necessary.
Can I reuse old coolant?
It’s not recommended to reuse old coolant as it may contain contaminants and lose its effectiveness. Dispose of the old coolant properly and use new coolant for your car.