
Do you find yourself in a sticky situation with a clogged coolant hose? Don’t panic! Unclogging a coolant hose is easier than you think. Whether you’re a seasoned DIY enthusiast or a novice car owner, all it takes is a little bit of time and some basic tools to get your coolant flowing smoothly again. In this step-by-step guide, we’ll walk you through the process of unclogging a coolant hose.
We’ll cover everything from diagnosing the problem to removing the blockage and getting your car back on the road in no time. So grab your toolbox and get ready to tackle this common car maintenance issue with confidence. Imagine your coolant system as a network of veins that keeps your engine cool and operating at its best.
Just like a clog in your bloodstream can cause health issues, a clogged coolant hose can lead to overheating and potential damage to your engine. So it’s essential to address the problem promptly. The good news is that you don’t need to be a mechanic to unclog a coolant hose.
With a few simple steps, you can clear the blockage and restore proper coolant flow. Before you know it, your engine will be running smoothly, and you’ll be back on the road worry-free. So, let’s get started on this DIY adventure and learn how to unclog a coolant hose in a few easy steps.
Get ready to impress your friends with your newfound car knowledge and avoid hefty repair bills at the same time.
Table of Contents
- 1 Introduction
- 2 Tools and Materials You Will Need
- 3 Step 1: Safety Precautions
- 4 Step 2: Locate the Coolant Hose
- 5 Step 3: Drain the Coolant
- 6 Step 4: Remove the Hose
- 7 Step 5: Clean the Hose
- 8 Step 6: Inspect for Damage or Wear
- 9 Step 7: Replace or Reinstall the Hose
- 10 Step 8: Refill the Coolant
- 11 Conclusion
- 12 FAQs
Introduction
Are you experiencing overheating issues with your car? A possible cause could be a clogged coolant hose. The coolant hose is responsible for circulating the coolant through the engine and radiator, helping to regulate the engine’s temperature. Over time, debris and sediment can build up inside the hose, causing it to become partially or completely blocked.
This can prevent the coolant from flowing properly and lead to overheating. Fortunately, unclogging a coolant hose is a relatively straightforward process that you can do yourself. In this article, we will guide you step by step on how to unclog a coolant hose and get your car running smoothly again.
So, let’s get started and get that coolant flowing freely once more.
Understanding the Importance of Coolant Hoses
coolant hoses
Identifying a Clogged Coolant Hose
coolant hose, clogged, identifying
Tools and Materials You Will Need
When it comes to unclogging a coolant hose in your car, having the right tools and materials is essential. You will need a few things to get the job done properly. First and foremost, you will need a set of wrenches or pliers to remove any clamps or fittings that are holding the hose in place.
It’s also a good idea to have a bucket or drain pan handy to catch any coolant that may leak out during the process. Another important tool you will need is a flashlight or work light to help you see what you’re doing under the hood. Additionally, you may also need a pair of gloves and safety goggles to protect your hands and eyes from any coolant splashing.
Finally, you will need a new coolant hose to replace the old one if it is deemed necessary. With these tools and materials in hand, you will be well-equipped to tackle the task of unclogging your coolant hose.
List of Necessary Tools
“list of necessary tools” (Title: Essential Tools and Materials You’ll Need for Your Project) So, you’ve decided to take on a new project. Whether it’s a home improvement task or a creative DIY endeavor, having the right tools and materials at your disposal is essential. Here’s a list of the must-have items you’ll need to successfully complete your project.
First and foremost, you’ll need a good set of hand tools. A hammer, screwdrivers, pliers, and a utility knife are just a few of the basics. These tools will come in handy for a variety of tasks, from hanging pictures to assembling furniture.
Make sure you invest in high-quality tools that can withstand heavy use. Next, consider the power tools you’ll need for your project. Depending on the nature of your task, you may require a drill, circular saw, or even a table saw.
These power tools can save you a significant amount of time and effort, making your project more efficient and enjoyable. Don’t forget about safety! Protecting yourself should be a top priority, so make sure to have safety gear on hand. Safety glasses, gloves, and a dust mask are essential items to keep you protected from any potential hazards.
To complete your project, you’ll also need a variety of materials. Nails, screws, and bolts are crucial for fastening things together, while adhesives such as glue or epoxy can provide extra strength. Additionally, having the right measuring tools, such as a tape measure or level, will ensure accuracy and precision in your work.
Lastly, having a reliable toolbox or storage system will keep your tools organized and easily accessible. This will save you time and frustration searching for the right tool when you need it most. Remember, having the right tools and materials at your disposal can make all the difference in the success of your project.
Required Materials
required materials, tools and materials, projects In order to successfully complete any DIY project, it is essential to have the right tools and materials on hand. Whether you are a seasoned DIY enthusiast or a beginner tackling your first project, having the necessary tools will make your job much easier. Some common tools that you may need include a hammer, screwdriver set, wrenches, pliers, and a tape measure.
These basic tools can come in handy for a wide variety of projects. Additionally, it is important to have the proper safety gear such as goggles, gloves, and a dust mask to protect yourself while working. In terms of materials, it will depend on the specific project you are undertaking.
This could range from wood for building furniture to paint for a room renovation. Before starting any project, take the time to gather all the required tools and materials so that you have everything you need to get the job done right.
Step 1: Safety Precautions
When it comes to unclogging a coolant hose, it’s important to prioritize safety. Before you begin, make sure the engine is completely cool. This will prevent any accidental burns or injuries.
Additionally, wear protective gloves and eyewear to protect yourself from any possible spills or splashes. It’s also a good idea to have a bucket or container nearby to catch any excess coolant that may come out during the unclogging process. Taking these precautions will help ensure a safe and smooth unclogging experience.
Protective Gear
It’s important to prioritize safety when participating in any activity that requires protective gear. Whether you’re riding a bike, playing a sport, or working in a hazardous environment, taking the necessary precautions can make all the difference. Step one in ensuring safety is to equip yourself with the right gear.
From helmets and knee pads to safety goggles and gloves, having the appropriate protective gear can greatly reduce the risk of injuries. Think of it as a shield that guards against potential harm. Just as a knight wouldn’t go into battle without armor, you shouldn’t engage in any activity without the proper protective gear.
So, before you embark on your next adventure or job, don’t forget to gear up and protect yourself. Safety should always come first!
Safety Measures for Working with Coolant
coolant, safety measures, working with coolant
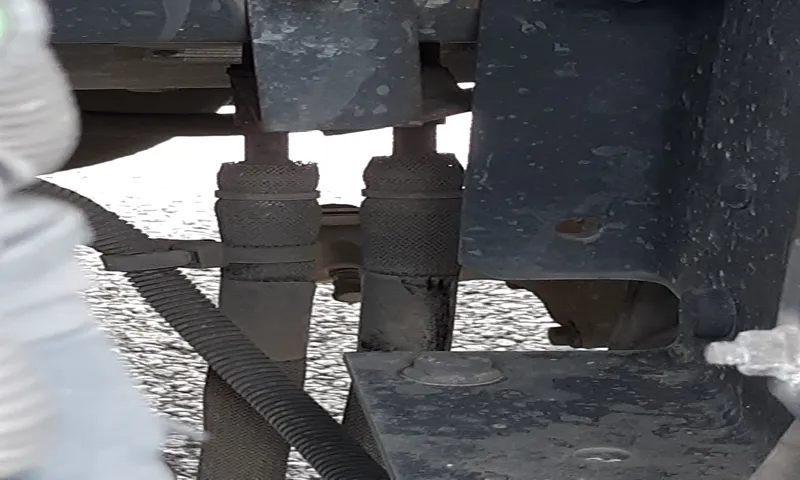
Step 2: Locate the Coolant Hose
When it comes to unclogging a coolant hose, the first step is to locate the hose itself. The coolant hose is an essential part of the vehicle’s cooling system, carrying coolant from the radiator to the engine and back. It is usually made of rubber and can be found under the hood, connecting the radiator and the engine.
Locating the coolant hose may require you to open the hood and visually inspect the engine bay. Look for a rubber hose that is connected to the radiator and the engine. It is essential to identify the coolant hose correctly to ensure that you are working on the right one and avoid any potential damage.
Once you have located the coolant hose, you can move on to the next step in the process of unclogging it.
Identifying the Coolant Hose in Your Vehicle
coolant hose in vehicle, locate coolant hose
Examine the Hose for Signs of Blockage
In order to diagnose and fix any blockages in your coolant system, one of the first things you should do is locate the coolant hose. This hose is an essential component of the system, as it transports the coolant from the radiator to the engine, helping to regulate the engine temperature. The coolant hose is typically made of rubber and can be found in the engine compartment, connecting the radiator to the engine.
To locate it, you can follow the path of the radiator hoses, which are generally large and have clamps securing them to various parts of the engine. Once you have located the coolant hose, it’s time to move on to the next step of examining it for signs of blockage.
Step 3: Drain the Coolant
So, you’ve discovered that your coolant hose is clogged and you’re wondering how to go about unclogging it. Well, don’t worry, I’m here to guide you through the process step by step. The third step in this process is to drain the coolant from your system.
This is important because you don’t want the coolant to spill all over the place when you start to work on unclogging the hose. To drain the coolant, you’ll need to locate the drain plug on your radiator. It’s usually located at the bottom of the radiator, but consult your vehicle’s manual if you’re not sure.
Once you’ve located the drain plug, place a container or bucket underneath it to catch the coolant. Then, using a wrench or pliers, loosen the drain plug and allow the coolant to flow out into the container. Be careful, as the coolant can be hot and can cause burns.
Once all the coolant has drained out, you can move on to the next step in the process. Remember to properly dispose of the coolant in accordance with local regulations.
Proper Coolant Drainage Procedure
coolant drainage procedure, drain coolant, coolant system maintenance, car maintenance
Preventing Coolant Spillage
prevent coolant spillage, drain coolant
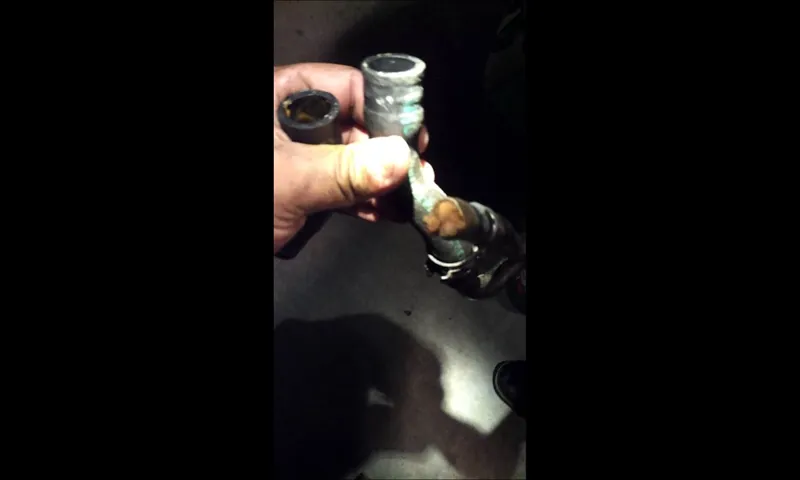
Step 4: Remove the Hose
Now that you have located the clogged coolant hose, it is time to remove it and clear out the blockage. Begin by carefully loosening the clamps that secure the hose in placexve4(move) them out of the way. Remember to work with caution as the hoses may still contain hot coolant.
Once the clamps are loose, gently wiggle the hose back and forth to loosen it from its connection points. If you are having trouble removing the hose, try twisting it slightly to break any seal that may have formed. It may also help to use a pair of pliers to grip the hose and give it a firm tug.
Be patient and persistent, as some hoses can be stubborn to remove. Once the hose is disconnected, inspect it for any signs of cracks or damage. If necessary, replace the hose with a new one before reattaching it.
Removing the clogged hose is an important step in unclogging your coolant system and ensuring proper engine function.
Tools and Techniques for Removing Clamps
In this step, we’ll focus on removing the hose from the clamp. Once the clamp is loosened, carefully slide the hose off the connection point. This may require a bit of wiggling or twisting to break any stubborn seals.
If the hose seems stuck, try using a pair of pliers or channel locks to get a better grip and gently pull it off. Be cautious not to use too much force, as this could damage the hose or the connection point. It’s also important to note that some hoses may have additional attachments, such as clips or clamps, that need to be removed before the hose can be fully taken off.
Take your time and carefully inspect the hose to ensure all connections are detached before proceeding to the next step.
Gently Detach the Hose from the Connectors
Once you’ve turned off the water supply and drained the water from the hose, it’s time to remove the hose from the connectors. This step is important because it allows you to fully detach the hose and prepare it for cleaning or storage. To remove the hose, start by loosening the connectors.
Depending on the type of connectors you have, you may need to twist them counterclockwise or use a wrench to loosen them. Be careful not to apply too much force, as this could damage the connectors. Once the connectors are loose, gently pull the hose away from them.
If the hose is stuck, you can try wiggling it or using a pair of pliers to help loosen it. Keep in mind that different hoses and connectors may have different removal methods, so be sure to consult the manufacturer’s instructions if you’re unsure. By following these steps, you’ll be able to easily remove the hose and get it ready for its next use.
Step 5: Clean the Hose
So, you’ve reached step 5 of unclogging your coolant hose. This is the crucial step of actually cleaning the hose to remove any blockages that may be causing your engine to overheat. To do this, you’ll need a few supplies on hand.
First, you’ll need a bucket to catch any coolant that may still be in the hose. Next, you’ll need a clean rag or towel to wipe down the hose and remove any debris. Finally, you’ll need some distilled water or a gentle cleaning solution to flush out the hose thoroughly.
Begin by disconnecting the hose from both ends, being careful not to spill any coolant. Place one end of the hose into the bucket and pour some of the distilled water or cleaning solution into the other end. Allow the liquid to flow through the hose, pushing out any debris or blockages as it goes.
You can use your rag or towel to wipe down the exterior of the hose as well, ensuring that it is clean and free of any gunk. Once you’ve flushed the hose thoroughly, reattach it to the engine and radiator, making sure to tighten any clamps or connections securely. And just like that, your coolant hose is clean and ready to keep your engine running cool!
Use a Hose Cleaning Kit
hose cleaning kit
Alternative Cleaning Methods
hose cleaning, cleaning methods, alternative cleaning methods
Step 6: Inspect for Damage or Wear
Alright, so we’ve made it to step 6 in our quest to unclog a coolant hose. This step is all about inspecting the hose for any signs of damage or wear. Now, when it comes to coolant hoses, there are a few things we want to keep an eye out for.
First and foremost, check for any cracks or splits in the hose itself. These can occur over time due to the constant exposure to heat and pressure. Additionally, be on the lookout for any signs of wear, such as weak spots or bulges.
These can indicate that the hose is weakening and may be prone to a blowout in the future. Finally, check the clamps and connections to make sure they are tight and secure. Loose clamps can cause coolant to leak or blockage to occur.
Taking the time to inspect your coolant hose can help prevent any future issues and keep your engine running smoothly. So don’t skip this step!
Check for Cracks, Leaks, or Deterioration
“cracks, leaks, deterioration, inspect for damage or wear” Do you ever feel like your house is trying to tell you something? Well, it might be! When it comes to home maintenance, one important step is to inspect for any cracks, leaks, or signs of deterioration. Just like our bodies, houses can develop wear and tear over time. It’s essential to catch these issues early before they turn into bigger, more expensive problems.
So, grab a flashlight and get ready to play detective in your own home! Start by examining the exterior walls of your house. Look for any cracks or gaps that could be potential entry points for unwanted pests or water. These cracks may seem small, but they can grow over time, causing even more damage.
Pay attention to any areas where the siding may have come loose or where the paint is peeling. These are signs that your exterior may be deteriorating and in need of some TLC. Next, turn your attention to the interior of your home.
Inspect the ceilings for any water stains or signs of leaks. This could indicate a problem with your roof or plumbing systems. Check the floors for any cracks or unevenness, as this could be a sign of foundation issues.
Don’t forget to inspect the walls for any cracks or bulges that could point to structural problems. In addition to these visual inspections, it’s also important to listen for any strange sounds or smells. Do you hear dripping or gurgling noises when you flush the toilet or run the dishwasher? This could indicate a plumbing issue.
Are there any musty or damp odors in certain areas of your home? This could be a sign of water damage or mold growth. Remember, prevention is key when it comes to maintaining your home. By regularly inspecting for cracks, leaks, and signs of deterioration, you can catch potential problems early and save yourself from costly repairs down the road.
Possible Causes of Hose Damage
Possible causes of hose damage can range from wear and tear over time, to accidental cuts or punctures. It’s important to regularly inspect your hoses for any signs of damage, as even small tears or cracks can lead to significant problems down the line. When inspecting your hose, look for any visible signs of wear, such as fraying or splitting, as well as any areas that may have been crushed or bent.
Additionally, check for any leaks or dripping around the connections, as this can indicate a damaged or worn-out hose. It’s also worth checking the hose for any foreign objects or debris that may have gotten caught or lodged in the hose, as these can cause blockages or further damage. By regularly inspecting your hoses for damage or wear, you can prevent costly repairs or replacements in the future and ensure that your hoses are working efficiently and effectively.
Step 7: Replace or Reinstall the Hose
Replacing or reinstalling a clogged coolant hose is an essential step in resolving cooling system issues in your vehicle. Once you have identified the clog and determined that the hose needs to be replaced, it’s time to get to work. Start by locating the hose that is causing the problem.
This can usually be done by following the path of the coolant hoses and identifying any areas that feel soft or squishy. Once you have located the clogged hose, use a pair of pliers to remove any clamps or connections that are holding it in place. Be sure to have a container nearby to catch any coolant that may spill out during the process.
Once the hose is detached, inspect it closely for any signs of damage or wear. If the hose is in good condition, you can simply reinstall it by reversing the steps you took to remove it. However, if the hose is damaged or worn out, it is best to replace it with a new one.
Make sure to choose a hose that is compatible with your vehicle’s make and model. Slide the new hose onto the fittings and secure it in place with clamps or connections. Double-check all connections and make sure they are tight before adding coolant back into the system.
Replacing or reinstalling a clogged coolant hose may seem like a daunting task, but with the right tools and a little patience, it can be done. Remember to always refer to your vehicle’s manual for specific instructions and safety precautions.
Determining if Replacement is Necessary
Determining if Replacement is Necessary
Proper Installation Techniques
After removing the old hose, it’s time to replace or reinstall a new hose in your equipment. This step is crucial to ensuring that everything is properly connected and sealed. Depending on the type of equipment you’re working with, you may need to refer to the manufacturer’s instructions for the specific hose installation process.
In some cases, you may need to use hose clamps or other securing mechanisms to hold the hose in place. It’s important to make sure that the hose is securely attached and is not loose or leaking. You don’t want any leaks or loose connections that could cause damage or compromise the efficiency of your equipment.
Take your time with this step and double-check that everything is in place before moving on to the next step.
Step 8: Refill the Coolant
After completing the previous steps, it’s time to refill the coolant in your vehicle. This is an important step to ensure that your engine stays cool and runs smoothly. To do this, locate the coolant reservoir, which is usually a plastic tank with a cap labeled “coolant” or “engine coolant.
” Remove the cap and check the fluid level. If it’s low, you’ll need to add more coolant. When adding the coolant, make sure to use the right type for your vehicle, as specified in the owner’s manual.
It’s important to use a mixture of coolant and water in the correct ratio, usually 50/50, to prevent freezing and overheating. Once you’ve added the coolant, replace the cap and start your engine. Let it run for a few minutes to circulate the coolant throughout the system.
Afterward, check the coolant level again and top it off if necessary. Keep an eye on the coolant level in the following days to ensure there are no leaks or any further issues with your coolant system.
Replenishing the Coolant Reservoir
coolant reservoir, refill coolant, replenish coolant, cooling system Coolant is a crucial component in keeping your car’s engine cool and preventing it from overheating. Over time, coolant levels may deplete due to evaporation or leaks. To ensure that your engine stays properly cooled, it’s important to regularly check and refill the coolant reservoir.
The coolant reservoir is a translucent plastic container located near the radiator, and it is marked with minimum and maximum fill lines. To refill the coolant, start by making sure the engine is cool. Then, remove the cap of the coolant reservoir and carefully pour the coolant into the reservoir until it reaches the maximum fill line.
It’s important not to overfill the reservoir, as this can cause overflow and lead to coolant leaks. After refilling the coolant, replace the cap securely. It’s recommended to also check for any signs of leaks or damage to the reservoir.
Remember, the coolant in your vehicle plays a vital role in maintaining the optimal temperature of the engine. Without it, the engine can overheat, leading to potential damage and costly repairs. Regularly inspecting and replenishing the coolant reservoir will help ensure that your engine stays cool and performs at its best.
Bleeding Air from the Cooling System
Refilling the coolant is the final step in the process of bleeding air from the cooling system. Once you have finished releasing the air pockets and ensuring that the system is properly bled, it is essential to refill the coolant to the correct level. This step is crucial because coolant is responsible for regulating the temperature of the engine and preventing it from overheating.
Without enough coolant, the engine can suffer serious damage. To refill the coolant, locate the coolant reservoir, which is typically a translucent plastic tank near the radiator. Remove the cap and pour a 50/50 mixture of coolant and water into the reservoir until it reaches the “full” line.
Replace the cap securely, and you’re done! It’s important to remember that the engine should be cool before attempting to refill the coolant, as the hot coolant can cause burns. Additionally, be sure to use the correct type of coolant recommended by your vehicle’s manufacturer. Regularly checking and refilling the coolant is an essential part of vehicle maintenance to ensure that your engine stays cool and runs efficiently.
Conclusion
And there you have it, folks! The art of unclogging a coolant hose unveiled. It may seem like a daunting task, but with a little patience and a few key tools, you can regain the flow of the liquid life-force into your car’s engine. Remember, radiator blockages can happen to anyone.
It’s like that annoying relative who overstays their welcome at family gatherings – eventually, they have to be shown the door. So, roll up your sleeves, grab your trusty wire coat hanger, and get ready to be the hero of your engine’s circulation system. In the grand scheme of automotive maintenance, unclogging a coolant hose is a small victory, sure, but it’s the little victories that keep us humble and remind us that we are the masters of our own car’s destiny.
So the next time you find yourself faced with a sluggish or clogged coolant hose, don’t panic – channel your inner MacGyver, and become a coolant hose unclogging legend!”
Regular Maintenance to Prevent Coolant Hose Clogs
In order to properly maintain your vehicle’s coolant system and prevent coolant hose clogs, it is important to regularly refill the coolant. This is typically done after performing any maintenance or repairs that may have caused a loss of coolant. Refilling the coolant ensures that there is enough fluid in the system to properly cool the engine and prevent overheating.
When refilling the coolant, it is important to use the correct type of coolant recommended by your vehicle’s manufacturer. This information can usually be found in the owner’s manual or on the coolant reservoir cap. Using the wrong type of coolant can lead to engine damage and potential clogs in the coolant hoses.
To refill the coolant, start by locating the coolant reservoir. This is typically a translucent plastic container located near the radiator. Once you have located the coolant reservoir, remove the cap and check the fluid level.
If the level is low, use a funnel to slowly pour the coolant into the reservoir until it reaches the proper level. After refilling the coolant, be sure to replace the reservoir cap securely. It is also a good idea to check for any leaks or signs of damage to the coolant hoses.
If you notice any leaks or damage, it is important to have them repaired as soon as possible to prevent further issues. Regularly refilling the coolant is an important step in maintaining the health of your vehicle’s coolant system. By doing so, you can prevent clogs in the coolant hoses and ensure that your engine stays cool and running smoothly.
So, don’t forget to give your vehicle the care it deserves and keep those coolant levels topped up!
Seeking Professional Assistance if Necessary
car coolant refill, professional assistance, car maintenance
– If you’re not confident in your ability to refill the coolant in your car, it is always a good idea to seek professional assistance. While this step may seem relatively straightforward, it is crucial to ensure it is done properly to avoid damaging your vehicle’s engine.
Professional technicians have the expertise and experience to perform this task correctly, using the right coolant for your specific car make and model. They can also inspect the cooling system for any leaks or issues that may need immediate attention. By relying on the knowledge and skills of professionals, you can have peace of mind knowing that your car’s coolant system is in good hands.
FAQs
How do I know if my coolant hose is clogged?
If your engine is overheating or you notice a decrease in coolant flow, it may indicate a clogged coolant hose.
What are the common causes of a coolant hose clog?
Clogs in coolant hoses can be caused by debris, sediment, or rust that accumulates over time.
Can I unclog a coolant hose myself?
Yes, you can try to unclog a coolant hose yourself using methods such as flushing the system or using a hose cleaning solution.
What is the best way to unclog a coolant hose?
Flushing the coolant system with a hose or using a specialized coolant system cleaner can help remove clogs in coolant hoses.
Are there any precautions I should take when unclogging a coolant hose?
It is important to follow the manufacturer’s instructions and wear protective gear, as coolant may be hot and under pressure.
Can a clogged coolant hose cause engine damage?
Yes, a clogged coolant hose can prevent proper cooling of the engine, leading to overheating and potential engine damage.
How often should coolant hoses be checked for clogs?
It is recommended to inspect coolant hoses regularly, especially during routine maintenance, to catch any potential clogs early on.
What other signs should I look for to determine if a coolant hose is clogged? A8. Other signs of a clogged coolant hose include coolant leaks, unusual noises from the engine, or a strong smell of coolant.
Can a coolant hose be replaced if it is severely clogged?
In cases where a coolant hose is severely clogged or damaged, it may be necessary to replace the hose entirely.
Are there any preventive measures to avoid coolant hose clogs?
Flushing the coolant system regularly, using a coolant filter, and keeping the system free from debris can help prevent coolant hose clogs.
Can a coolant hose clog be prevented by using a different coolant type?
While using the correct coolant type is important, it may not guarantee the prevention of coolant hose clogs. Proper maintenance and regular inspections are still necessary.
Should I seek professional help to unclog a coolant hose?
If you are unsure or uncomfortable with unclogging a coolant hose yourself, it is recommended to seek professional assistance from a mechanic or technician.