
Having a properly functioning coolant system is crucial for maintaining the optimal performance of your vehicle’s engine. However, over time, debris and sediment can build up in the coolant system, leading to clogs and reduced efficiency. If your engine is running hotter than usual or you notice coolant leaks, it may be time to unclog your coolant system.
In this blog post, we will explore effective methods to unclog your coolant system and keep your engine running smoothly. So, let’s dive in and learn how to unclog your coolant system like a pro!
Table of Contents
Introduction
Are you experiencing issues with your coolant system? Is your engine temperature rising and causing you concern? If so, there is a good chance that your coolant system is clogged and in need of a thorough cleaning. But don’t worry, with the right steps and a little bit of elbow grease, you can unclog your coolant system and get your engine running smoothly again. In this blog post, we will walk you through the process of unclogging your coolant system step by step, so you can get back on the road in no time.
So grab your tools and let’s get started on unclogging your coolant system.
Understanding the Coolant System
understanding the coolant system
Signs of a Clogged Coolant System
clogged coolant system, signs of a clogged coolant system, overheating engine, coolant level, coolant leaks, coolant pressure, coolant color, coolant odor. Introduction: You hop into your car, ready to hit the road, and notice that the temperature gauge is rising. Panic sets in as you realize that your engine might be overheating.
One of the potential culprits for an overheating engine is a clogged coolant system. The coolant system plays a crucial role in maintaining the engine’s temperature, so it’s important to recognize the signs of a clogged system. In this blog post, we will explore some of the common signs that indicate a clogged coolant system, such as changes in coolant level, leaks, pressure, color, and odor.
By being aware of these signs, you can take action to prevent further damage to your engine and avoid costly repairs down the line.
The Tools You Will Need
If you’re experiencing a coolant system clog in your car, don’t panic! Unclogging the coolant system is a task that can be done with a few simple tools and a little bit of patience. The first tool you will need is a pair of pliers or a wrench to disconnect the hoses from the coolant system. This will allow you to flush out any debris or clogs that may be causing the issue.
Next, you will need a bucket or a container to catch the coolant that will drain out of the system. It’s important to properly dispose of the coolant, as it can be toxic to the environment. You will also need a hose or a pressure washer to flush out the system.
By applying water or pressure to the system, you can effectively clear out any blockages. Additionally, you may want to have a clean rag or towel on hand to wipe up any spills or messes that may occur during the unclogging process. Overall, unclogging a coolant system can be a relatively simple task with the right tools and a little bit of know-how.
Don’t let a clogged coolant system ruin your day – get the proper tools and get to work!
Coolant Flush Kit
coolant flush kit
Safety Gear
safety gear, tools, safety equipment, protective gear, personal protective equipment (PPE) Are you ready to tackle that home improvement project you’ve been dreaming of? Before you dive in, make sure you have the right tools to keep you safe. Safety gear is not something to take lightly – it’s essential for protecting yourself from accidents and injuries. So, what are the tools you will need? First and foremost, you must have the appropriate personal protective equipment (PPE).
This includes items like safety goggles, gloves, and a hard hat. Safety goggles are crucial for shielding your eyes from flying debris or chemicals that could cause serious harm. Gloves are necessary for protecting your hands from cuts, abrasions, and exposure to harmful substances.
And a hard hat is essential for safeguarding your head from falling objects or accidental bumps. Another important tool to have is a high-visibility vest. If you’re working in an area where there’s a risk of being hit by a car or machinery, a high-visibility vest can make all the difference.
It makes you stand out and increases your chances of being seen, reducing the likelihood of accidents. If you’re planning on working with power tools, ear protection is a must. Power tools can be incredibly loud and prolonged exposure can cause irreversible damage to your ears.
Invest in a good pair of ear muffs or ear plugs to protect your hearing while you work. Lastly, don’t forget about proper footwear. If you’re working in an environment where there’s a risk of heavy objects falling on your feet or sharp objects piercing through, steel-toed boots are a must.
They provide added protection to your feet and reduce the risk of injury. When it comes to safety gear, it’s better to be over-prepared than under-prepared. Investing in the right tools will not only keep you safe but also give you peace of mind while you work.
Drain Pan
drain pan, tools, need
Step-by-Step Guide
So you’ve noticed that your coolant system is clogged, huh? Well, don’t worry, because I’m here to guide you through the process of unclogging it step-by-step. First things first, you’ll want to gather all the necessary tools and materials. This includes a coolant system flush kit, a drain pan, a hose, and fresh coolant.
Once you have everything you need, start by locating the radiator drain valve and placing the drain pan underneath it. Open the valve and allow the coolant to completely drain out. Now it’s time to mix the coolant flush solution with water as per the instructions on the package.
Once the solution is ready, pour it into the radiator through the fill cap. Next, start the engine and let it run for about 10 minutes or as directed by the flush kit instructions, allowing the solution to circulate through the system. After the designated time, turn off the engine and let it cool down.
At this point, it’s important to note that you should never open the radiator cap while the engine is still hot, as it could cause severe burns. Once the engine has cooled, open the drain valve again and let the solution drain out completely. Now it’s time to flush the system with water.
Use the hose to flush water through the radiator inlet, allowing it to flow until the water coming out is clear. Close the drain valve and fill the system with fresh coolant, making sure to check the owner’s manual for the correct type and amount of coolant to use. Finally, start the engine and let it run for a few minutes to circulate the coolant through the entire system.
And that’s it! Your coolant system should now be unclogged and ready to keep your engine cool. Remember, if you’re unsure or uncomfortable performing this process yourself, it’s always best to consult a professional mechanic.
Step 1: Locate the Radiator
radiator, locate, step-by-step guide. Finding the radiator in your car may seem like a daunting task, especially if you’re not familiar with the inner workings of your vehicle. However, with a little guidance and knowing what to look for, locating the radiator can be a simple and straightforward process.
So, let’s dive in and explore a step-by-step guide to help you locate your car’s radiator. The first step in locating the radiator is to open the hood of your car. Once you have the hood open, take a moment to familiarize yourself with the engine bay.
Look for any parts or components that might be connected to the radiator, such as hoses or a grille. Next, you’ll want to look for a metal or plastic container with fins on it. This is the radiator itself.
It’s usually positioned at the front of the engine bay, near the grille, to allow for optimal airflow. Sometimes, the radiator may be covered by a plastic panel, so be sure to remove any covers if necessary. Once you’ve identified the radiator, take a closer look at its construction.
You’ll notice that it has multiple tubes or pipes running through it. These tubes are responsible for circulating coolant throughout the engine, helping to regulate its temperature. You may also see a cap on top of the radiator, which is used to add or remove coolant as needed.
In some cars, particularly older models, the radiator may be mounted on the side or back of the engine bay. If this is the case, you may need to refer to your car’s manual or consult with a mechanic to locate it accurately. Remember that the radiator is an essential part of your car’s cooling system and plays a crucial role in preventing the engine from overheating.
Step 2: Prepare the Coolant Flush Kit
coolant flush kit.
Step 3: Drain the Coolant
drain coolant, car maintenance, flushing coolant, coolant system, vehicle maintenance In this step-by-step guide, we will walk you through the process of draining the coolant from your car’s cooling system. The coolant, also known as antifreeze, plays a crucial role in preventing overheating and freezing in your engine. Over time, the coolant can become contaminated with debris and lose its effectiveness, so it’s important to flush and replace it regularly to maintain optimal engine performance.
To drain the coolant, start by locating the radiator drain valve. This valve is typically located at the bottom of the radiator and can be opened by turning it counterclockwise. Before you open the valve, it’s essential to place a drain pan underneath to catch the coolant.
This will prevent it from spilling onto the ground and causing environmental harm. Once the drain pan is in place, carefully open the radiator drain valve. As you do this, the coolant will start to flow out through the valve and into the drain pan.
To speed up the process, you can also remove the radiator cap or open the bleeder valve. This will create a vacuum and allow the coolant to flow out more easily. As the coolant drains, it’s important to keep an eye on the drain pan’s capacity and ensure that it doesn’t overflow.
If needed, you can pause the draining process and empty the drain pan before continuing. Additionally, take note of the color and condition of the coolant as it drains. If it appears dirty or has a foul odor, it may be a sign of underlying issues with your vehicle’s cooling system.
Once all the coolant has drained from the radiator, close the drain valve by turning it clockwise. This ensures that no coolant will leak out of the radiator once you refill it. With the drain valve closed, you can move on to the next step of the coolant flushing process, which involves refilling the system with fresh coolant.
Step 4: Use the Flush Kit to Unclog the System
flush kit, unclog the system. Trying to unclog a plumbing system can be frustrating and time-consuming, especially if the clog is stubborn and resistant to traditional methods. But don’t worry, there’s a solution that can save you from this headache – a flush kit.
This handy tool can help you eliminate those stubborn clogs and get your plumbing system back in working order. So, how do you use a flush kit to unclog the system? Let’s break it down step-by-step. First, you’ll need to gather the necessary equipment for the task: a flush kit (which typically includes a hose, a nozzle, and a valve), a bucket, and some towels or rags to protect your floors from any spills or messes.
Once you have everything ready, it’s time to get started. The first step is to locate the cleanout plug in your plumbing system. This plug is typically located near the main drain line or at the bottom of a pipe.
Once you’ve found it, remove the plug and attach the valve from the flush kit onto the opening. Make sure it’s securely attached to prevent any leaks. Next, take the hose from the flush kit and connect it to the valve.
This hose will serve as the main conduit for the water to flow through and flush out the clog. Once the hose is securely connected, open the valve to allow water to flow into the plumbing system. Now comes the fun part – creating a high-pressure force to dislodge the clog.
To do this, you’ll need to turn on the water source and let it flow through the hose. As the water builds up pressure, it will begin to push against the clog, gradually breaking it apart and clearing the blockage. During this process, it’s important to monitor the flow and pressure of the water.
Step 5: Refill with Fresh Coolant
“cooling system maintenance” Now that you have successfully drained the old coolant from your vehicle’s cooling system, it’s time to refill it with fresh coolant. But before you do, it’s essential to make sure you are using the right type of coolant for your vehicle. Check your owner’s manual or consult with a professional to determine the correct coolant specifications for your specific make and model.
Once you have the appropriate coolant, locate the coolant reservoir in your vehicle’s engine bay. It is usually a clear plastic container with markings indicating the minimum and maximum levels of coolant. Make sure the engine is cool before removing the cap from the reservoir.
Next, use a funnel to pour the fresh coolant into the reservoir. Slowly add the coolant until it reaches the recommended level indicated by the markings on the reservoir. Be sure not to overfill, as this can cause the coolant to overflow when the engine heats up.
After filling the reservoir, replace the cap securely, ensuring it is tightly sealed. It’s also a good idea to check the hoses and connections for any signs of leaks or damage while you are in the process of refilling the coolant. Finally, start the engine and let it run for a few minutes to allow the coolant to circulate throughout the cooling system.
As the engine runs, check the coolant reservoir once again to ensure it is at the proper level. If it is not, add more coolant as needed. Properly refilling your vehicle’s cooling system with fresh coolant is an essential step in maintaining its optimal performance and preventing overheating.
By following the steps in this guide, you can ensure that your engine stays cool and runs smoothly for miles to come.
Tips and Precautions
One of the common issues that car owners may face is a clogged coolant system. This can lead to overheating and potential damage to the engine if not addressed promptly. So, how can you effectively unclog your coolant system? Firstly, it’s important to identify the cause of the clog, which can be anything from sediment buildup to a malfunctioning thermostat.
Once identified, you can use different techniques to clear the blockage. One method involves flushing the system with a coolant flush solution, which helps to break down any deposits or debris. Another option is to use a pressure washer to forcefully remove the clog.
However, it’s important to exercise caution and follow safety guidelines when using this method to avoid damaging the system. Ultimately, it may be best to consult a professional mechanic to ensure that the coolant system is properly and safely unclogged. Remember, proper maintenance and regular check-ups are key in preventing future clogs.
Use Safety Gear
safety gear, precautions, protect yourself
Follow Proper Coolant Disposal Procedures
coolant disposal procedures
Check for Leaks
The main keyword used organically: “Check for Leaks” When it comes to household maintenance, checking for leaks is an essential task that shouldn’t be overlooked. Leaks can cause significant damage to your property, as well as waste water and increase your utility bills. So, how can you effectively check for leaks in your home? Here are a few tips and precautions to keep in mind.
Firstly, start by examining your water meter. Make sure that no water is being used inside or outside the house, and then take a reading of the meter. Wait for a couple of hours without using any water, and then check the meter again.
If there is a change in the reading, even with no water usage, it’s an indication that you might have a leak somewhere in your plumbing system. Next, you should inspect all visible pipes for any signs of leakage. Look for damp spots, water stains, or puddles around your pipes.
If you notice any of these signs, it’s likely that you have a leak. Additionally, check the walls and ceilings for any discoloration or water damage, as this could indicate a hidden leak behind the walls. Another area to pay attention to is your toilet.
A running toilet can waste a significant amount of water, so it’s important to check if your toilet is continuously running or if you hear any unusual noises. You can also try using food coloring in the toilet tank. If the color shows up in the bowl without flushing, there is a leak in the flapper valve.
It’s also a good idea to regularly inspect faucets, showerheads, and other fixtures for any signs of leaks. Look for dripping or leaking water and promptly fix any issues you find. Additionally, keep an eye out for any unusual smells or mold growth, as these could be indications of hidden leaks in your plumbing system.
Conclusion
And there you have it, a step-by-step guide on how to unclog your coolant system. Just remember, all it takes is a little patience, a touch of elbow grease, and perhaps a dash of engineering expertise to breathe new life into your vehicle’s cooling system. So, next time you find yourself stuck on the side of the road with an overheating engine, don’t fret.
Instead, channel your inner mechanic, roll up your sleeves, and tackle the problem head-on. With these simple tips and tricks, you’ll be back on the road and cruising in no time! After all, unclogging your coolant system is not just about fixing your engine’s health; it’s about asserting your dominance over the mechanical world. It’s a battle of wits and wills between you and your vehicle, and by following these steps, you are not just fixing a problem but proving your prowess as a DIY mechanic.
So, go forth, brave adventurer, and let the unclogging of your coolant system be your shining moment of triumph. And remember, when it comes to saving the day and restoring balance to your engine’s temperature, a little know-how and a sprinkle of cleverness will always go a long way. Happy unclogging!”
Maintaining a Healthy Coolant System
coolant system maintenance, healthy coolant system, tips for maintaining coolant system, precautions for coolant system maintenance, maintaining a car’s coolant system, importance of coolant system maintenance, how to keep coolant system in good condition. One essential aspect of car maintenance that often gets overlooked is the coolant system. Neglecting this crucial system can lead to serious engine problems and costly repairs.
To ensure a healthy coolant system and prevent overheating issues, there are a few tips and precautions you should keep in mind. Firstly, regular coolant system maintenance is key. This includes checking the coolant level and quality regularly and topping up or replacing it as needed.
Coolant should typically be changed every two to five years, depending on the manufacturer’s recommendations. It’s also important to ensure that the coolant mixture is correct – usually a 50:50 mixture of coolant and distilled water. Another crucial aspect of coolant system maintenance is checking for leaks.
A leaking coolant system can lead to a loss of coolant, resulting in the engine overheating. Inspect the hoses, radiator, water pump, and other components for any signs of leakage, such as puddles of coolant under the car or visible wet spots. If you notice any leaks, it’s important to address them promptly to prevent further damage.
In addition to regular maintenance, there are a few precautions you can take to keep your coolant system in good condition. Firstly, avoid mixing different types of coolant. Different coolant formulations can react with each other and form deposits or even gel-like substances that can clog the coolant system.
Stick to using the coolant recommended by your vehicle’s manufacturer. It’s also important to avoid using tap water when topping up or replacing coolant. Tap water often contains minerals and impurities that can create deposits and cause corrosion in the coolant system.
Regular Maintenance and Inspections
If you own a car or any other vehicle, regular maintenance and inspections are essential to keep it running smoothly and avoid costly repairs in the future. Here are some tips and precautions to keep in mind. Firstly, make sure to follow the manufacturer’s recommended maintenance schedule.
This includes changing the oil, checking the fluids, and replacing any worn-out parts. Additionally, it’s important to inspect the tires regularly and ensure they are properly inflated and have sufficient tread depth. This not only helps improve fuel efficiency but also enhances road grip and safety.
Another crucial aspect of maintenance is keeping the vehicle clean, both inside and out. Regular washing and waxing help protect the paint and prevent rust. Furthermore, don’t forget to check the brakes, lights, and wipers regularly.
These components play a significant role in ensuring your safety on the road. If you notice any unusual sounds, vibrations, or leaks, it’s best to have them checked by a professional mechanic. Taking these precautionary measures will help extend the life of your vehicle and keep it in optimal condition.
So, be proactive and give your vehicle the care it deserves.
FAQs
How can I unclog my coolant system?
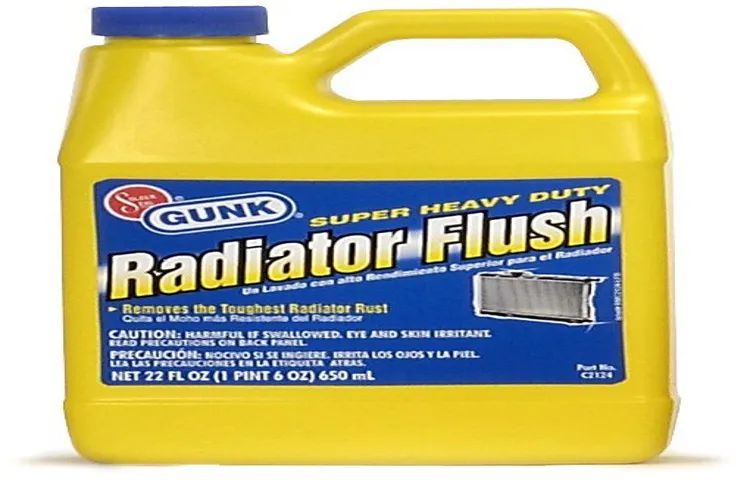
To unclog your coolant system, you can start by checking the radiator for any debris or obstructions. If you find any, you can use a hose or a pressure washer to flush out the system and remove the clog. Additionally, you can also try using a radiator flush additive to help break down any buildup in the system. Remember to always follow the manufacturer’s instructions and consult a professional if you’re unsure.
What are the signs of a clogged coolant system?
Some common signs of a clogged coolant system include overheating of the engine, a sweet smell in the cabin or under the hood, a decrease in engine performance, and a higher temperature gauge reading. If you notice any of these signs, it’s important to address the issue promptly to prevent further damage to your vehicle.
Can I use a DIY method to unclog my coolant system?
While there are DIY methods available to unclog a coolant system, it’s important to exercise caution. Using the wrong tools or techniques can potentially cause damage to your vehicle. It’s always recommended to consult a professional or follow the manufacturer’s guidelines when it comes to maintaining and repairing your coolant system.
How often should I flush my coolant system to prevent clogs?
It’s generally recommended to flush your coolant system every 30,000 to 50,000 miles or every 2 to 5 years, depending on the manufacturer’s guidelines. Regular maintenance can help prevent clogs and ensure optimal performance of your coolant system.
Are there any preventive measures to avoid clogs in the coolant system?
Yes, there are several preventive measures you can take to avoid clogs in the coolant system. One important measure is to use the recommended coolant and coolant-to-water ratio as specified by the manufacturer. Regularly inspecting and replacing worn-out hoses, checking for leaks, and scheduling regular maintenance checks can also help prevent clogs in the coolant system.
Can a clogged coolant system cause engine damage?
Yes, a clogged coolant system can potentially cause engine damage. When the coolant flow is restricted due to a clog, the engine may overheat, resulting in damage to various components such as the radiator, water pump, and even the engine itself. Regular maintenance and prompt action when there are signs of a clogged coolant system can help prevent costly repairs.
How much does it cost to unclog a coolant system?
The cost to unclog a coolant system can vary depending on the severity of the clog and the specific repair or maintenance needed. DIY methods can range from inexpensive, such as using a cooling system flush additive, to more costly if professional help is required. It’s best to consult a mechanic or reputable service center for an accurate estimate based on your specific situation.