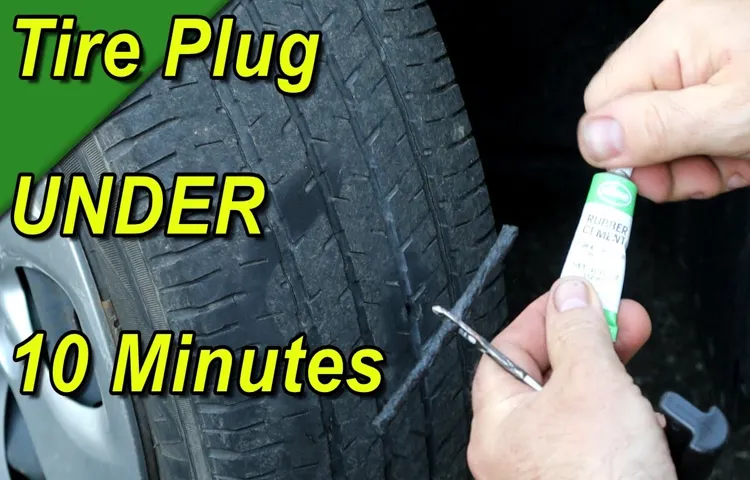
Have you ever been stranded in the middle of nowhere with a flat tire and no spare? It’s not a pleasant experience to say the least. But what if there was a solution that could help you fix the flat tire quickly and be back on the road in no time? That’s where the Slime Tire Plug Kit comes in. This nifty little tool is designed to seal punctures in your tire and get you back on the road in minutes, without the need for a spare or a mechanic.
No more waiting on the side of the road, no more stress, just a quick and easy fix that anyone can do themselves. In this blog, we will explore how to use the Slime Tire Plug Kit and the benefits it offers for motorists. So, let’s dive in and see how this amazing tire repair tool works.
Table of Contents
Getting Started
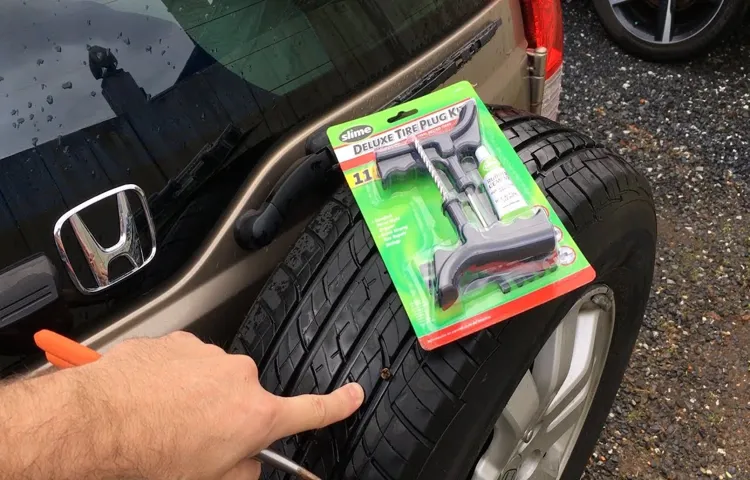
Are you tired of getting a flat tire while on the road and not knowing what to do about it? Look no further than the Slime tire plug kit. This handy tool is designed to quickly and easily repair punctured tires, getting you back on the road in no time. But how exactly do you use it? First, locate the puncture in your tire and remove any debris that may be stuck in the hole.
Next, use the reamer tool included in the kit to make the hole slightly larger. Then, take one of the rubber plugs included and thread it onto the insertion tool. Push the plug into the hole, making sure it is snugly fit within the puncture.
Finally, use the scissors included in the kit to trim any excess plug material sticking out of the tire. That’s it! With the Slime tire plug kit, you can confidently handle any flat tire situation that comes your way.
Step 1: Locate the Puncture
When you notice your tire is flat, the first thing you need to do is find the puncture. It’s important to locate the source of the problem so that you can determine the best way to fix it. The easiest way to locate the puncture is to inspect the tire for any visible holes or tears.
If you can’t find the puncture this way, inflate the tire and listen for any hissing sounds. Once you’ve found the puncture, mark it with a piece of chalk or a pen so you can easily locate it again. The goal is to assess the size and location of the puncture so that you can decide whether it can be repaired or if you need to replace the tire altogether.
By following these steps, you’ll be able to get started on fixing your tire as soon as possible.
Step 2: Remove the Object
After identifying the object causing the blockage, it’s time to start removing the obstacle. Before doing so, we must take safety precautions such as wearing protective gear and turning off the power supply. We can use various tools, such as pliers, wire hangers, or drain snakes, to remove the obstruction.
It’s essential to approach the situation with patience and care to avoid causing further damage. A drain snake is a useful tool that enables us to reach deeper blockages. We can insert the snake into the drain and turn the handle to break up and remove the obstacle.
Remember, safety always comes first when removing the object from the drain.
Step 3: Ream the Hole
Reaming a hole is an important step in many DIY projects, as it ensures that the hole is the right size and shape for the intended use. But before you begin, it’s essential to gather the right tools. You’ll need a reamer – which is like a specialized drill bit with cutting edges on both sides – and a power drill.
Once you have these tools, you can begin the reaming process. First, it’s important to clamp the workpiece securely to a workbench or table. This will help you to maintain control over the drill and reamer.
Then, insert the reamer into the hole and turn on the drill. Apply gentle pressure, pushing the reamer into the hole while keeping it centered and straight. The cutting edges of the reamer will remove material from the inside of the hole bit by bit, gradually widening and refining it until it’s the desired size and shape.
Remember to keep the drill at a slow speed and apply gentle pressure – too much force or speed can cause the reamer to break or damage the workpiece. With some practice and patience, you can use reaming to create precise, high-quality holes in a variety of materials.
Inserting the Plug
Inserting the plug is the next step in using the Slime tire plug kit to fix a punctured tire. First, you need to locate the hole in the tire. Then, take a plug from the kit and insert it into the hole until only a small amount of the plug is left outside of the tire.
Use the insertion tool included in the kit to push the plug into the hole further until it is flush with the tire’s surface. You should feel resistance when pushing the plug, which indicates a good seal. Once the plug is in place, you can trim any excess material with the provided knife, making sure not to cut any part of the plug sticking out of the tire.
It is crucial to remember that a tire plug is a temporary solution, and you should get your tire fixed or replaced as soon as possible to ensure your safety on the road.
Step 4: Thread the Plug
Once you’ve prepared the spark plug, it’s time to thread it into place. Be sure to carefully line up the threads with those in the cylinder head, and then turn the plug clockwise until it’s snug. Use a socket wrench to tighten it until you feel some resistance, and then give it an additional half-turn.
Be careful not to overtighten, as this can strip the threads in the cylinder head and cause major damage. Once you’ve threaded the plug in, you’re ready to move on to the next one. Repeat this process for each plug in your engine.
With careful attention to detail, you can successfully install spark plugs and keep your engine running smoothly.
Step 5: Insert the Plug
After you have stripped the wires and twisted them, it’s time to insert the plug. Make sure that you insert the wires in the right order. You can do this by checking the wiring diagram of the plug.
Most plugs have three wires that you need to insert- live, neutral, and earth. The live wire is usually red and should be inserted into the terminal marked with the letter L. The neutral wire, which is typically black, goes into the terminal marked with the letter N.
Finally, the earth wire, which is green and yellow, is inserted into the terminal marked with the letter E. You should be careful not to over-tighten the screws, but they should also be tight enough so that the wires do not come loose. Once you have inserted all of the wires, check that they are secure before using the electrical appliance.
By following these steps, you can safely wire a plug and avoid any potential hazards.
Step 6: Trim the Excess
Now that you’ve successfully inserted the plug into the hole, it’s time to trim the excess material. This is an important step that will ensure the plug is flush with the surface and looks neat and tidy. To trim the excess, you’ll need a flush cutting saw or a sharp knife.
Carefully cut the excess material flush with the surface, using small, controlled strokes. Be careful not to cut into the surrounding material, as this could cause damage and compromise the integrity of the plug. Once you’ve trimmed the excess, sand the area down until it’s smooth and flush with the surface.
Congratulations, you’ve successfully inserted a plug and trimmed the excess! Your project is one step closer to being complete.
Inflation and Inspection
If you’re in a bind and need to fix a punctured tire quickly, a slime tire plug kit is a great solution. But once you’ve plugged the hole, you’ll need to inflate the tire to get back on the road. Using a tire pressure gauge, check the recommended pressure for your tire and inflate accordingly.
Be sure to use caution when inflating your tire, as overinflating can cause damage. It’s also important to inspect the tire again once it’s inflated to ensure that the plug is properly seated and doing its job. Keep in mind that a tire plug is meant to be a temporary fix, and you should take your vehicle to a professional as soon as possible for a permanent repair or replacement.
By following these steps and using a slime tire plug kit correctly, you can get back on the road safely and quickly.
Step 7: Inflate and Test
Congratulations! You’re almost done setting up your new inflatable equipment. The next step is to inflate and test it. But before you start, make sure to inspect the unit thoroughly for any damage that may have occurred during shipping or handling.
Make sure all seams are properly sealed and all zippers and valves work smoothly. Once you’ve confirmed that everything is in order, it’s time to inflate. Depending on the size of your equipment, you may need an air blower or pump.
Be sure to follow the manufacturer’s instructions carefully to avoid over-inflation, which can cause bursting. Remember, safety always comes first. After inflating, test your equipment by giving it a few hard shakes or jumps to ensure it’s stable.
And there you have it! Your brand new inflatable equipment is ready for use. Just make sure to follow proper safety guidelines and maintenance procedures to prolong its life and ensure maximum enjoyment.
Step 8: Inspect the Repair
After inflating the tire and completing the repair, the last step is to inspect your work thoroughly. This quality check is critical because any oversight can compromise the safety of your vehicle. Begin by visually inspecting the tire to see that it is sitting snugly on the wheel rim without any visible bulging or irregularities.
Give the tire a few nudges to see if it’s firmly in place. If it moves or wobbles, it’s likely that you haven’t reattached it correctly. Secondly, use your hand to feel the tire’s tread for any rough spots or bulges caused by internal damage.
Check the tire pressure with a digital gauge and make sure it matches the recommended pressure for your vehicle. Finally, take your repaired car for a test drive and listen carefully for any unusual noises or vibrations that could indicate further problems. Conducting a thorough inspection is an essential step in ensuring your safety while driving.
Final Thoughts
In conclusion, using a Slime tire plug kit is an easy and effective way to repair small punctures in your tire. By following a few simple steps, you can have your tire fixed in no time and avoid the hassle and expense of having to replace it altogether. Remember to always inspect your tire regularly and address punctures as soon as possible to ensure safe driving.
And with the help of a Slime tire plug kit, you can feel confident in handling any unexpected tire issues on your own. So, don’t wait until you’re stuck on the side of the road – get yourself a Slime tire plug kit and be prepared for the unexpected.
Conclusion
In conclusion, if you find yourself in a sticky situation with a flat tire, fear not! The slime tire plug kit has got your back, providing a quick and easy solution for patching up punctured tires. Simply follow the instructions provided in the kit, and with some patience and finesse, your tire will be up and rolling again in no time. Don’t let a flat tire deflate your spirit – let the slime tire plug kit be your trusty sidekick on the road to adventure!”
FAQs
What is a slime tire plug kit and how does it work?
A slime tire plug kit is a product used to repair punctures in tubeless tires. It works by inserting a rubber plug into the puncture hole, which seals the hole and prevents air from leaking out of the tire.
Can I use a slime tire plug kit on any type of tire?
Slime tire plug kits are designed to work on all tubeless tires, including car tires, motorcycle tires, and bicycle tires. However, they should not be used on tube tires.
How long does it take to use a slime tire plug kit?
The time it takes to use a slime tire plug kit depends on the size of the puncture and your level of experience. Generally, it takes between 10 and 20 minutes to repair a puncture using a slime tire plug kit.
Are slime tire plug kits a permanent solution?
Slime tire plug kits are designed to provide a temporary repair to a puncture, so it is not a permanent solution. It is recommended that you take your vehicle to a tire repair professional as soon as possible after using a slime tire plug kit.
Can I use a slime tire plug kit on a sidewall puncture?
No, slime tire plug kits should not be used on sidewall punctures. They are only designed to repair punctures in the tread area of the tire.
Is it safe to drive on a tire that has been repaired with a slime tire plug kit?
Yes, it is safe to drive on a tire that has been repaired with a slime tire plug kit, as long as the puncture is in the tread area of the tire and the plug has been installed correctly. However, it is recommended that you check the tire pressure regularly to ensure that the tire remains properly inflated.
How many times can I use a slime tire plug kit on the same tire?
A slime tire plug kit should only be used as a temporary repair, so it is recommended that you take your vehicle to a tire repair professional for a permanent repair after using a slime tire plug kit. Using a slime tire plug kit multiple times on the same tire is not recommended.