
Do you dread finding a flat tire while on a road trip? It’s easy to feel helpless in those situations, but not anymore. The solution to your flat tire problems lies in the use of slime tire sealant. It’s a quick and easy fix that can get you back on the road in no time.
In this article, we’ll guide you through the process of using slime tire sealant. From preparing the tire, inserting the sealant, and re-inflating it, we’ll cover all the necessary steps to get you rolling again. So, let’s get started!
Introduction
If you’ve ever experienced a flat tire, you know how frustrating and time-consuming it can be to fix it. Luckily, Slime tire sealant offers a simple and effective solution to this problem. To use Slime tire sealant, start by removing any debris from the punctured area of your tire.
Then, remove the valve core and attach the Slime hose to the valve stem. Squeeze the recommended amount of sealant into the tire, replace the valve core, and inflate the tire to the recommended pressure. As you ride, the Slime sealant will evenly coat the inside of the tire, sealing any punctures or leaks as they occur.
With Slime tire sealant, you can avoid the hassle and expense of traditional tire repair methods and keep on riding with confidence.
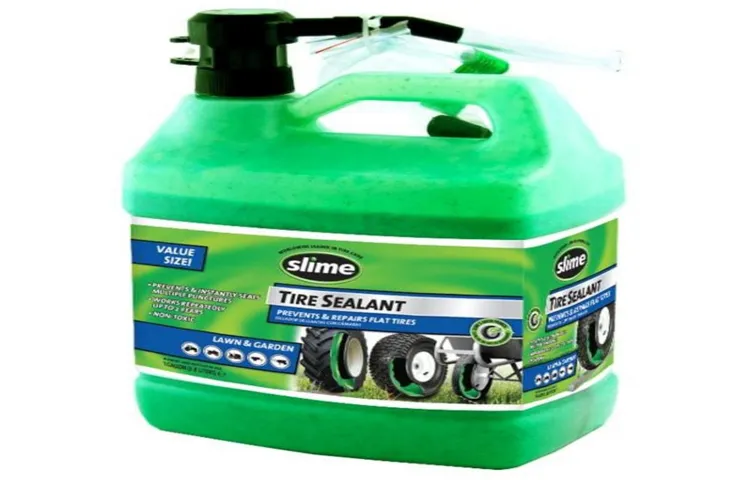
What is Slime Tire Sealant?
Slime Tire Sealant Introduction: Slime tire sealant is a revolutionary product that can turn a flat tire into a patched one without the need to take it to a mechanic or tire shop. It is a liquid gel substance that is poured into a tire just like air and works by coating the inside of the tire with a sealant. When a puncture occurs, the sealant fills the hole and solidifies, creating a temporary seal.
Slime tire sealant is perfect for emergency situations and can be used on a variety of tires, including those on bicycles, cars, trucks and even lawn mowers. With Slime tire sealant, you can be sure that you will make it to your destination, regardless of sudden flat tire situations.

Why Use Slime Tire Sealant?
As a vehicle owner, it can be quite frustrating and dangerous to experience a tire puncture or blowout while driving. This is where Slime tire sealant comes in handy. Slime tire sealant is a special solution that is designed to be injected directly into the tire’s valve stem, sealing any leaks or punctures along the way.
So, why should you use Slime tire sealant? Firstly, the product is incredibly easy to use, and it can save you time and money by eliminating the need for an emergency roadside tire replacement. Additionally, Slime tire sealant is a long-lasting solution that can keep your tires functioning optimally for extended periods. Overall, Slime tire sealant is an efficient and convenient solution that every car owner should have in their kit.
Step-by-Step Instructions
If you’ve been frustrated with having flat tires, you may want to consider using Slime tire sealant to fix the problem. Here’s how to use it step by step. First, remove the valve cap.
Then, attach the Slime tire inflator hose to the valve stem. Screw the cap on the valve and then remove the valve core to deflate your tire. Shake the bottle well before squeezing the recommended amount of Slime into your tire using the inflator hose.
Reinstall the valve core before reinflating the tire with an air compressor. Finally, check the tire’s pressure and adjust accordingly. Slime tire sealant is an effective solution for repairing punctures up to 1/4″ in diameter, and one bottle can repair one flat tire.
With these easy-to-follow instructions, you can use Slime tire sealant with ease and get back on the road quickly.
1. Remove the Valve Cap and Valve Core
If you need to remove the valve cap and valve core from your tire, don’t worry! It is a relatively straightforward process. The first step is to remove the valve cap from the valve stem. You can do this by unscrewing it counterclockwise.
Be sure to set the cap aside in a safe place so it doesn’t get lost. Next, you’ll need to remove the valve core. To do this, you’ll need a valve core remover tool.
Place the tool over the valve stem and turn it counterclockwise to unscrew the valve core. Again, be sure to keep the valve core in a safe place so you don’t lose it. Removing the valve core will allow you to deflate the tire completely, which can make it easier to work on.
This step is crucial if you need to repair a flat tire or add a sealant to your tire. Once you’ve removed the valve core, you can move on to the next step in the process.
2. Shake the Bottle and Attach the Hose
To start your siphon quickly and efficiently, shake the bottle that you’re siphoning from and attach the hose. This step is essential to begin the flow of liquid through the hose without any air bubbles. Give the bottle a few gentle shakes to kick start the siphoning process and prevent any blockages in the hose.
Afterward, slide the hose’s free end into the liquid, ideally near the bottom of the container, and secure the other end to your receiving container. You can use a hose clamp or a simple knot to keep the hose firmly in place. Make sure to consider the distance between the two containers and the height difference between them.
The higher the container to be siphoned from, the faster the liquid will flow, lessening the need for a long hose. With this step complete, you’re well on your way to a successful siphoning process. Now all that’s left to do is let the magic of gravity do its work.
3. Inject the Slime Tire Sealant into the Tire
Injecting the Slime Tire Sealant into your tire is the next crucial step to get you back on the road as quickly and safely as possible. Here are simple step-by-step instructions on how to do it. First, remove the valve cap from the tire valve stem.
Then, attach the Slime tire sealant nozzle to the valve stem. Make sure the nozzle is firmly connected to prevent any air leaks. Once the nozzle is in place, squeeze the Slime tire sealant bottle and inject the recommended amount of sealant into the tire.
Use the measurement guide on the bottle to ensure accurate quantities. After injecting, remove the nozzle and replace the valve cap. Now, rotate the tire in every direction to spread the sealant evenly.
The Slime tire sealant will immediately start sealing any punctures or leaks in the tire, allowing you to get back on the road without any further delays or hassles. So, follow these simple instructions, and enjoy a safer and smoother driving experience.
4. Reinsert the Valve Core and Inflate the Tire
After successfully sealing the puncture in your tire, it’s time to reinsert the valve core and inflate the tire. This step requires a bit of cautiousness to avoid undoing the patch job you’ve just done. First, use the valve core remover to unscrew the valve core from the valve stem.
Then, insert the valve core back into the stem and use the valve core remover to tighten it. It should be tight enough, but not too tight to make it difficult to remove in the future. With the valve core properly seated, it’s time to inflate the tire.
Before you start, check the manufacturer’s instructions to ensure you don’t exceed the recommended tire pressure. It’s essential to use a pressure gauge to monitor the tire pressure accurately. Inflate the tire with an air compressor, and regularly check the pressure until it reaches the recommended level.
Once you’ve reached the correct pressure, use the valve core remover to remove the valve core again and quickly re-tighten it. Finally, check the tire for any leaks, and you’re good to go. With these simple instructions, you can confidently fix a punctured tire and get back on the road in no time.
5. Rotate the Tire to Distribute the Sealant
Rotating the tire is an essential step in distributing the sealant and ensuring it’s coverage throughout the tire. Start by driving the vehicle a few feet forward or backward, and then use a lug wrench to loosen the lug nuts. Use a jack to lift the vehicle and replace the loosened lug nuts with lug bolts.
Now is the perfect time to inspect the tires and make sure there are no punctures or damage to the tire’s surface. Once you’ve determined the tire is in good condition, add pressure if needed and spin the tire to allow the sealant to coat the entire inner surface. After the tire has been evenly coated, it’s time to lower the jack and torque the lug bolts to the recommended specification.
Finally, road test the vehicle and ensure the tire is still properly balanced. Rotating your tire regularly can extend the life of your tire and prevent costly repairs.
Tips and Tricks
Slime tire sealant is a popular and cost-effective way to fix punctures and slow leaks in tires. However, many people may be unsure of how to use it properly. First, make sure your tire is inflated to the recommended pressure.
Next, remove any debris that may be stuck in the tire and locate the puncture. Shake the bottle of Slime and remove the cap, then attach the provided hose to the valve stem. Squeeze the bottle to release the required amount of sealant into the tire, and then quickly inflate the tire to its recommended pressure.
Slime will then coat the inside of the tire and seal the puncture as it rotates. After using Slime, drive the vehicle for a few miles to ensure the sealant is evenly distributed. Remember to bring the tire to a professional as soon as possible to have the puncture repaired permanently.
By following these simple steps, you can easily use Slime tire sealant to fix your flat tire and get back on the road in no time!
How Much Slime Tire Sealant Do You Need?
If you’re considering using slime tire sealant, you’re in luck because it’s a highly effective solution to fixing minor tire punctures. However, one common question is how much slime tire sealant do you actually need? The answer is, it depends on the size of your tire. Generally, a small tire like a bike tire will require about 4 ounces of slime sealant, whereas a large truck tire may require up to 32 ounces.
It’s important to follow the manufacturer’s guidelines, but always err towards using a little more than necessary if you’re unsure. Additionally, it’s essential to check the sealant’s expiration date before applying it as expired sealant may not work as well. By using an appropriate amount of slime sealant and following the proper instructions, you can quickly and easily fix tire punctures and get back on the road in no time.
How Long Does Slime Tire Sealant Last?
Slime tire sealant is great to have on hand in case of emergency, but how long does it last? It’s a common question asked by many car owners. The good news is that Slime tire sealant can last for up to five years, as long as it’s stored correctly. The sealant needs to be kept in a dry, cool place, and away from direct sunlight and high temperatures.
It’s also essential to follow the manufacturer’s instructions and not to overinflate the tire after using the sealant. Using too much sealant or inflating the tire beyond the recommended level can cause the tire to burst. Therefore, it’s essential to use the right amount of sealant and get the tire properly repaired as soon as possible.
In summary, Slime tire sealant can last for up to five years if stored correctly, following the manufacturer’s instructions, and getting the tire repaired promptly.
What to Do if the Tire Still has a Leak?
If you find that your tire still has a leak, don’t fret, there are several things you can do to fix the issue. One tip is to inspect the tire thoroughly and identify where the leak is coming from. Once you have located the puncture or hole, try using a tire sealant to patch up the damage.
Another option is to take the tire to a professional mechanic who can repair or replace the tire depending on the severity of the leak. In some cases, the leak may be caused by a faulty valve stem, which can be easily replaced by a mechanic. Remember to always keep your tires properly inflated and check them regularly to catch any leaks early on.
By staying proactive and taking care of your tires, you can avoid a tire blowout on the road.
Conclusion
In conclusion, using slime tire sealant is like having a superhero on standby for your tires. With its advanced formula and quick application process, you could say that it’s the ultimate tire protector. Just like how Spider-Man swings into action to save the day, all you have to do is pour in the sealant when you get a puncture, and let it work its magic.
So, if you want to keep your tires safe from harm and avoid any unexpected roadblocks, it’s time to add slime tire sealant to your toolkit. Trust us, your tires will thank you.”
FAQs
What is slime tire sealant?
Slime tire sealant is a liquid rubber compound that is used to seal punctures in tires.
How do I use slime tire sealant?
To use slime tire sealant, you need to remove the valve core from the tire, attach the slime bottle to the valve stem, and squeeze the slime into the tire. Then you need to reinflate the tire to the recommended pressure.
Is slime tire sealant effective for repairing punctured tires?
Yes, slime tire sealant is highly effective for repairing punctured tires. It can seal punctures up to 1/4 inch in diameter.
How long does slime tire sealant last?
Slime tire sealant is a temporary fix, and it is designed to last for up to two years. You should replace the sealant after that time.
Can I use slime tire sealant on all types of tires?
Slime tire sealant is suitable for use on all types of tires, including tubeless, tubed, and radial tires.
Is slime tire sealant safe to use?
Yes, slime tire sealant is safe to use. It is non-toxic and non-flammable.
Can I store unused slime tire sealant?
Yes, you can store unused slime tire sealant in a cool, dry place for up to two years. Make sure that the container is tightly sealed.