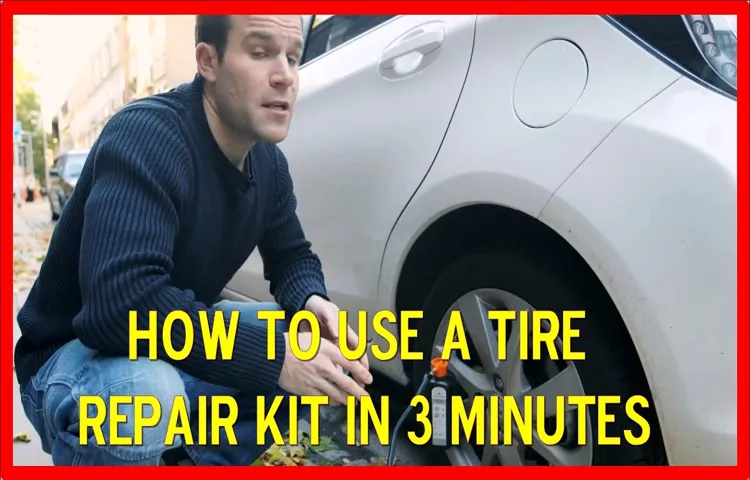
If you are someone who loves the open road, then you know how important it is to be prepared for any unforeseen mishaps. One such mishap is a flat tire. A flat tire can happen at any time, no matter how prepared you are.
That’s where a tire repair kit comes in. Using a tire repair kit can seem daunting, but with the right knowledge, you can fix a flat tire in a matter of minutes. A tire repair kit typically includes a set of pliers, rubber cement, plugs, and a reamer.
Knowing how to use a tire repair kit can save you a lot of time and money. You won’t have to wait for a tow truck or go to a mechanic, which can be quite expensive. Additionally, knowing how to fix a tire yourself can give you peace of mind when you’re on a road trip or in an area with limited access to mechanics.
In this blog post, we will provide you with a step-by-step guide on how to use a tire repair kit properly. We will cover everything from how to find the puncture, how to insert a plug, and how to check the pressure. So, buckle up, and let’s get started on learning how to use a tire repair kit!
Table of Contents
Gather Supplies
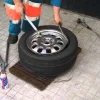
If you’ve ever experienced a flat tire while on the road, you know that it can be a stressful situation. However, having a tire repair kit can make a huge difference in getting you back on the road quickly and safely. The first step is to gather the supplies you need for the job.
Your tire repair kit typically includes a T-handle reamer, a needle tool, rubber string plugs, and lubricant. Before you begin to use the kit, make sure you have a spare tire, a jack, and a lug wrench to remove the flat tire. Once you have all of the supplies at hand, park on a flat surface and engage the parking brake.
Follow the instructions on the tire repair kit to properly plug the hole that caused the flat tire. Remember to always prioritize your safety and the safety of others while repairing a flat tire. With the right tools and proper technique, you can use a tire repair kit to fix your flat tire and get back on the road in no time.
Kit Components
When it comes to creating a DIY project or tackling a repair, having the right tools and components is essential for success. This is why it’s important to gather all the necessary kit components before diving into a project. Depending on the task at hand, kit components can include anything from screws and bolts to electrical wires and circuit boards.
The key is to make sure you have everything you need before starting, so you don’t have to stop in the middle of the project to run to the store. Not only does this save time, it also helps you stay organized and keep your workspace clutter-free. So, before you begin your next DIY project, take the time to gather all the kit components you’ll need to ensure a smooth and successful process.
Safety Precautions
When it comes to safety precautions, one of the best things you can do is gather all the necessary supplies beforehand. This might include things like hard hats, steel-toed boots, work gloves, and protective eyewear. Depending on the job, you might also need specialized equipment like respirators or body harnesses.
It’s important to make sure everything fits properly and is in good condition before you start working – a loose hard hat or broken harness can be just as dangerous as not wearing them at all. Taking the time to gather your supplies and inspect them can help ensure that you’re prepared and safe on the job. So, before you get to work, ask yourself – do I have everything I need to stay safe?
Locate the Hole
When faced with a flat tire, it’s important to have a tire repair kit at the ready. However, using one can be a bit daunting if you’ve never done it before. To start, you’ll need to locate the hole in the tire.
One way to do this is by visually inspecting the tire and looking for any obvious punctures or objects stuck in it. Alternatively, you can use the provided tools, such as a probe or reamer, to gently poke and prod the tire to find the leak. Once you’ve located the hole, mark it with a piece of chalk or similar marking tool to make it easier to find later.
With this step done, you’re ready to move on to the next one in repairing your tire. Remember to stay calm and take things one step at a time, and soon you’ll be back on the road with a fully repaired tire.
Visual Inspection
When it comes to repairing a tire puncture, the first step is to visually inspect the tire to locate the hole. This can be daunting, especially if you don’t have any experience in tire repair. However, with a few simple steps, you can locate the puncture quickly and easily.
First, remove the tire from the car and immerse it in water. Look for bubbles coming out of the tire, which indicate where the puncture is located. You can also run your hand along the surface of the tire to feel for any sharp objects, such as nails or screws.
Once you find the hole, mark it with a piece of chalk or a marker so that you can easily find it again when it’s time to repair the tire. With a little patience and attention to detail, you can easily locate and repair a tire puncture in no time. So don’t let a flat tire keep you from hitting the road – get to work and fix that puncture!
Soap and Water Test
If you suspect that your tire’s got a puncture, the first thing you need to do is locate the hole. It’s not always visibly apparent, but there’s a simple trick that can help you find it: the soap and water test. This method involves mixing water and liquid soap and applying it to your tire’s surface.
When you see bubbles forming in a specific area around the tire’s tread or sidewall, this indicates the location of the puncture. This is because the escaping air from the tire’s inside causes the soap to bubble up, giving you a clear indication of where the hole is. Once you’ve identified the location, you can mark it for repair or replacement.
This test is simple to do and can give you peace of mind that you’ve found the puncture location accurately.
Prepare the Tire
When it comes to using a tire repair kit, the first step is to prepare the tire. This means finding the puncture or damage and removing any foreign objects that may be sticking out of the tire. It’s important to use the right tools for the job, such as pliers or a pair of tweezers.
Once the object is removed, use a reamer tool to clean out the hole so the patch will adhere properly. It’s important to be thorough and ensure that the area is clean and dry before attempting to patch the tire. With the tire now prepared, it’s time to move onto the next step of using the tire repair kit to fix the puncture.
Remember, taking your time and being careful in the preparation process can make a big difference in the success of the tire repair.
Remove the Object
When preparing to remove an object from your tire, there are a few essential steps you should take first to ensure your safety and prevent further damage to your tire. Begin by parking your vehicle in a safe location away from traffic and ensuring that your emergency brake is engaged. Then, examine the tire and make note of the location of the object and any visible damage it has caused.
Before attempting to remove the object, you’ll need to release any pressure in the tire. Use your tire gauge or a similar tool to deflate the tire slowly and safely. Once the tire is fully deflated, you can begin the process of removing the object.
Remember to wear protective gloves and eye gear, and be gentle when pulling the object out to avoid causing further damage. By following these steps, you’ll be able to safely remove the object and get back on the road in no time!
Rough up the Area Around the Hole
When it comes to fixing a flat tire, preparing the tire is an essential step to ensure a successful repair. One effective method to prepare the tire is to rough up the area around the hole. This helps to create a better bonding surface for the patch or plug to adhere to.
To do this, use a piece of sandpaper or a wire brush to rough up the area about 2-3 inches around the puncture. Be careful not to damage the tire further or create any additional holes. Once the area is adequately roughed up, wipe it down with a clean rag to remove any debris or dust.
By taking the time to properly prepare the tire, you increase the likelihood of a long-lasting repair. So, next time you have a flat, don’t forget to rough up the area around the hole before attempting a repair to ensure a strong and durable fix.
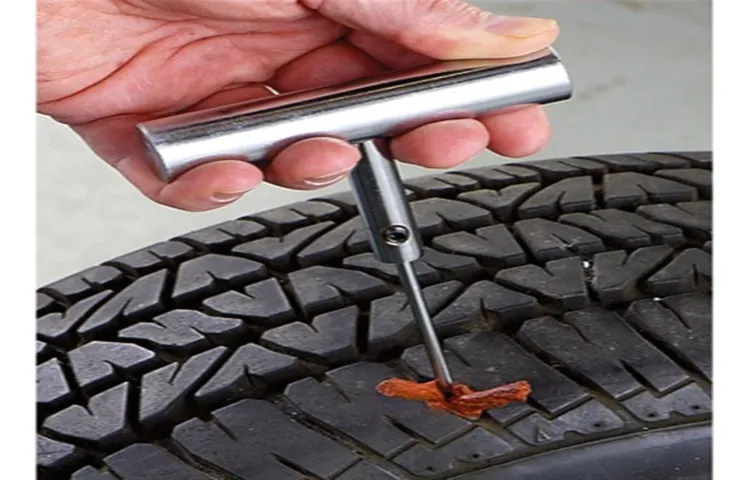
Insert the Plug
If you’re faced with a flat tire, don’t panic! Using a tire repair kit can be a straightforward process if you know how to use it correctly. The first step is to find the puncture and remove any debris before inserting the reaming tool into the hole. Once you’ve done that, twist it back and forth to create a clean, round hole.
Next, grab one of the rubber plugs included in the kit and thread it through the eye of the insertion tool. Then, carefully insert the tool into the hole and push the plug until only a small section remains visible. Finally, slowly remove the insertion tool by pulling it straight out while pressing against the tire to ensure the plug stays in place.
Remember to check your tire pressure, and you should be good to go! With this straightforward process in mind, you’ll be well equipped to tackle any flat tire situation you may face in the future.
Thread the Plug into the Tool
Thread the Plug into the Tool Now that you have prepared your power tool and a compatible plug, it’s time to thread the plug into the tool. Start by holding the plug in one hand and the tool in the other. Then, align the prongs of the plug with the slots in the tool’s socket.
Gently insert the plug into the socket and turn it clockwise until it is snugly secured. It’s important to make sure that the plug is fully inserted and screwed in tightly. This will ensure a secure connection between the tool and the power source.
If the plug is loose, it can cause the tool to short-circuit or even cause a potential hazard. It’s also essential to check that the plug you are using is compatible with the tool you are working with. Using an incorrect plug can damage the tool and even harm the user.
Always refer to the manufacturer’s instructions or consult a professional if you are unsure about the type of plug to use. In summary, threading the plug into the tool is a simple but crucial step when using power tools. Always make sure that the plug is fully inserted and tightened securely, and ensure that you are using the correct type of plug for the tool you are using.
By following these simple steps, you can ensure safe and successful tool operation.
Insert the Tool into the Hole
Insert the plug When it comes to electrical wiring, inserting a plug into a socket may seem like an easy task. However, it is important to ensure that the tool is inserted correctly into the hole to avoid any electrical hazards or accidents. Firstly, make sure that the plug fits securely into the socket, and that there are no loose connections.
Next, check that the correct plug is being inserted into the right socket, as using the wrong plug can cause damage to appliances or even cause fires. Before inserting the plug, switch off the main power supply to avoid any accidental shocks. Finally, insert the plug fully into the socket until it clicks into place.
Remember, if the plug does not fit securely or if there are any signs of damage to the plug or socket, do not attempt to insert it as this can cause serious harm. It is better to seek professional help in these circumstances to ensure your safety.
Push the Plug into the Hole
Inserting a plug into a hole may seem like an easy task, but it can be tricky if you’re not familiar with the process. Firstly, check the plug and hole sizes to ensure they match. If they don’t, you may need to use a different plug or drill a new hole.
Next, line up the plug with the hole and press it in with a moderate amount of force. Resist the urge to hit or force it in, as this can damage the plug or the surrounding area. You should hear a satisfying “click” when the plug is fully inserted, and it should be flush with the surrounding surface.
If the plug doesn’t go in smoothly, don’t force it. Instead, evaluate the plug and hole again to make sure they’re compatible. Remember, inserting a plug is like putting a puzzle piece together – it may take a bit of finesse, but with patience and careful attention, you’ll have a snug and secure fit in no time.
Reinforce the Repair
If you find yourself with a flat tire, your trusty tire repair kit can save the day. Before you begin, make sure to locate the puncture in the tire and remove any debris. Next, use the reamer tool to rough up the inside of the hole and insert the plug into the puncture with the inserting tool.
Then trim the excess plug and inflate the tire to the recommended pressure. But what many people forget is to reinforce the repair with a tire sealant. This can prevent any air from leaking out and provide an extra layer of protection against future punctures.
So, before you hit the road again, be sure to reinforce the repair with a tire sealant to ensure your safety and the longevity of your tire. As always, make sure to consult your tire repair kit instructions for proper use and safety precautions.
Cut the Excess Plug
When fixing a damaged plug, it’s important to not only cut away the excess damaged parts, but also reinforce the repair for long-lasting durability. Simply cutting away the damaged parts may temporarily fix the issue, but it doesn’t address the root problem. By reinforcing the repair, you’re not only extending the lifespan of the plug, but also preventing potential future problems.
Think of it like adding a sturdy support beam to a wobbly table, instead of just propping it up with a piece of cardboard. The reinforcement can come in the form of electrical tape or even a replacement sleeve for the wire. By taking these extra steps, you’re making a more permanent solution that will save you time, money, and frustration in the long run.
So, next time you encounter a damaged plug, remember to cut the excess and reinforce the repair. Your future self will thank you.
Inflate the Tire
After patching up a tire, it’s critical to ensure that it’s appropriately inflated to avoid any further damage. Proper inflation not only increases the lifespan of the tire but also prevents uneven wear and tear, making your drive safer. This process is simple and can be done with an air pump or a tire inflator.
First, check the recommended PSI level, which can be found in the owner’s manual or the vehicle’s sticker label. Then, remove the valve cap and attach the inflator, ensuring a secure fit. Start pumping air and keep checking the PSI level using a tire gauge until you reach the recommended pressure.
Don’t overinflate as it can lead to dangerous explosions or tire bursts, and underinflation can lead to poor handling, reduced fuel economy, and damage to the tire’s structural integrity. Properly inflated tires can also help with fuel efficiency, saving you money in the long run. So, always reinflate after a repair and make sure to check your tire pressure regularly.
Check the Repair
When it comes to using a tire repair kit, the most important step is to check the repair once it’s completed. This involves making sure the puncture or hole has been completely sealed and that the tire is holding air properly. To do this, use a tire pressure gauge to check the air pressure and ensure it’s at the recommended level for your vehicle.
If there are any leaks or the tire is losing air, the repair may need to be redone or a new tire may need to be installed. It’s also important to drive cautiously for the first few miles after the repair to ensure it’s holding up properly, and to have the tire inspected by a professional as soon as possible to ensure it’s safe to use. By following these steps and staying vigilant, you can safely and effectively use a tire repair kit to fix common tire issues on the road.
Check for Leaks with Soapy Water
After making a plumbing repair, it’s essential to check for leaks with soapy water. This simple technique is a great way of identifying any potential issues before things escalate to a major problem. Apply a small amount of soapy water to the area you’ve fixed and watch for bubbles, which indicate a leak.
This could be caused by a loose connection or a faulty seal, allowing the pressurised water to escape. It’s easy to overlook these minor details, but catching them early can save you from a flood, water damage and expensive repairs later on. Overall, by taking these steps, you’ll feel more confident safe and secure in the knowledge that your plumbing repair was a success.
Drive Carefully and Check Tire Pressure Regularly
As a driver, it’s important to always keep an eye on your tires. Not only can driving on underinflated tires be dangerous, but it can also decrease your fuel efficiency and cause uneven tire wear. That’s why it’s essential to check your tire pressure regularly and ensure that they are properly inflated to the manufacturer’s recommended PSI.
Additionally, if you’ve recently had any tire repairs done, it’s crucial to double-check and ensure that the repair was done correctly. A missed puncture or a leaky repair can cause your tires to fail unexpectedly while driving, which can be incredibly dangerous. So, take the time to inspect your tires and ensure that they are in good condition before hitting the road.
Remember, a simple check can make a huge difference in your safety and the longevity of your tires!
Conclusion
In conclusion, using a tire repair kit can be the knight in shining armor when it comes to getting back on the road. Just like any hero, preparation is key – familiarize yourself with the kit and instructions before a tire emergency strikes. Remember to always prioritize safety and use caution when working with tools, and don’t forget to give yourself a pat on the back for a job well done (and maybe a well-deserved cup of coffee).
With these tips in mind, you’ll be well-equipped to handle any flat tire and turn a frustrating situation into a victorious one. Happy repairing!”
FAQs
What is a tire repair kit?
A tire repair kit is a set of tools and materials used to fix punctured or damaged tires.
How do I use a tire repair kit?
First, locate the puncture or damage on the tire. Then, remove any debris from the area and insert the plug or patch included in the kit. Follow the specific instructions included with your kit for the best results.
Can I use a tire repair kit on any type of tire?
Tire repair kits are typically designed for use on tubeless tires, such as those found on cars, trucks, and motorcycles. They may not be effective for repairing punctured or damaged tires on other types of vehicles, like bicycles or ATVs.
Is it safe to drive on a tire that has been repaired with a tire repair kit?
It depends on the extent of the damage and the effectiveness of the repair. Follow the instructions included with your tire repair kit and use your best judgment. It may be best to have the tire professionally inspected and repaired if you’re unsure.
How long does a tire repair using a tire repair kit typically last?
A properly repaired tire using a tire repair kit can often last for the remaining life of the tire. However, it’s important to monitor the repaired area and have the tire inspected regularly to ensure it’s still safe to drive on.
Can I use a tire repair kit as a long-term solution for a damaged tire?
A tire repair kit is typically meant as a temporary fix for a puncture or damage until a permanent repair or replacement can be made. It’s not recommended to rely on a tire repair kit as a long-term solution.
How do I properly store a tire repair kit?
To ensure the materials in a tire repair kit remain effective, store the kit in a cool, dry place out of direct sunlight. Replace any used or expired materials as needed to ensure the next repair will be effective.