
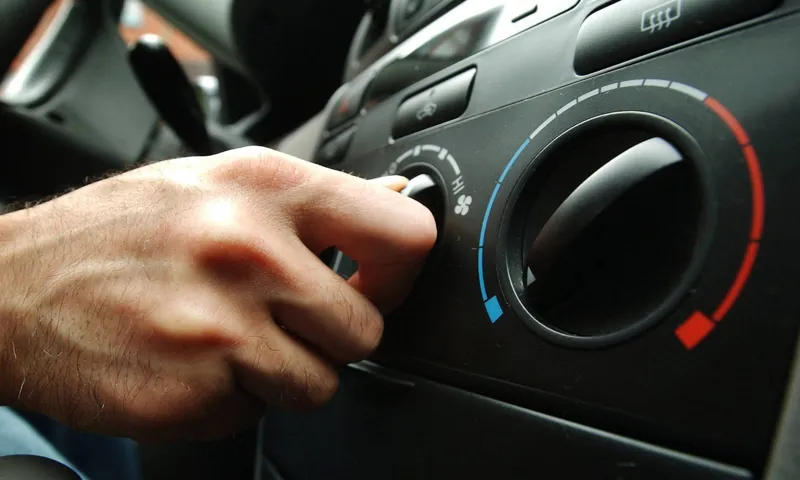
Hey there! Is your car’s air conditioning not working as well as it used to? Does it feel like the air is barely coming out or not getting cold enough? If so, it might be time to give your car’s AC system a good cleaning and remove any trapped dirt and debris. One effective way to do this is by vacuuming the air conditioning system. Just like how you vacuum your home to get rid of dust and dirt, vacuuming your car’s AC can help deliver cleaner, fresher air and improve the overall performance of your vehicle’s cooling system.
In this blog post, we’ll show you how to vacuum your car’s air conditioning system step by step, so you can enjoy a comfortable and refreshing ride no matter the weather outside. So, grab your vacuum cleaner and let’s get started!
Introduction
If you’re tired of stepping into a hot, stuffy car on a scorching summer day, it might be time to learn how to vacuum your car’s air conditioning system. Cleaning the AC system can help improve its performance and ensure that you’re getting cool air when you need it most. So, how do you vacuum an air conditioning system in a car? Well, it’s not as complicated as it may sound.
All you need is a vacuum cleaner with a hose attachment and some basic knowledge of your car’s AC system. In this blog post, we’ll guide you through the steps to properly vacuum your car’s air conditioning system, so you can enjoy a cooler, more comfortable ride all summer long.
Understanding the importance of vacuuming air conditioning in a car
Vacuuming the air conditioning system in your car is an important maintenance task that should not be overlooked. Just like any other part of your vehicle, the air conditioning system can accumulate dirt, dust, and debris over time. This buildup can not only hinder the overall performance of the system but also affect the quality of the air you breathe inside the car.
By vacuuming the air conditioning system, you can effectively remove all the unwanted particles and ensure that the system functions optimally. So, let’s dive deeper into why vacuuming the air conditioning in a car is so crucial and the benefits it can provide.
The benefits of regularly vacuuming air conditioning in a car
air conditioning in a car, vacuuming, benefits
Step-by-Step Guide
Vacuuming the air conditioning system in your car can help to improve its performance and efficiency. To begin, you’ll need a vacuum pump, gauge manifold set, and a can tap valve. Start by removing the high and low-pressure service caps on the air conditioning unit.
Connect the gauge manifold set and vacuum pump to the air conditioning system using the can tap valve. Next, set the gauge manifold to the “off” position and connect it to the vacuum pump. Turn on the vacuum pump and let it run for at least 30 minutes to remove any moisture or debris from the system.
Monitor the pressure gauge to ensure that the system is properly vacuumed. Once the time is up, turn off the vacuum pump and remove the gauge manifold set. Reinstall the high and low-pressure service caps and make sure they are securely tightened.
Finally, recharge the air conditioning system with refrigerant according to the manufacturer’s instructions. By vacuuming the air conditioning system in your car, you can ensure that it functions optimally, providing you with cool and refreshing air during your drives. So why wait? Give your car’s air conditioning system a vacuum today and enjoy a comfortable ride all year round.
Step 1: Prepare the necessary equipment
In order to successfully prepare for an outdoor camping trip, it is essential to gather all the necessary equipment beforehand. This will ensure that you have everything you need for a comfortable and enjoyable experience in the great outdoors. First and foremost, you will need a good quality tent that is both waterproof and easy to set up.
A sleeping bag and sleeping pad or air mattress are also crucial for a good night’s sleep. Additionally, it is important to pack appropriate clothing for the weather conditions, including warm layers for cooler evenings. Don’t forget essentials such as a camping stove, cooking utensils, and a cooler for food and drinks.
Other items that should be included in your camping gear checklist are a flashlight, a first aid kit, insect repellent, sunscreen, and a camping chair. By gathering all of these necessary items in advance, you can ensure a smooth and hassle-free camping experience.
Step 2: Locate the air conditioning system in your car
air conditioning system, car. So, you’ve decided to take matters into your own hands and fix the air conditioning system in your car. Good for you! The first step in this process is to locate the air conditioning system in your vehicle.
Now, you may be wondering where on earth it could be hiding. Well, fear not, because I’m here to guide you through the process. Depending on the make and model of your car, the air conditioning system could be located in various places.
In most cars, you can find it under the hood, near the front of the engine. Look for a large metal box with hoses and wiring connected to it. This is usually the compressor, which is a vital part of the air conditioning system.
Another common location is underneath the dashboard, behind the glove compartment. You might need to partially remove the glove compartment to access it. Remember, these are just general guidelines, and you should consult your car’s manual for specific instructions.
Overall, locating the air conditioning system is an essential first step in fixing it, so take your time and familiarize yourself with the different parts and their locations.
Step 3: Connect the vacuum pump to the system
vacuum pump, connect, system So now that you have properly prepared your system for vacuuming, it’s time to connect the vacuum pump. The vacuum pump is the heart of the system, so it’s important to get this step right. First, locate the vacuum pump and position it near your system.
Make sure there is enough space around it for proper ventilation and maintenance. You don’t want it to overheat or be obstructed in any way. Next, you will need to connect the vacuum pump to your system’s suction port.
This could be a port on the side or bottom of your system, depending on the design. Use a vacuum hose or a series of connected hoses to make the connection. Be sure to choose a hose that is compatible with the pump and system you are using.
Once you have the hose connected, secure it by tightening the hose clamps or locking mechanisms. This will ensure a tight and secure connection, preventing any leaks or air from entering the system. Now you’re ready to start the vacuum pump.
Before turning it on, check that all valves in the system are closed. This will prevent any air from entering the system while the vacuum pump is running. Once everything is in place, turn on the vacuum pump and let it run for the recommended amount of time.
This will vary depending on the size and complexity of your system. Keep a close eye on the pressure gauge and make sure it stays within the desired range. If you notice any fluctuations or abnormalities, it may indicate a problem with the pump or system.
Step 4: Turn on the vacuum pump
vacuum pump
Step 5: Allow the vacuum pump to run for a specified period of time
Once you’ve set up your vacuum pump and connected it to the appropriate apparatus, the next step is to allow the pump to run for a specified period of time. This step is crucial because it allows the pump to create the required vacuum level needed for your specific application. The time needed for the pump to reach the desired vacuum level will vary depending on factors such as the size and capacity of the pump, as well as the volume of the system being evacuated.
It is important to refer to the manufacturer’s guidelines or consult with an expert to determine the appropriate run time for your specific setup. Running the pump for the recommended duration will ensure that the vacuum level is achieved, allowing you to proceed with your experiment or process efficiently.
Step 6: Disconnect the vacuum pump
vacuum pump, disconnect, step-by-step guide. Now that you’ve successfully completed the previous steps of replacing your vacuum pump, it’s time to move on to the next one – disconnecting the vacuum pump itself. This step is crucial in order to ensure a smooth and safe removal of the pump.
So, how exactly do you do it? Let’s break it down step-by-step. First, locate the power source of the vacuum pump. It may be connected to an electrical outlet or a power switch.
Make sure the power is turned off before proceeding any further. Safety first, right? Next, you’ll need to disconnect the vacuum hose from both ends – the pump and the appliance it’s connected to. This can typically be done by twisting the hose to loosen it from the fittings.
If it’s tightly secured, you may need to use pliers or a wrench to gently loosen it. Be careful not to damage the fittings or the hose itself. Once the hose is disconnected, you can move on to removing the pump from its mounting bracket.
Depending on the type of mounting, this may involve unscrewing bolts or releasing clamps. Take note of how the pump is secured in place so you can easily reattach it later. After the pump is free from the mounting bracket, you can now disconnect any electrical connections.
This includes unplugging any cables or wires connected to the pump. Again, always ensure the power is turned off before handling any electrical components. Finally, double-check that all connections have been properly disconnected and that the pump is completely free from any attachments.
Tips and Precautions
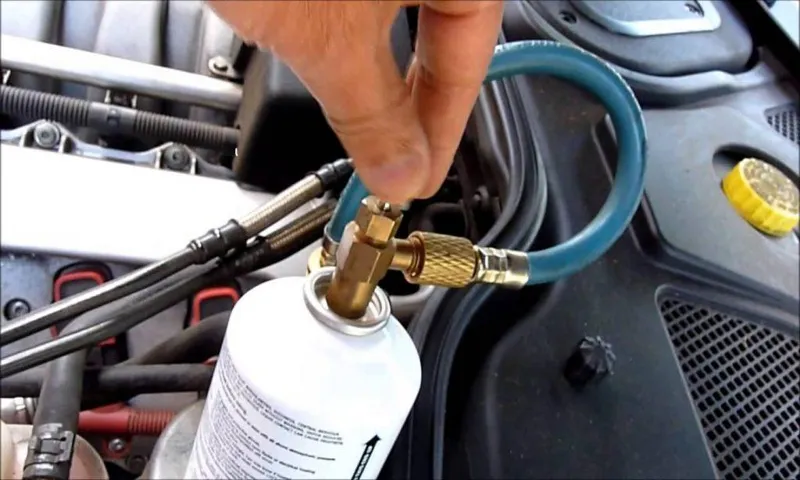
Vacuuming the air conditioning in your car is an important maintenance task that can help ensure its optimal performance. To vacuum your car’s air conditioning system, you’ll first need a vacuum pump, which can be rented or purchased from an auto supply store. Start by locating the low-pressure service port, which is typically found on the larger of the two metal pipes near the AC compressor.
Attach the vacuum pump to this port, and turn on the pump. Let it run for about 30 minutes to remove any moisture or air from the system. While the system is being vacuumed, it’s important to check for any leaks or damage to the AC components.
If you notice any leaks or damaged parts, it’s best to have them repaired before proceeding. Once the vacuuming process is complete, you can recharge your AC system with refrigerant, following the manufacturer’s instructions. This will help ensure that your car’s air conditioning is running efficiently and providing you with cool air on hot summer days.
By regularly vacuuming your car’s air conditioning system, you can help extend its lifespan and prevent costly repairs down the road.
Tip 1: Wear protective gear
“protective gear” When it comes to engaging in any physical activity, protecting yourself should always be a top priority. Whether you’re going for a leisurely bike ride or participating in an intense sport, wearing the right protective gear can make all the difference. Gear such as helmets, knee and elbow pads, and wrist guards can help prevent serious injuries and minimize the impact of falls or crashes.
So, why should you wear protective gear? Well, think of it as your personal shield against potential harm. Just like a knight wears armor to protect themselves on the battlefield, you should wear your protective gear to shield yourself from potential injuries. And let’s face it, accidents happen and they can happen to anyone.
So, it’s better to be safe than sorry. So, the next time you’re about to engage in any physical activity, don’t forget to suit up with your protective gear.
Tip 2: Follow the manufacturer’s instructions
manufacturing instructions, following instructions, appliance safety, user manual, product manual, electrical appliances When it comes to using electrical appliances, it’s always important to follow the manufacturer’s instructions. These instructions are specifically designed to ensure the safe and proper use of the appliance. Whether it’s a kitchen appliance, a power tool, or a piece of electronics, the manufacturer’s instructions should always be your go-to resource.
This means taking the time to read the user manual or product manual before using the appliance for the first time. The manufacturer’s instructions will provide you with step-by-step guidance on how to set up and operate the appliance safely. They will also give you important information on any precautions you need to take to avoid accidents or damage to the appliance.
By following the manufacturer’s instructions, you can not only protect yourself and your household but also extend the lifespan of your appliance. So the next time you bring home a new electrical appliance, remember to take a few minutes to read and follow the manufacturer’s instructions – it’s a small effort that can make a big difference in terms of safety and performance.
Tip 3: Do not over-vacuum the system
In our previous blog posts, we discussed the importance of regular maintenance and cleaning for your vacuum system. However, it is just as crucial to avoid overdoing it and excessively vacuuming your system. While vacuuming is an effective way to remove dust and debris from your system, too much suction can actually cause damage.
Over-vacuuming can put strain on the motor and other components, leading to premature wear and tear. It’s a bit like over-exercising – it might seem like a good idea to do more, but it can actually do more harm than good. So, how do you know when you’re over-vacuuming? Pay attention to the sound your vacuum makes.
If it sounds strained or is making unusual noises, it’s a sign that you may be applying too much suction. Additionally, you should also avoid vacuuming up large objects or liquids, as these can cause clogs and damage. Remember, when it comes to vacuuming your system, moderation is key.
Tip 4: Check for leaks after vacuuming
When it comes to vacuuming, it’s important to not only remove the dirt and debris from your floors but to also prevent any leaks from occurring. After you finish vacuuming, it’s a good idea to do a quick check to make sure that there aren’t any leaks in the vacuum or its attachments. Leaks can not only make your vacuum less effective in picking up dirt, but they can also create a mess and potentially damage your floors or furniture.
To check for leaks, start by inspecting the vacuum bag or canister to make sure it is securely attached and not torn or damaged. Next, inspect the various attachments, such as the hose and brush heads, to ensure there are no cracks or holes. Finally, run your hand along the entire length of the hose and listen for any hissing sounds, which could be a sign of a leak.
By taking these precautions and checking for leaks after vacuuming, you can ensure that your floors stay clean and your vacuum operates at its best.
Conclusion
And there you have it, the ultimate guide on how to vacuum air conditioning in a car! By following these simple steps, you can ensure that your car stays cool and comfortable even during the hottest of summer days. So say goodbye to sweaty drives and hello to your very own personal arctic oasis on wheels! Remember, vacuuming your car’s air conditioning system not only improves its performance but also prolongs its lifespan. Plus, let’s be honest, who doesn’t want to feel like a master magician, conjuring up refreshing gusts of cool air with the flick of a switch? So go ahead, grab your vacuum cleaner, and get ready to work your magic on your car’s AC.
Your car and your well-being will thank you for it!”
Importance of regular vacuuming for car air conditioning
car air conditioning, vacuuming, importance
Final tips and reminders
In conclusion, before you set off on your journey, here are some final tips and reminders to keep in mind. First and foremost, always double-check your travel documents. Make sure your passport is valid for at least six months and that you have all the necessary visas and permits for your destination.
It’s also a good idea to make copies of your documents and store them in a separate location, in case of loss or theft. Another important tip is to research and familiarize yourself with the local customs and traditions of your destination. This will help you better understand and respect the local culture, and ensure that you don’t unintentionally offend anyone.
Additionally, learning a few basic phrases in the local language can go a long way in connecting with the locals and making your experience more enjoyable. When it comes to packing, remember to pack light and smart. Think about the climate and activities you’ll be engaging in, and pack accordingly.
It’s also a good idea to pack a travel first aid kit with essentials like band-aids, pain medication, and any necessary prescription medications. Lastly, don’t forget to notify your bank and credit card companies about your travel plans. This will help prevent any issues or declined transactions while you’re abroad.
It’s also a good idea to carry some cash in the local currency for emergencies or places that may not accept card payments. In summary, by following these tips and precautions, you can ensure a smooth and enjoyable journey. So, get out there, explore the world, and make unforgettable memories!
FAQs
Why is it important to vacuum air conditioning in a car?
Vacuuming the air conditioning system in a car removes any moisture and contaminants that could affect its performance and longevity.
How often should I vacuum my car’s air conditioning system?
It is recommended to vacuum a car’s air conditioning system every 2-3 years or whenever it is serviced to ensure optimal performance.
Can I vacuum my car’s air conditioning system myself?
While it is possible to vacuum your car’s air conditioning system yourself, it is generally recommended to have it done by a professional to ensure proper equipment and technique are used.
What happens if I don’t vacuum my car’s air conditioning system?
If the air conditioning system is not properly vacuumed, moisture and contaminants can accumulate, leading to reduced cooling performance, increased wear and tear, and potential damage to components.
How does vacuuming the air conditioning system affect its overall efficiency?
Vacuuming the air conditioning system helps remove air and moisture, which can impede the efficiency of the system. By removing these factors, the air conditioning system can operate at its optimum level, providing better cooling performance.
How long does it take to vacuum a car’s air conditioning system?
The time it takes to vacuum a car’s air conditioning system can vary depending on the size of the system and the equipment used. On average, it takes about 30 minutes to 1 hour.
Can vacuuming the air conditioning system improve the air quality inside the car?
Yes, vacuuming the air conditioning system helps remove dust, debris, and potential allergens, resulting in improved air quality inside the car.