
Hey there! Are you looking to dive into the fascinating world of [Introduction] but not sure where to start? Well, you’re in the right place! In this blog, we’re going to explore the ins and outs of [Introduction], breaking it down in a way that is easy to understand and captivating at the same time. Think of [Introduction] as the doorway to any topic or subject you want to explore. It’s like the opening chapter of a book that sets the stage for everything that comes after.
Whether you’re writing an essay, a research paper, or even just trying to introduce yourself to a new group of people, nailing the introduction is crucial. In this blog, we’ll uncover the secrets to crafting a compelling introduction that immediately grabs your readers’ attention. We’ll discuss the different types of introductions you can use, the elements that make them effective, and how to tailor your introduction to your specific audience or purpose.
So, if you’ve ever found yourself staring at a blank page, uncertain of how to begin, or if you simply want to up your introduction game, then this blog is for you. By the end of it, you’ll have all the tools and knowledge you need to create captivating and engaging introductions that leave a lasting impression. So, what are you waiting for? Let’s dive into the art of introductions together and take your writing to a whole new level.
Whether you’re a student, a writer, or just someone who wants to master the art of captivating an audience, this blog is your go-to resource. Get ready to captivate, engage, and leave a lasting impression with your introductions!
Table of Contents
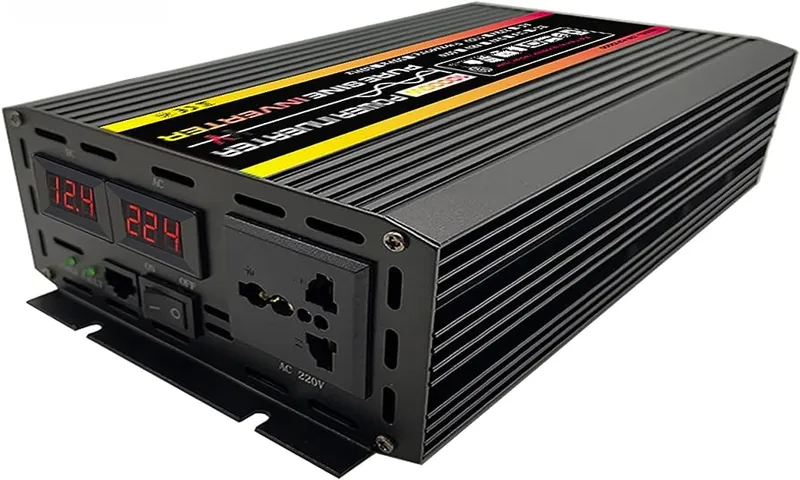
What is a power inverter?
How to wire in a power inverter? Well, let me break it down for you. A power inverter is a device that allows you to convert DC power from your vehicle’s battery into AC power that can be used to run various electronic devices and appliances. It’s like having a portable electrical outlet with you wherever you go.
So, how do you wire in a power inverter? First, you’ll need to find a suitable location to install the inverter. Make sure it’s close to the battery but in a well-ventilated area. Then, you’ll want to connect the inverter to the battery using heavy-duty cables and proper connectors.
It’s important to make sure you have the right gauge wire for the power output of your inverter. Once the inverter is securely connected to the battery, you can then connect your devices and appliances to the inverter’s AC outlets. Just like that, you’ll have power on the go! So whether you’re camping, on a road trip, or just need some extra power in your vehicle, wiring in a power inverter is a great way to stay connected wherever you are.
Why would you want to wire in a power inverter?
If you’re looking to power devices that require AC electricity while on the go, then a power inverter is a great solution. Whether you need to charge your laptop, run small appliances, or even keep your phone or tablet powered up, a power inverter can provide the necessary conversion from DC to AC. So, how do you wire in a power inverter? It’s actually quite straightforward.
First, you’ll need to locate a power source, such as your vehicle’s battery. Next, connect the power inverter to the battery using heavy-duty cables, making sure to connect the positive cable to the positive terminal and the negative cable to the negative terminal. It’s essential to ensure proper sizing and installation to avoid any electrical hazards or damage to your vehicle.
Once the inverter is wired in, you can plug in your devices and enjoy the convenience of AC power no matter where you are.
Things to consider before wiring in a power inverter
So you’ve decided to install a power inverter in your vehicle. That’s a great idea! But before you dive right in, there are a few things you should consider. First and foremost, you need to think about the power requirements of the devices you plan on using with the inverter.
Different power inverters have different wattage ratings, so it’s important to choose one that can handle the load you’ll be placing on it. If you’re just planning on using the inverter to charge your phone or run a small appliance, a lower wattage inverter might be sufficient. However, if you plan on running larger electronics like a microwave or a refrigerator, you’ll need a higher wattage inverter.
Next, you need to think about where you want to install the inverter in your vehicle. Ideally, you’ll want to mount it in a location that is easily accessible but also safe and secure. Keep in mind that the inverter will generate heat, so it’s important to choose a location with good ventilation to prevent overheating.
Once you’ve chosen a location, you’ll need to decide how you’re going to wire the inverter into your vehicle’s electrical system. This will typically involve connecting the inverter to the vehicle’s battery using and integrating it with the existing wiring. It’s important to follow the manufacturer’s instructions and use the appropriate gauge of wire to ensure a safe and reliable connection.
Finally, you’ll want to consider any additional accessories or safety features you might need. For example, you might want to install a fuse or circuit breaker to protect the inverter and your vehicle’s electrical system in case of a power surge. You might also want to consider a remote on/off switch or a voltage meter to monitor the inverter’s performance.
Wiring in a power inverter can be a great way to bring added convenience and functionality to your vehicle. By considering the power requirements, choosing a suitable location, and following proper wiring procedures, you’ll be well on your way to getting the most out of your power inverter. So why wait? Start enjoying the benefits of a power inverter today!
Power requirements
power inverter, wiring, power requirements
Battery capacity
power inverter, battery capacity, wiring, considerations
Safety precautions
power inverter safety precautions, wiring a power inverter If you’re planning on using a power inverter to convert DC power to AC power, there are a few important safety precautions to keep in mind. Before you start wiring in your power inverter, it’s crucial to ensure that you fully understand the electrical system and have the necessary knowledge and experience. One of the key things to consider is the size of the power inverter in relation to the load you will be running.
It’s important to select a power inverter with enough capacity to handle the appliances or devices you intend to power. Using an undersized inverter can not only reduce the efficiency of your electronic devices but also lead to overheating and potential damage. Additionally, it’s important to make sure you have the appropriate wiring and protection devices in place, such as fuses or circuit breakers, to prevent electrical overloads and prevent damage to your power inverter or electrical system.
Lastly, it’s crucial to follow the manufacturer’s instructions and guidelines when installing and using a power inverter. Taking the necessary safety precautions can help ensure that your power inverter operates safely and efficiently, providing you with reliable power for your electronic devices.
Step-by-step guide to wiring in a power inverter
Are you looking to wire in a power inverter to your vehicle or camper? We’ve got you covered with this step-by-step guide. First, you’ll need to gather all the necessary materials: a power inverter, a power source (such as a battery), cables, and connectors. Make sure to choose an inverter that matches the power requirements of the devices you plan to use.
Once you have everything ready, begin by disconnecting the power source to avoid any accidents. Then, locate a suitable place to mount the inverter, ensuring it is secure and easily accessible. Next, you’ll need to connect the positive cable from the power source to the positive terminal on the inverter and the negative cable to the negative terminal.
It’s important to ensure that the connections are secure and free from any dirt or corrosion. Finally, double-check all the connections and tighten any loose parts. Once everything is in place, you can reconnect the power source and test the inverter to ensure it is functioning properly.
With these easy steps, you’ll be able to wire in a power inverter and enjoy the benefits of electricity on the go.
Step 1: Gather all necessary tools and materials
The first step to wiring in a power inverter is to gather all the necessary tools and materials. You’ll need a few specific items to successfully complete the installation. First, you’ll need the power inverter itself, which is the device that will convert the DC power from your vehicle’s battery into AC power.
Make sure to choose an inverter that is compatible with your vehicle’s battery and power needs. You’ll also need a set of electrical cables, preferably with alligator clips on one end and ring terminal connectors on the other end. These cables will be used to connect the inverter to the battery.
Additionally, you’ll need a pair of wire strippers to remove the insulation from the cables, as well as electrical tape to secure the connections. It’s also a good idea to have a wire cutter and a wrench or socket set on hand, as you may need to make adjustments or remove certain components during the process. Once you have all of these tools and materials gathered, you’ll be well-equipped to move on to the next step of the wiring process.
Step 2: Choose the location for the power inverter
When it comes to wiring in a power inverter, one of the crucial steps is choosing the right location for it. This step requires careful consideration to ensure maximum functionality and convenience. Ideally, the power inverter should be located close to the battery, as this will minimize the length of the cables required and reduce the risk of voltage drop.
Additionally, the location should be dry and easily accessible, allowing for easy maintenance and monitoring. It’s also important to consider the ventilation requirements of the power inverter, as it can generate heat during operation. Installing the power inverter in a well-ventilated area will help dissipate the heat and prevent overheating.
By taking these factors into account and choosing the perfect location, you can ensure that your power inverter operates efficiently and effectively, providing the power you need when you need it.
Step 3: Connect the power inverter to the battery
In the previous steps, we discussed how to gather the necessary tools and materials and how to connect the power inverter to the fuse box. Now, we’re ready for the next step: connecting the power inverter to the battery. This step is crucial because it ensures that the inverter receives a direct power source and can provide electricity to your devices.
To connect the power inverter to the battery, you’ll need a set of battery cables. These cables are typically provided with the inverter, but if not, you can purchase them separately. Ensure that these cables are long enough to reach from the inverter to the battery with some slack.
Start by identifying the positive and negative terminals on the battery. The positive terminal is usually marked with a “+”, and the negative terminal is marked with a “-“. It’s important to connect the cables correctly to avoid any damage or accidents.
Next, attach the positive cable to the positive terminal on the battery. You may need to use a wrench or pliers to tighten the connection securely. Once the positive cable is connected, do the same for the negative cable to the negative terminal.
It’s important to note that the battery should be disconnected during this process to avoid any electrical shock or short circuit. Also, make sure that the inverter is turned off before connecting it to the battery. Once both cables are securely connected, you can now turn on the power inverter and test it by plugging in a device.
If everything is connected properly, you should be able to use your devices and enjoy the convenience of portable power. In conclusion, connecting the power inverter to the battery is a crucial step in the wiring process. By following these steps and ensuring correct connections, you can safely and efficiently power your devices on the go.
Step 4: Connect the power inverter to the electrical system
wiring a power inverter, power inverter installation, connecting a power inverter to the electrical system So, you’ve decided to install a power inverter in your vehicle. Great choice! Power inverters are incredibly useful for turning your vehicle’s DC power into AC power, allowing you to charge electronic devices or power small appliances on the go. Now, it’s time to connect the power inverter to your electrical system.
Here’s a step-by-step guide to help you through the process. First, you’ll need to locate your vehicle’s battery. This is where you’ll connect the power inverter to draw power.
Make sure the vehicle is turned off and the ignition is off before proceeding. Next, you’ll want to disconnect the negative battery cable. This is an essential safety step to prevent any electrical mishaps while working on the electrical system.
Use a wrench or socket to loosen the nut on the negative battery terminal and remove the cable. With the negative battery cable disconnected, you can now start connecting the power inverter. Take a look at the power inverter’s instruction manual to find the appropriate wire size for your specific model.
This is crucial because the wrong wire size can lead to overheating and potential hazards. Now, it’s time to connect the power inverter to the battery. Start by securing the positive cable from the power inverter to the positive battery terminal.
Use a wrench or socket to tighten the nut on the positive terminal and make sure the connection is secure. Then, connect the negative cable from the power inverter to the negative battery terminal in the same way. Once the power inverter is securely connected to the battery, you’ll need to route the power inverter’s AC output to your vehicle’s interior.
Troubleshooting tips
If you want to wire in a power inverter, there are a few key steps to follow to ensure a successful installation. First, you’ll need to locate a suitable power source. This is typically the vehicle’s battery, but always refer to your power inverter’s instructions for specific requirements.
It’s important to connect the inverter directly to the battery using the appropriate gauge of wire and fuse. This ensures a safe and efficient power transfer. Make sure to use proper wire connectors and follow the correct polarity when connecting the wires.
Once the power inverter is wired in, double-check all connections and secure them properly. It’s also important to test the inverter to ensure it’s functioning correctly before using it for its intended purpose. By following these troubleshooting tips, you’ll be well on your way to successfully wiring in a power inverter.
Common issues and solutions
Common issues and their solutions Troubleshooting tips When it comes to technology, it’s not uncommon to run into issues that can leave us feeling frustrated and overwhelmed. Fortunately, many common issues have simple solutions that you can try before seeking professional help. One common problem is a slow internet connection.
If you find that your internet is sluggish, try restarting your router or moving closer to it if you’re using Wi-Fi. Another common issue is a frozen or unresponsive computer. In this case, a simple restart often does the trick.
If you’re experiencing problems with a specific program, try uninstalling and reinstalling it. Sometimes, corrupted files can cause issues that can be resolved by a fresh installation. Another frequent issue is computer crashes or blue screens of death.
These can be caused by hardware or software problems, so it’s important to update your drivers and run virus scans regularly. If you’re encountering error messages, a quick internet search can often provide solutions. In general, staying proactive and keeping your software and drivers up to date can help prevent many common issues from occurring in the first place.
Conclusion
And there you have it, my friends. With these simple steps, you now know how to wire in a power inverter like a true DIY guru. So go forth and conquer your electrical needs with the power of inversed voltage! Just remember, safety first – don’t zap yourself into a cartoon-like state of shock.
And if something goes wrong, don’t be afraid to call a professional, because sometimes even the best of us need a little extra spark of help. Now go forth and power up your world with your newfound knowledge. Happy wiring!”
Additional resources
If you’re looking to wire in a power inverter, there are some important steps to follow to ensure a safe and successful installation. First, you’ll need to gather the necessary materials, including a power inverter, appropriate gauge wire, and cable connectors. Once you have everything you need, you’ll want to find a suitable location for the inverter, preferably close to the battery, to minimize power loss during transmission.
Next, you’ll need to connect the inverter to the battery using the appropriate gauge wire and cable connectors. It’s important to refer to the manufacturer’s instructions for the specific gauge wire and connectors needed for your particular inverter. Lastly, you’ll want to test the installation by turning on the inverter and checking that everything is functioning properly.
It’s also a good idea to double-check all connections to ensure they are secure and tight. By following these steps and taking the necessary precautions, you can safely wire in a power inverter and have a reliable source of AC power wherever you go.
FAQs
What is a power inverter and what does it do?
A power inverter is a device that converts direct current (DC) from a battery or solar panel into alternating current (AC) that can be used to power electronic devices. It allows you to use your portable devices or appliances in places where there is no access to grid electricity.
What are the different types of power inverters?
There are three main types of power inverters: modified sine wave inverters, pure sine wave inverters, and grid tie inverters. Modified sine wave inverters are the most common and affordable type, but they may cause compatibility issues with some devices. Pure sine wave inverters produce a high-quality, smooth AC output, suitable for all devices. Grid tie inverters are used for connecting solar panels to the grid.
How do I choose the right power inverter for my needs?
To choose the right power inverter, you need to determine your power requirements. Calculate the total wattage of the devices you want to power simultaneously and choose an inverter that can handle that load. Consider the type of devices you will be using and their compatibility with modified or pure sine wave inverters. Also, consider the input voltage and connection options of the inverter.
Can I install a power inverter myself?
Yes, most power inverters come with detailed installation instructions, and it is possible to install them yourself. However, if you are not familiar with electrical systems, it is recommended to hire a professional electrician for a safer and more reliable installation. They can ensure that the inverter is properly wired and connected to the battery or solar panel.
How do I connect a power inverter to a battery?
Connecting a power inverter to a battery requires several steps. First, you need to determine the appropriate cable size based on the distance between the battery and inverter. Then, connect the positive (red) cable to the positive terminal of the battery and the negative (black) cable to the negative terminal. Make sure to use proper cable connectors and secure the connections tightly to ensure good conductivity.
How can I protect my devices from power surges when using a power inverter?
To protect your devices from power surges, you can use surge protectors or voltage regulators. These devices help regulate the power output and protect against voltage fluctuations. It is also recommended to use high-quality cables and connectors to minimize the risk of power surges. Additionally, avoid overloading the inverter by not exceeding its maximum wattage capacity.
Can a power inverter drain my vehicle’s battery?
Yes, if a power inverter is left connected to a vehicle’s battery without the engine running, it can drain the battery. Inverters consume a small amount of power even when they are idle, and this can gradually deplete the battery’s charge. To prevent this, it is recommended to disconnect the inverter when the engine is not running or use a battery isolator to automatically disconnect the inverter when the battery voltage drops to a certain level.