Do you love going on camping trips with your travel trailer (TT)? Exploring new places and enjoying the great outdoors is unbeatable. But one thing that can be a hassle is properly rolling up the awning fabric on your TT. We’ve all been there – struggling to fold it up neatly, only to end up with a messy tangle of fabric.
But fear not! In this blog post, we will guide you through the process of correctly rolling up your awning fabric on a TT, so that you can enjoy a stress-free camping experience. Just imagine – effortlessly rolling up your awning like a pro, ready for your next adventure. So let’s get started and make your camping trips even more magical!
Table of Contents
Introduction
When it comes to replacing the awning fabric on a travel trailer, it’s essential to know the correct way to roll the fabric. The correct method not only ensures a smooth and efficient replacement process but also helps to extend the lifespan of the fabric. To start, make sure to retract the awning completely.
This will give you full access to the fabric and make the replacement easier. Next, loosen the tension knobs or straps on each end of the fabric. These are typically located near the roller tube.
Once the tension is released, you can carefully roll up the fabric, making sure to keep it straight and even. As you roll, avoid pulling or tugging on the fabric too forcefully, as this can cause damage. Instead, use gentle, steady pressure to guide the fabric onto the roller tube.
Finally, secure the rolled-up fabric with straps or bungee cords to keep it in place during transport. By following these steps, you can ensure a proper and successful replacement of your awning fabric.
Why is it important to roll awning fabric correctly?
awning fabric, roll, correctly, importance
Tips for replacing awning fabric on a TT
awning fabric, replacing, TT
Step-by-Step Guide
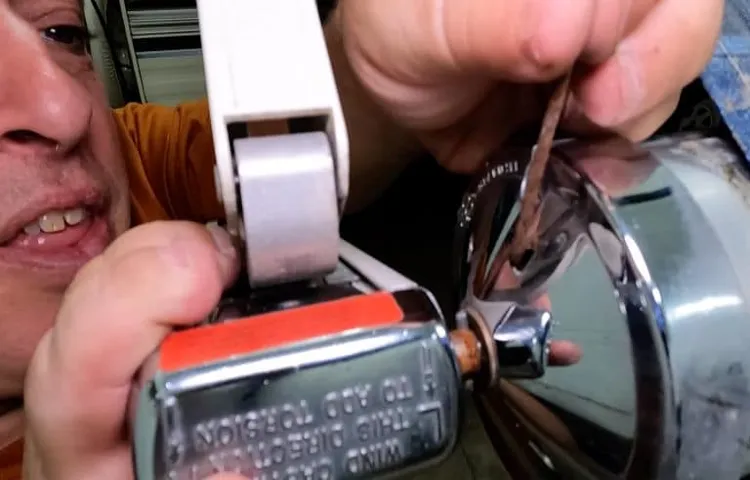
When replacing the fabric on an awning for a travel trailer, it’s important to know the correct way to roll the fabric. The first step is to extend the awning completely to its full length. Next, locate the tension knobs on both ends of the roller tube.
These knobs are used to control the tension of the fabric. Turn the knobs counterclockwise to release the tension. Once the tension is released, carefully roll the fabric onto the roller tube.
Be sure to roll the fabric evenly and without any wrinkles or folds. As you roll, keep an eye out for any obstructions or damage to the fabric. Once the fabric is completely rolled onto the tube, use the tension knobs to secure it in place.
Turn the knobs clockwise to tighten the fabric and restore the tension. By following these steps, you can ensure that the fabric on your awning is properly rolled and ready for use.
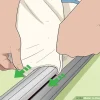
Step 1: Prepare the area
When it comes to preparing a space for renovation or construction, the first step is to get organized and ready. This initial stage is crucial because it sets the foundation for the entire project. You want to make sure you have all the necessary tools, equipment, and materials readily available.
Clear out any debris or clutter from the area to create a clean workspace. This will not only make it easier to move around but will also help prevent accidents or injuries. Take the time to assess the space and check for any potential hazards or obstacles that need to be addressed before starting the project.
By taking these simple yet essential steps, you will set yourself up for success and ensure that everything runs smoothly during the construction or renovation process.
Step 2: Remove the old fabric
Welcome back to our step-by-step guide on how to reupholster a chair! In this second step, we will be removing the old fabric from your chair. It’s an exciting process because it means we’re getting closer to giving your chair a fresh new look. To remove the old fabric, start by flipping the chair upside down, allowing easy access to the underside.
You may need to unscrew or remove any parts that are holding the fabric in place, such as staples or tacks. Using a pair of pliers, carefully pull out any staples or tacks that are securing the old fabric to the chair frame. It may take some time and effort, but be patient and take precautions to avoid damaging the chair or yourself.
Once all the staples or tacks have been removed, gently peel away the old fabric from the chair frame. Pay attention to any padding or cushioning that may be attached to the fabric and remove it as well. It’s not uncommon to come across layers of fabric or additional padding when removing the old fabric.
Take your time and remove each layer carefully until you have completely cleared away the old materials. Removing the old fabric can be a messy process, so it’s a good idea to have a vacuum or a broom nearby to clean up any loose debris as you go. This will also help create a clean surface for the new fabric to be attached to.
And that’s it! You have successfully removed the old fabric from your chair. Now it’s time to move on to the next step of the reupholstering process. Stay tuned for the next installment of our guide, where we will be diving into the exciting world of selecting new fabric for your chair.
Step 3: Measure the new fabric
measure fabric, step-by-step guide, new fabric After choosing the new fabric for your project, the next step is to measure it correctly. Measuring your fabric accurately is crucial to ensure a perfect fit and save any wastage. To measure the new fabric, start by laying it out on a flat surface.
Use a ruler or a tape measure to determine the dimensions you need. Measure the length and width of the fabric, making sure to account for any pattern repeats or allowances for seams. If you are working with a large piece of fabric, it may be helpful to ask someone to assist you in holding it taut during the measuring process.
Take your time and be precise, as even a small error in measurement can have a significant impact on the final outcome. By following this step-by-step guide, you can ensure that your project will turn out just the way you envisioned it.
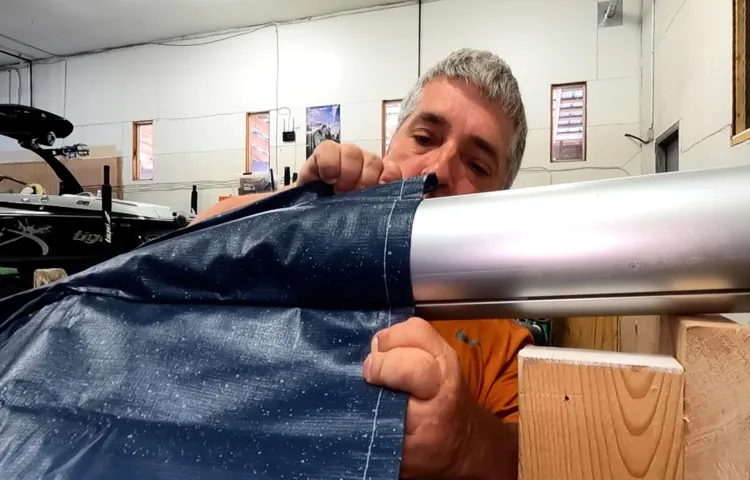
Step 4: Attach the new fabric to the roller
In this step, we will learn how to attach the new fabric to the roller of your window shade. This is where all your hard work and preparations start to pay off. First, unroll the new fabric and lay it out flat on a clean surface.
Make sure it is facing the right way, with the front side facing up. Then, take your roller and place it at one end of the fabric. Next, carefully roll the fabric onto the roller, making sure it is evenly distributed and smooth.
You can use your hands to help guide the fabric onto the roller, making sure there are no wrinkles or uneven sections. As you roll the fabric onto the roller, make sure to keep it taut. This will ensure that the fabric lays flat and looks neat when you hang it up.
If you notice any wrinkles or bumps, you can gently pull on the fabric to smooth it out. Once the fabric is fully rolled onto the roller, use a staple gun or fabric adhesive to secure it in place. Start at one end of the roller and work your way to the other, making sure to secure the fabric tightly as you go.
Once you have attached the fabric to the roller, give it a gentle tug to make sure it is secure. If it feels loose, go back and reinforce the staples or adhesive. Congratulations! You have successfully attached the new fabric to the roller of your window shade.
Now you are ready to hang it up and enjoy your freshly updated window treatment.
Step 5: Roll up the fabric
The final step in creating your fabric roll-up is to roll up the fabric itself. This is where all of your hard work and careful folding comes together. Start by taking one end of the fabric and rolling it tightly towards the other end.
Make sure to keep the edges aligned as you go to ensure a neat and even roll. As you roll, you may need to adjust the fabric to make sure it stays in place. Once you have rolled up the entire piece of fabric, use rubber bands or fabric ties to secure the roll.
This will help keep everything tight and compact. And just like that, your fabric roll-up is complete! Now you can easily store or transport your fabric without worrying about it becoming wrinkled or damaged.
Step 6: Secure the rolled fabric
In the final step of securing the rolled fabric, you want to make sure it stays in place. One way to do this is by using a needle and thread to sew a few stitches along the edge of the fabric. This will hold it together and prevent it from unraveling.
Another option is to use fabric glue or a hot glue gun to secure the fabric. Simply apply a small amount of glue along the edge of the fabric and press it down firmly. This will create a strong bond and keep the fabric in place.
Whichever method you choose, make sure to let the glue dry or the stitches set before handling the rolled fabric. Once it is secure, you can feel confident that your rolled fabric will stay neat and organized until you’re ready to use it.
Conclusion
When it comes to replacing the fabric on your trusty travel trailer’s awning, you might think it’s as simple as rolling it up like a burrito and calling it a day. But oh, dear adventurers, it’s not that simple. The correct way to roll awning fabric is a delicate dance that requires precision, finesse, and a touch of whimsy.
Imagine you are a master sushi chef, delicately rolling the perfect California roll. You must start by ensuring that the fabric is centered and aligned with the awning roller. This is crucial, my friends, for a wonky fabric roll will lead to nothing but frustration and potential disaster when you try to extend your shade sanctuary in the great outdoors.
Now, as you begin your rhythmic roll, remember to keep tension on the fabric. Think of it as a tightrope walker gracefully traversing the line, maintaining balance and elegance. You want to avoid any floppy fabric or loose ends that could be snagged by a rogue branch or cheeky critter.
As the fabric rolls, be mindful of any wrinkles or folds that may form. Smooth them out gently, like a masseuse kneading out the knots in a weary traveler’s back. You want your awning fabric to be as smooth and flawless as the surface of a serene mountain lake on a calm summer’s day.
And finally, my fellow adventurers, embrace the artistry of the roll. This is your chance to showcase your awning fabric rolling prowess to the world! Channel your inner Olympian figure skater and twirl that fabric with grace and flair. Let your awning roll be the envy of every campsite neighbor, an awe-inspiring masterpiece that leaves them begging for a tutorial.
So, dear wanderers, remember these sacred steps when it comes to rolling awning fabric. Center it, maintain tension, smooth out any wrinkles, and unleash your inner awning fabric artist. And may your adventures be filled with shade, style, and the admiration of all who witness your fabric rolling finesse.
Taking the time to roll your awning fabric correctly will ensure longevity and proper functionality of your TT’s awning.
awning fabric, roll, longevity, functionality, step-by-step guide, TT’s awning. Properly rolling and storing your TT’s awning fabric is essential to maintain its longevity and ensure its proper functionality. Taking the time to do it correctly will save you from potential damage and costly repairs in the future.
Here is a step-by-step guide on how to roll your awning fabric properly. First, start by cleaning the fabric thoroughly to remove any dirt or debris that may have accumulated. Next, ensure that the fabric is completely dry before proceeding.
Once dry, retract the awning fully by using the retraction mechanism. Make sure that the fabric is straight and evenly folded as you roll it in. Avoid folding or rolling the fabric in such a way that it creates creases or wrinkles, as this can cause damage over time.
Finally, secure the rolled fabric in place using the provided straps or ties. By following these simple steps, you can ensure the longevity and proper functionality of your TT’s awning fabric.
FAQs
How do I replace the fabric on my TT’s awning?
To replace the fabric on your TT’s awning, start by fully extending the awning and securing it in place. Then, carefully remove the old fabric by unscrewing it from the roller tube and gently pulling it off. Next, unroll the new fabric and align it with the roller tube, ensuring that the stitching is facing outwards. Secure the new fabric to the roller tube using the provided screws, making sure to evenly distribute the tension. Finally, retract and extend the awning a few times to ensure it rolls up and down smoothly.
Can I replace my TT’s awning fabric myself or should I hire a professional?
Replacing the fabric on your TT’s awning can be done by yourself if you have some basic DIY skills. However, if you are unsure or uncomfortable performing the task, it is recommended to hire a professional to ensure proper installation and prevent any potential damage.
What tools do I need to replace the fabric on my TT’s awning?
To replace the fabric on your TT’s awning, you will typically need a ladder, screwdriver or drill, pliers, and a helper to assist with the process. Additionally, it may be helpful to have a measuring tape or ruler to ensure proper alignment and tension.
How often does the fabric on a TT’s awning need to be replaced?
The frequency of fabric replacement for a TT’s awning can vary depending on various factors such as usage, exposure to the elements, and maintenance. However, on average, awning fabric should be replaced every 5-10 years or if it shows signs of significant wear and tear, such as fading, tearing, or mold/mildew growth.
Can I choose a different color or pattern for my TT’s awning fabric?
Yes, you can typically choose from a variety of colors and patterns when replacing the fabric on your TT’s awning. Many manufacturers offer a range of options to customize the look of your RV. Be sure to check with the manufacturer or supplier for availability and compatibility with your specific awning model.
How do I clean and maintain the fabric on my TT’s awning?
To clean and maintain the fabric on your TT’s awning, start by gently brushing off any loose dirt or debris. Then, mix a solution of mild soap (such as dish soap) and warm water. Using a soft brush or cloth, lightly scrub the fabric, paying extra attention to any stains or spots. Rinse thoroughly with clean water and allow the fabric to air dry before retracting the awning. Avoid using harsh cleaners, abrasive materials, or excessive pressure, as these can damage the fabric.
Can I upgrade my TT’s awning fabric to a more durable or weather-resistant material?
Depending on your awning model and manufacturer, you may have the option to upgrade to a more durable or weather-resistant fabric. Upgrades may include features such as enhanced UV protection, increased water resistance, or improved tear resistance. Check with the manufacturer or supplier to see if such upgrades are available for your specific awning model and consider the potential benefits and costs before making a decision.